How to post not square pictures on instagram
How To Share Non-Square iPhone Photos On Instagram
It’s finally happened! Instagram now allows for the sharing of non-square photos. One of the key features that helped shape the early success of Instagram was the app’s dedication to the square aspect ratio. While this helped define the quintessential Instagram format, it’s also been a serious limitation because not all scenes are suited to a square format photo. In this article you’ll discover how to easily share your rectangular images on Instagram, improving your overall iPhone photography experience.
Overview
Up until now you had two options if you wanted to share a non-square photo. You could crop your photo into a square (typically resulting in the cutting-off of some important elements).
Or you could use a third-party app such as Squaready to add white, black or other colored “bars” to the long sides of your non-square photo, so that it would fit into the square space of the Instagram format.
But with the latest app update, you’re now free to simply upload your images without having to crop or add the bars along the edges. Instagram will display photos in their original aspect ratio whether horizontally (landscape) or vertically (portrait) oriented.
According to a recent Instagram blog post, “Square format has been and always will be part of who we are. That said, the visual story you’re trying to tell should always come first, and we want to make it simple and fun for you to share moments just the way you want to.
“It turns out that nearly one in five photos or videos people post aren’t in the square format, and we know that it hasn’t been easy to share this type of content on Instagram…”
How it Works
When you upload a photo to Instagram, the app will automatically detect when an image isn’t square. In such cases it will display a new “format” icon (circle with two white arrows) in the lower left corner of the crop screen.
Tapping on this icon will toggle back and forth between the square-cropped version and the original full image. You can also pinch zoom in and out to crop or “un-crop” your photo for sharing. It’s that simple.
Please be aware that while your non-square photos will always display in rectangular format when viewed individually, they will all continue to be displayed as square thumbnails in your photo grid.
Benefits Of Different Aspect Ratios
If you’ve generally stuck to sharing square photos up until now, this change presents a great opportunity for you to start experimenting with other types of crops.
The shape of a crop is traditionally called the “aspect ratio” and it’s commonly indicated in a proper ratio format. For example, a 1:1 aspect ratio would be a square image as the width and height are both represented by a “1”, therefore they would be the same length.
In a 3:2 aspect ratio, the “3” represents the width of the image and the “2” the height. To use a simple analogy, a landscape-oriented photo that is 300 pixels wide by 200 pixels high would be a perfect 3:2 crop.
On a related note, if you have an image of these same dimensions, but displayed in a “portrait” orientation, then technically the aspect ratio would be 2:3. Incidentally, the 3:2 (and therefore 2:3) aspect ratio is the same as a traditional 35mm film camera.
Some of the most popular aspect ratios for non-square photography include:
3:2 (35mm equivalent – very versatile for all styles of photography and works well for 4×6, 8×12, and 12×18 print sizes)
4:3 (the default aspect ratio of the native iPhone camera – also quite versatile, but not as print-friendly without some cropping)
16:9 (widescreen format – great for landscapes)
4:5 (a bit less popular than the others, but if you like to print your photos, this equates perfectly to an 8×10 print with no cropping)
As you can see, there are many different aspect ratios to consider. The above are only some of the most popular “standard” crop ratios available within photo editing apps such as Snapseed and VSCO Cam.
With today’s editing apps, you can technically crop your photos to any aspect ratio conceivable as long as the app offers a “free” crop tool which doesn’t constrain you to a certain aspect ratio.
You may want to use this change to Instagram’s display format to start experimenting with how different aspect ratios can affect your approach to photography – both in shooting and in editing.
If you still prefer to stick to square photos, then you can keep on shooting and sharing as you do now. What’s important is that we now have even more choices for sharing our photos, and that’s always a good thing!
How To Post Portrait or Vertical Photos on Instagram Without Cropping
When Instagram was launched, it only allowed users to upload square photos. This meant that a substantial portion of your photos had to be cropped.
Instagram’s square photo dimensions became a major drawback to photographers and Instagram users as the image quality, content, and resolution of images were often be sacrificed.
Fortunately, Instagram has seen the need to resolve this major issue. Instagram has given its users more freedom to be creative with their images. Now, pictures can be uploaded in landscape or portrait orientation.
Understanding Instagram Images
So how can you post portrait photos on Instagram without cropping?
The vast majority of Instagram images are squared off. That’s fine for the most part, but it does tend to impact the composition of a photo — especially if it’s a portrait or landscape subject.
When you upload an image or load it into Instagram, the image is automatically cropped to 4:5. No one wants to put a lot of time and effort into capturing the perfect photo only for Instagram to ruin it by cropping the image.
Instagram did add different orientations not long ago, but images still take a little tweaking to get right. Now, you can post images at a maximum size of 600 x 600 for square images, 1080 × 607 for landscapes, and 480 × 600 for portraits. The actual stored size differs slightly, but when you measure images within Instagram, these are what typically come up.
So, if you’re one of the many Instagram users that’s tired of having their photos cropped, let’s take a look at how you can post portrait or vertical photos on Instagram without cropping.
How to Post Portrait Photos on Instagram
Depending on the size of your image, you may now be able to post a portrait image on Instagram without having to crop it.
Here’s how you can check:
Step 1
Open Instagram and create a new post.
Step 2
Select the image you want to upload from your photo gallery.
Step 3
Select the small crop icon in the bottom left of the main image screen.
Step 4
Adjust the image within the grid until it’s to your liking.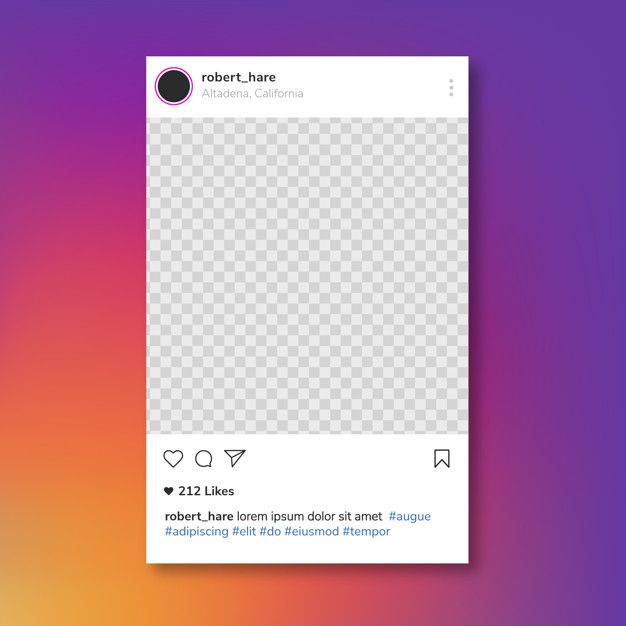
Using the crop icon shifts the shape from the usual square to its vertical or portrait orientation. This way, you won’t need to shave off the edges of your photos.
How to Post Landscape Images on Instagram
What if you want to post a landscape picture without cropping?
Well, fortunately, the same process above works in landscape orientation too. Since the two sizes were added to Instagram, it will pick up the shape and size of the image and let you post the most suitable size.
The same instructions apply for portrait and landscape photos, so you can simply refer to the above steps and select a landscape image that you want to upload.
Manually Cropping Instagram Images
Sometimes, the image just doesn’t look right with the new setup on Instagram and you need to do a little bit of manual editing first.
The new orientation feature is good but also has a few glitches, and if it won’t show your image off at its best. It may be better to manually edit the image and upload it as a square — even if it means sacrificing the composition.
There are a lot of photo editing apps that can help you edit your images first before uploading them to Instagram.
Just follow these simple steps to get started:
- Download the image to your computer and load it into your image editor.
- Crop your image to 5:4 using the image editor, and edit the photo so the subject is front and center.
- Upload the image to Instagram.
If that doesn’t quite work or leaves the image subject hanging out to dry, you can add a white border to either side of the image to create the 5:4 ratio.
This can often make the image look better. It has the advantage of leaving your image in its original form, but it will be slightly smaller than usual.
This method works great if you aren’t happy with the way your image looks when you upload it straight to Instagram without editing.
Third-Party Image Editors for Instagram
There are a number of third-party apps that can help prepare images for Instagram and help you resize an image with or without cropping. Even though you can now post portrait and landscape, these apps still make life a little easier when preparing something for publishing.
Two of the photo editing apps we can recommend are No Crop & Square for Instagram for Android and Whitagram for iPhone. Although, there are a lot more photo editing apps for you to explore.
Both of the apps mentioned above achieve the same goal as the manual editing method and will resize your images for Instagram. If you want to keep everything on your phone and not download it to your computer, these and other apps like it are well worth a try.
Final Thoughts
Most photographers find squaring off an image takes something away from the effect. Instagram users have been stuck on using the square dimension for years, but thanks to the app’s recent updates, there is now more flexibility in uploading photos.
Adding portrait and landscape orientation gives the professional photographers and those enthusiastic amateurs more options when composing their shots.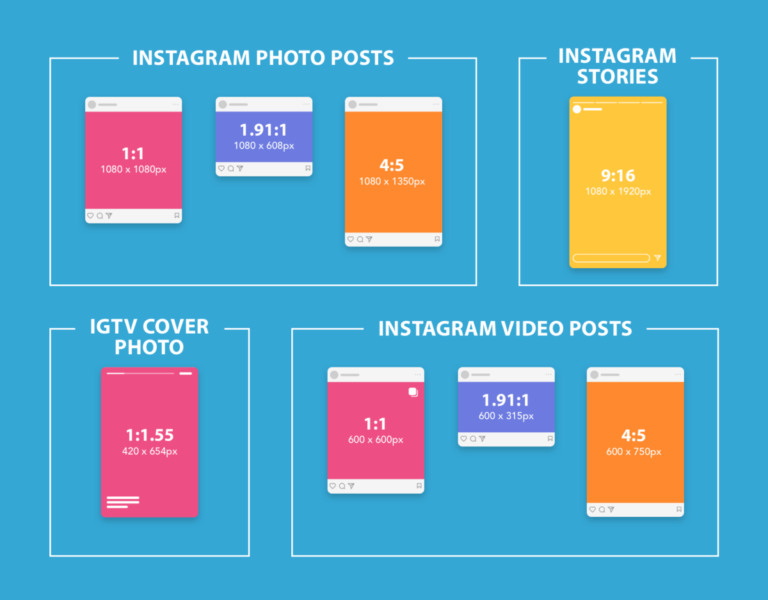
Want to find more apps to help you create eye-catching Instagram posts?
Check out our article on the Most Popular Instagram Apps.
How to post non-square photos and videos to Instagram (in Portrait and Landscape modes)
The Instagram application will allow users to post their photos and videos in Portrait and Landscape modes. Representatives of the company announced this yesterday, August 27. In this way, Instagram intends to expand on the all-encompassing square format that the service is so well known for.
| Apple in Telegram and YouTube. Subscribe! |
According to Instagram's official statement, about one in five posts does not follow the accepted format, so the company decided to prioritize the "visual story" of users, rather than the parameters in which it is told.
Extract from Instagram statement:
“The square format has been and will continue to be a part of us.
However, the visual story you are trying to tell needs to be at the forefront, and we intend to make this process as easy and fun as possible.
Approximately one in five photos or videos posted by users are found to be out of square format, and we know how difficult it is to share this type of content on Instagram. Friends are often cropped out of a group photo, objects in videos are compressed, and the Golden Gate Bridge fails to capture the full picture.
Now, when you select a video or image, you can click on the format icon and adjust the orientation in portrait or landscape mode. After you share a photo, it will appear in full size in the feed.
Step 1. Make sure you have the latest version of the application. To do this, in the App Store, select the " Updates " tab and, if necessary, update your version of Instagram.
Step 2. Launch the app and click the camera icon to select the photo or video you want to share on the service.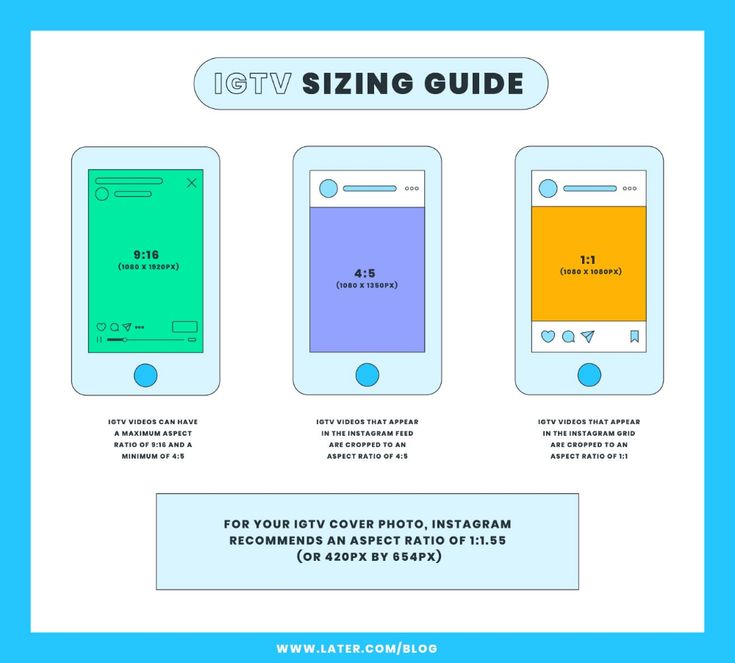
Step 3. By default, Instagram will display content in a square format. In order to change it, click on the icon " Format " and correct the orientation in " Portrait " or " Landscape " modes.
Step 4. Click on the " Next " button and continue posting images or videos as usual.
The update is now available to all Instagram users. If you haven't downloaded the app yet, you can do it for free using the App Store.
Download Instagram for iPhone (App Store)
See also:
- Check mail on iPhone. Sampling, Push or Manual, what to choose?
- 12 stories about how the Instagram craze cost people their jobs.
- Snapster review - a look at the "domestic Instagram".
- 3 Apps to Create Incredible Instagram Photos on iPhone.
- How to send WhatsApp messages from a computer.
How useful is the publication?
Click on a star to rate!
Average rating 0 / 5. Number of ratings: 0
No ratings yet. Rate first.
How to upload photos without cropping on Instagram - follow the requirements and use apps for posting
Instagram's habit* of cropping photos in the most inappropriate places is frustrating. The user uploads a photo, and Insta boldly compresses and cuts off half of the picture. As a result, heads, legs, parts of the landscape remain behind the scenes, and I only want to delete such a post. Previously, to place a photo without cropping, you had to use additional software, but now there are other ways that we will talk about in our article.
Why Instagram* crops photos
This social network has several reasons to crop users' photos. She tries to adapt pictures so that they look on vertical phone screens, even if the photo has a strange aspect ratio. And besides, network owners want to save space on servers.
The main reason why a social network crops photos is to equalize the conditions for all users so that photos of any size and quality look attractive, and all pages are the same on the social network on all devices.
Insta crops photos that do not meet its requirements by default. If the image width is between 320 and 1080 px and the aspect ratio is between 1.91:1 and 4:5, then the image is published unchanged. If the resolution is lower, Instagram* increases it. If more than 1080 px, then it compresses to 1080 px.
In Paint, the size of the future frame is always indicated at the bottom. The picture can be edited by moving the corners to achieve the desired sizeBy default, Instagram* scales the photo and takes the center of the frame for publication. If you click on the zoom icon in the lower left corner, then Instagram * will take the entire frame for publication.
When you click on the zoom icon, the photo appears entirely in the frame. The frame can be sent to Insta without editing the edges if the aspect ratio is 16:9. Before publishing, you can see how it will look likeRecommended reading: Optimal image sizes for social networks: cheat sheet.
How to post a photo to Instagram* without cropping
If the photo falls within the proportions Instagram* needs, then Instagram* will not crop part of the image.
| Format | Approval | |
| Avatar photo | square, 1:1 | optimal 160 x 160 px, minimum 110 x 110 px, maximum 180 x 180 px |
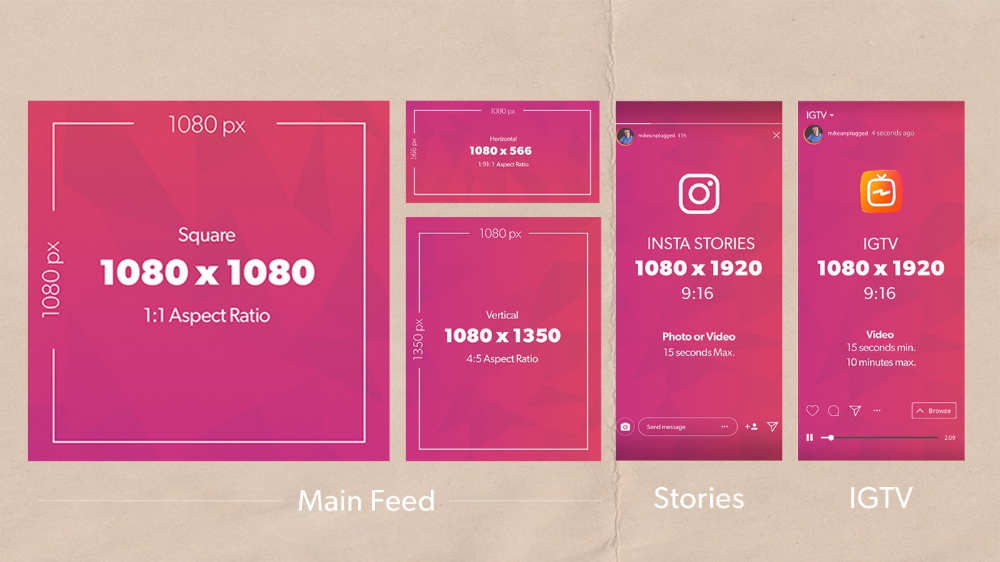
| Post photo | horizontal 1.91:1, vertical 4:5, square 1:1 | horizontal, 1080 x 566 px, vertical, 1080 x 1350 px, square, 1080 x 1080 px |
| Photos for stories and IGTV | vertical 9:16 orientation | 1080 x 1920 px |
Official information from Instagram support* says that the photo will be published in the best possible resolution with a width of up to 1080 pixels. This rule does not depend on whether the device is Android or iOS.
If the photo has a width of 320 to 1080 pixels, then its original size is preserved, but only in cases where the aspect ratio meets parameters from 1.91:1 to 4:5. In this case, the height should be from 566 to 1350 pixels, and the width should be 1080 pixels.
If you want to share a photo with a different extension, Instagram* will crop the photo to the correct size.
If the photo is smaller, then Instagram* will increase the width to 320 pixels. If more than 1080 pixels, then the width will be reduced to 1080 pixels.
There are several ways to add a full photo to Instagram*. To do this, select one of the options:
- do not use the background;
- use a vertical photo;
- present the photo as a panorama.
Let's consider these placement methods in more detail.
How to upload a photo without a background
Previously, all images of non-standard sizes were published by the social network with a white background behind the frame.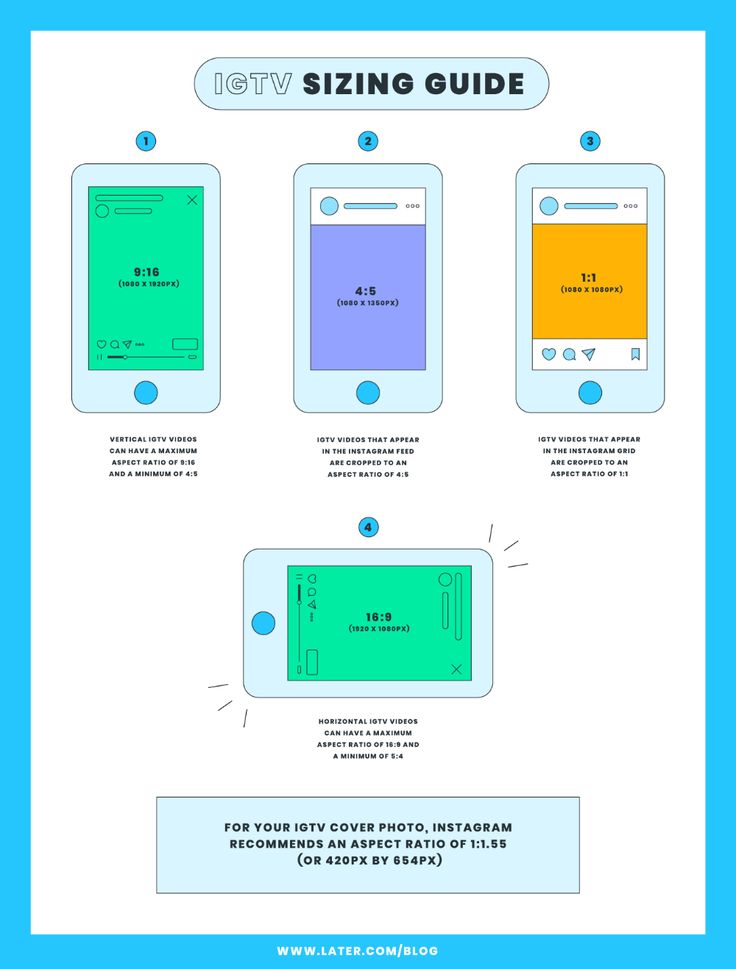 This was necessary if the width or height of the photo was not enough. Now you can do without it. Instagram* allows you to post pictures that do not fit the size requirements. When publishing, an automatic transparent background will appear on the image.
There will be no background if the photo is scaled when publishing. After the frame is selected, it remains to decide on the part of the picture that you want to publish. But there is a nuance - sometimes important parts of the photo disappear, because Insta crops them.
Half of the text at the bottom of the frame and part of the character's head are missing from the photo. But there is no transparent background on the sides. It is worth scaling if the essence of the image is in the center of the frame, and there is nothing important at the edgesRecommended reading: How to make your own stickers in Telegram.
How to upload if the photo is vertical
Not so long ago, Instagram* introduced the ability to post vertical long photos.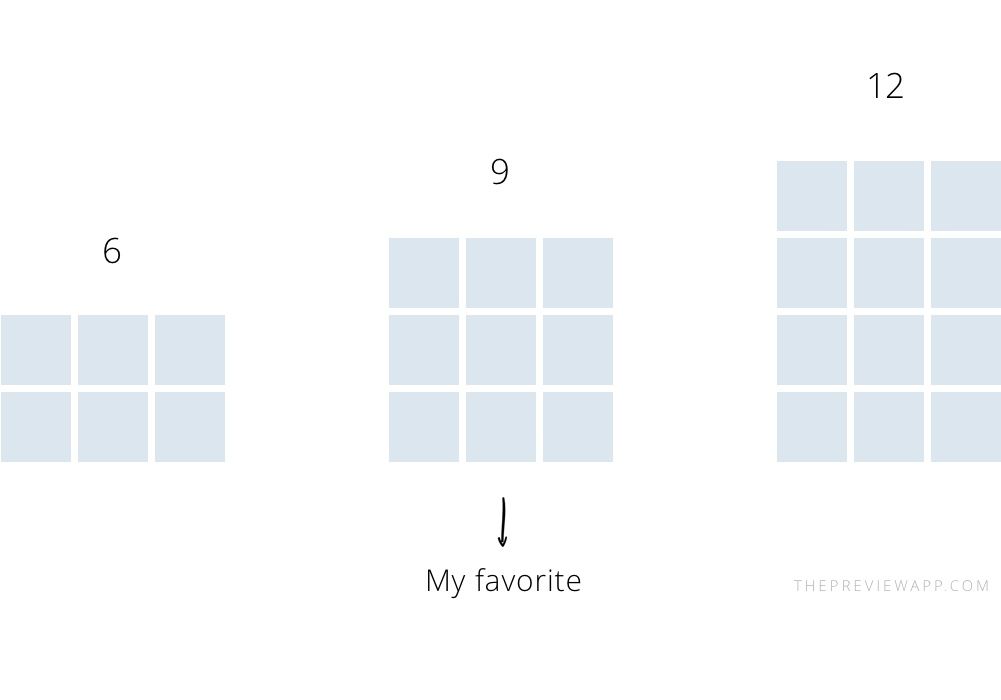 A special button has appeared in the interface that allows you to stretch the image on the sides and add a transparent background there. The photo will be in full size, but with frames.
How to work with a panoramic photo
Instagram* will not allow you to post a panoramic photo in the feed because it is too long horizontally. To upload a frame to the social network completely, without cropping along the edges of half the frame, you need to use special software.
There are 2 simple programs to help you with this - SwieablePanorama (iOS only) and InSwipe Panorama for Instagram* (works on Android and iOS). In any of the programs, a photo is easily loaded and cut into several identical blocks. They can be uploaded to Insta in the form of a carousel. This is a rather unusual and winning way to publish a panorama without losing the quality and meaning of the image.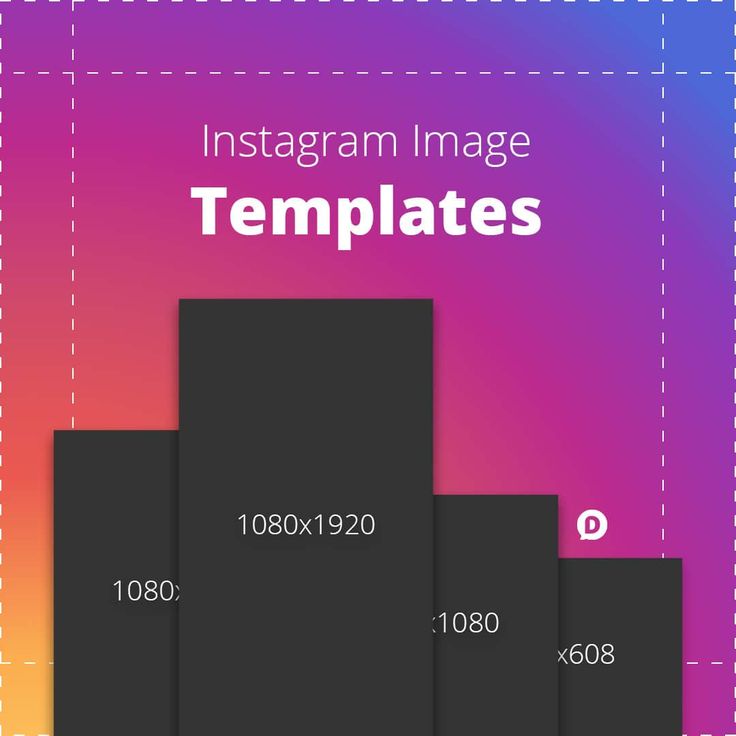
Recommended reading: How to make an attractive cover for a VK group.
How to adjust the size to Insta
To make the image meet the requirements of the social network, you can use special applications. Finding software that will help you crop a photo or fit it to the right size is not difficult.
Crop yourself from a computer
In order for the image to be displayed on the network completely, you can crop it manually, through the program. Almost any graphic editor will help with this, even the simplest Paint will cope with the task of changing the size in pixels or as a percentage.
Here are a couple of programs through which photos are usually cropped:
- Photoshop .
 A huge number of functions and possibilities for editing. The only difficulty is that you will have to install this rather big software and understand its intricacies.
 - Lightroom . Here you crop the layers, choose the aspect ratio, adjust the sharpness. You can apply the settings of one photo to the next, which will be processed later.
- Canvas . Free visual editor in SMMplanner with a set of ready-made templates and tools for creating creatives from scratch. Here you can quickly create a cover for a regular or promotional post of the desired format. The editor is available online, no download required and no advanced design skills required.
Sign up for the course "Design for social networks from 0 and for free." In 10 practical lessons, you will master the free Canvas editor, learn how to independently and quickly create visuals and advertising for your projects using ready-made templates or from scratch.
The main thing is to remember the proportions and the maximum possible expansion of the image, depending on its purpose. After all, it can be square, vertical or panoramic.
The easiest way to check and adjust the aspect ratio is in PaintCompress size to fit
You can use any online program, including Canvas tools. Through them you can upload photos, resize and edit. After such processing, Instagram* will not cut the edges.
Blogs usually prepare a lot of photos at once to provide a page with content for weeks and months. To do this, it is convenient to use SMMplanner delayed posting, where posts are posted in advance, and then become visible to subscribers exactly on schedule.
To understand this feature, we advise you to study Delayed Posting to Instagram* from a computer. Here we talked about how to work with it, how to create and schedule stories, how to publish carousels and much more.
Anastasia Belmega, Head of SMM at SMMplanner, social media content expert, speaker of the Profession SMM Manager course
Since the internal editor "Canvas" appeared in SMMplanner, I mainly use it.
There is a handy feature "Magic Resize" , it automatically adjusts the creative to the desired format. You can prepare a design for a post based on a ready-made template, and then resize it for the Stories format, as well as resize it for different social networks.
On Instagram*, I most often use square format – it is convenient to create a harmonious composition with it if the creative has different elements, text, several illustrations. The vertical format is good for photography as it captures as much of the screen as possible. A horizontal can add style to a variety of concept photos, such as vintage film shots.
Third party apps to share from your phone
Another way to upload full size photos is to use dedicated apps. Below are the most popular and simple among the programs.
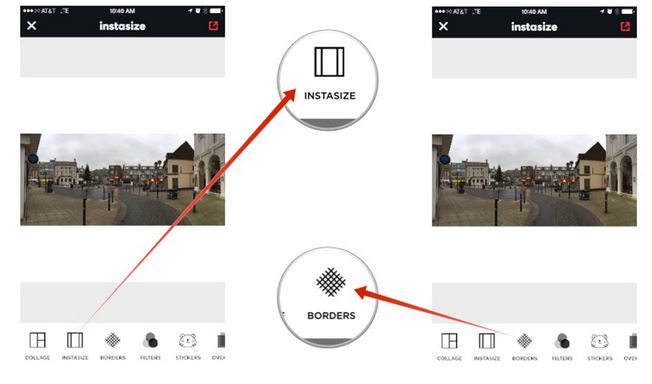
InstaSize
Software for Android and iOS phones. There are both standard functions and other features - change the size, edge, frame characteristics. You can edit a photo for publication, create a collage or story. In addition - the function of zooming pictures. You can pull up a photo from the gallery, clouds, or take a picture right now.
"No crop" or NoCrop
Another simple application that helps you upload a full photo to Instagram. Program with many functions. Most of them are paid, but for the main goal - to publish a photo without cropping the edges - the free functionality is enough.
By clicking on each of the options, the program offers to download additional utilities for editingIn addition, the following functions are available:
- rotate or resize the photo;
- use the background - over a hundred free options;
- filters - if there are not enough of those that are in Insta;
- blocks of text - insert, change slope, location;
- stickers - the user has more than 400 different stickers to choose from.
Launch the program and select a photo to share. A light frame will appear in the frame, under which you need to fit the image. After that, the frame can be published - Instagram * will no longer crop it.
Tikhon Vechersky Content marketer and creator
In my experience, most often the issue with the size of creatives is not at all a priority. Basically, everyone is primarily concerned with the text - as such a standard unit of content measurement in Insta, VK or Telega.
And when it comes down to business, "business" begins. After all, if it is still possible to publish bare letters in a shopping cart, then in Insta it is unrealistic, the visual is directly important there. And if earlier there were quick options to figure out a picture, like Canvas, then at some point we lost even that. Or to designers, or poking around in photoshop ...
Thank God that SMMplanner rolled out "Canvas" - it's really a brain explosion and a killer feature.
