Home »
Misc »
How to insert whatsapp audio in powerpoint
How to insert whatsapp audio in powerpoint
Add or delete audio in your PowerPoint presentation
You can add audio, such as music, narration, or sound bites, to your PowerPoint presentation. To record and hear any audio, your computer must be equipped with a sound card, microphone, and speakers.
2:00
Newer versions
- Which version are you using?
- Newer versions
- Office 2010
Add audio from your PC
-
Select Insert > Audio.
-
Select Audio on My PC.
-
In the Insert Audio dialog box, select the audio file you want to add.
-
Select Insert.
Record audio
-
Select Insert > Audio.
-
Select Record Audio.
-
Type in a name for your audio file, select Record, and then speak.
Note: Your device must have a microphone enabled in order to record audio.
-
To review your recording, select Stop and then select Play.
-
Select Record to re-record your clip, or select OK if you're satisfied.
-
To move your clip, select and drag the audio icon to where you want it on the slide.
If you’re using more than one audio file per slide, we recommend putting the audio icon in the same spot on a slide to find it easily.
-
Select Play.
Change playback options
Select the audio icon and then select the Audio Tools Playback tab. Then select which options you'd like to use:
-
To trim the audio, select Trim and then use the red and green sliders to trim the audio file accordingly.
-
To fade in or fade out audio, change the number in the Fade Duration boxes.
-
To adjust volume, select Volume and select the setting you prefer.
-
To choose how the audio file starts, select the dropdown arrow and select an option:
-
In Click Sequence: Plays the audio file automatically with a click.
-
Automatically: Plays automatically once you advance to the slide that the audio file is on.
-
When Clicked On: Plays audio only when the icon is clicked on.
-
To choose how the audio plays in your presentation, select an option:
-
To have the audio play continuously across all slides in the background, select Play in Background.
Delete audio
To delete an audio clip, select the audio icon on the slide and press Delete.
What would you like to do?
-
In Normal view, click the slide that you want to add a sound to.
-
On the Insert tab, in the Media group, click the arrow under Audio.
-
In the list, click Audio from file or Clip Art audio, locate and select the audio clip that you want, and then click Insert.
The audio icon and controls appear on the slide.
-
In Normal view or Slide Show view, click the icon and click Play to play the music or other sound.
-
In Normal view, click the slide that you want to add a sound to.
-
On the Insert tab, in the Media group, click the arrow under Audio.
-
In the list, click Record Sound.
The Record Sound dialog box opens.
-
In the Record Sound dialog box, click Record , and begin speaking or playing your own audio.
-
Click Stop when you're done recording. Assign a name to the recording.
Click Play to listen to the recording. If you're satisfied, click OK to save the recording and insert it on the slide. If you're not yet satisfied, repeat steps 4 and 5.
The audio icon and controls appear on the slide:
-
In Normal view or Slide Show view, click the icon and click Play to play the music or other sound.
-
On the slide, select the audio clip icon .
-
Under Audio Tools, on the Playback tab, in the Audio Options group, do one of the following:
-
To start the audio clip automatically when you show the slide, in the Start list, click Automatically.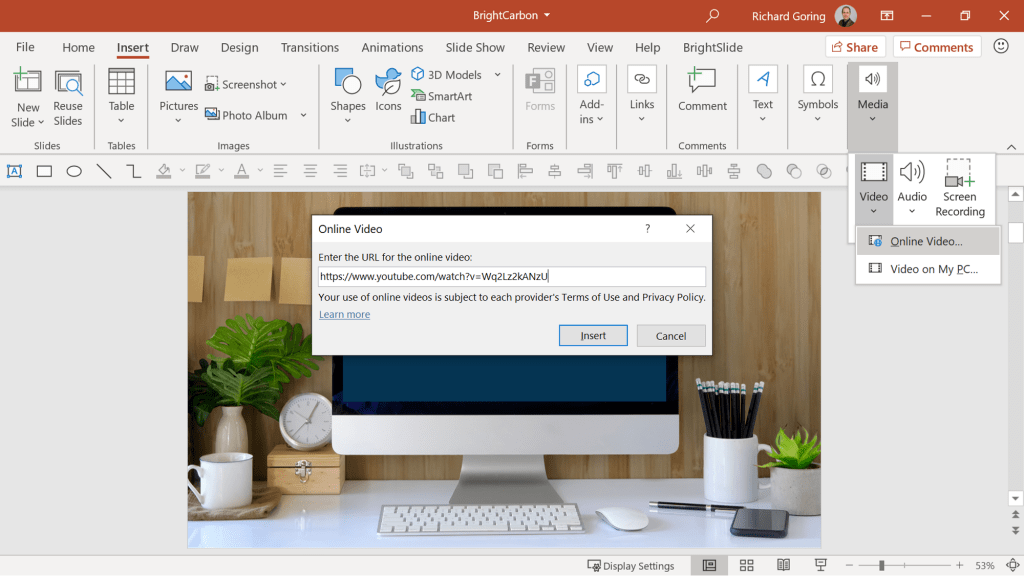
-
To manually start the audio clip when you click it on the slide, in the Start list, click On Click.
-
To play an audio clip as you click through the slides in your presentation, in the Start list, click Play across slides.
-
To play an audio clip continuously until you stop it, select the Loop until Stopped check box.
Note: When you loop a sound, it plays continuously until you advance to the next slide.
See Play music for the duration of your slide show.
Important: Use this option only if you set the audio clip to play automatically, or if you created some other kind of control, such as a trigger, to click to play the clip. (A trigger is something on your slide, such as a picture, shape, button, paragraph of text, or text box, that can set off an action when you click it.) Note that the audio icon is always visible unless you drag it off the slide.
-
Click the audio clip icon .
-
Under Audio Tools, on the Playback tab, in the Audio Options group, select the Hide During Show check box.
To delete a music clip or another sound in PowerPoint, do the following:
-
Locate the slide that contains the sound that you want to delete.
-
In Normal view, click the sound icon or CD icon , and then press Delete.
You can add audio, such as music, narration, or sound bites, to your PowerPoint presentation. To record and hear any audio, your computer must be equipped with a sound card, microphone, and speakers.
2:00
To add music or other audio clip to your slide show, select the slide you want and click Insert > Audio. You can add audio to a single slide, play audio automatically when a slide appears, or add a song that plays as background music during your entire presentation.
You can add your own narration or commentary to an entire presentation by recording it on the Slide Show tab. See Record your slide show for more information.
Add audio to a single slide
-
In Normal view, select the slide you want and click Insert > Audio.
-
Click Audio Browser to insert audio from iTunes, or Audio from File to insert an audio clip from your computer.
-
Select the audio clip. On the Audio Format tab, select the audio options you want.
-
(Optional) If you want to change or modify the standard audio file icon, use the picture format buttons on the Audio Format tab to add a frame, border, or other formatting effect to the audio icon.
Preview the audio
Play audio automatically when a slide appears
By default, during a slide show, audio plays when it is clicked. You can change it so that the audio plays automatically as soon as its slide appears.
-
In Normal view, select the slide you want and add an audio clip if you haven't already done so.
-
On the Audio Format tab, on the right, click Start > Automatically.
Add audio that plays during your entire presentation
-
In Normal view, select the first slide in your presentation and add an audio clip if you haven't already done so.
-
On the Audio Format tab, on the right, click Play across Slides.
Add audio that plays repeatedly
-
In Normal view, select the slide you want and add an audio clip if you haven't already done so.
-
On the Audio Format tab, on the right, click Loop Until Stopped.
(Used alone, this option means the looping sound lasts while the slide it resides on is being shown. When Loop Until Stopped is used in tandem with Play Across Slides, the looping sound continues throughout the presentation.)
Hide the Audio icon
-
Click the audio clip icon.
-
On the PowerPoint ribbon, on the Playback tab, select the Hide During Show check box.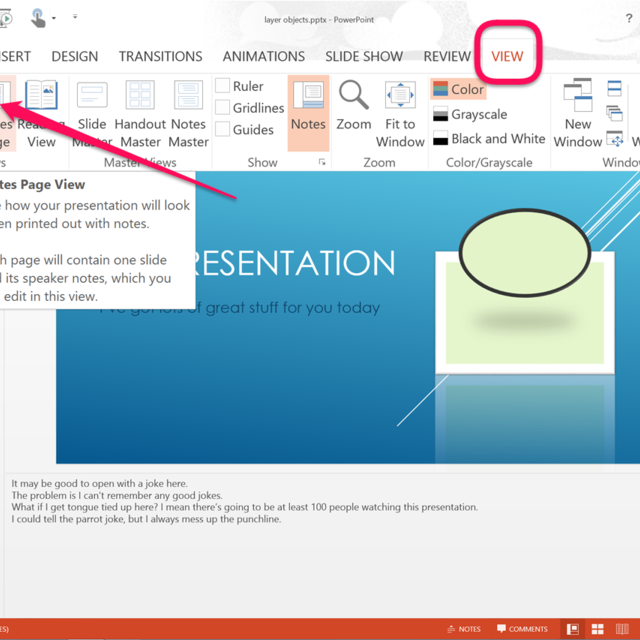
Use this option only if you set the audio clip to play automatically. Note that the audio icon is always visible unless you drag it off the slide.
See also
Record your slide show
Supported audio formats in PowerPoint for the web: MP3, WAV, M4A, AAC, and OGA
Maximum size of the audio file: 16 MB
Add audio from your computer
-
On the Insert tab, near the right end, select Audio.
-
In the file explorer, browse to the audio file you want to use, then select Open.
Change playback options
Select the audio icon and then select the Audio tab or Playback tab. Then select which options you'd like to use:
-
To adjust volume, select Volume and select the setting you prefer.
-
To choose how the audio file starts, select the Start dropdown arrow and select an option:
-
Automatically: During a slide show, the audio plays automatically once you advance to the slide that the audio file is on.
-
When Clicked On: During a slide show, the audio plays only when the icon is clicked.
-
To choose how the audio plays in your presentation, select one or more options under Audio Options:
-
Play Across Slides: Plays one audio file across all slides.
-
Loop until Stopped: Plays an audio file on loop until it’s stopped manually by clicking the Play/Pause button.
-
Hide During Show: If you've set the audio clip to play automatically, you can hide the audio icon during the show, because you won't need to click it at any time.
-
Rewind after Playing: Use this option if you need to play an audio clip more than once while you are still presenting the same slide that contains that audio clip.
-
To have the audio play continuously across all slides in the background, select Play in Background.
Play music or other sounds automatically when a slide appears
Play music across multiple slides in your slide show
Record a slide show with narration and slide timings
Add and record audio in PowerPoint
Animation, audio, & video
PowerPoint training
Animation, audio, & video
Animation, audio, & video
Add and record audio
-
Add animation
Video
-
Add transitions between slides
Video
-
Add, format, and record video
Video
-
Add and record audio
Video
Next:
Share and co-author
Try it!
Add and record audio, such as music, narration, or sound bites, to your PowerPoint presentation and select the playback options.
Add audio from your PC
-
Select Insert > Audio.
-
Select Audio on My PC.
-
In the Insert Audio dialog box, select the audio file you want to add.
-
Select Insert.
Record audio
-
Select Insert > Audio.
-
Select Record Audio.
-
Type in a name for your audio file, select Record, and then speak.
Important: Your device must have a microphone enabled in order to record audio.
-
To review your recording, select Stop and then select Play.
-
Select Record to re-record your clip, or select OK if you’re satisfied.
-
To move your clip, select and drag the audio icon to where you want it on the slide.
Note: If you’re using more than one audio file per slide, it’s advisable to put the audio icon in the same spot on a slide to find it easily.
-
Select Play.
Change playback options
Select the audio icon and then select the Audio Tools Playback tab. Then select which options you'd like to use:
-
To trim the audio, select Trim and then use the red and green sliders to trim the audio file accordingly.
-
To fade in or fade out audio, change the number in the Fade Duration boxes.
-
To adjust volume, select Volume and select the setting you prefer.
-
To choose how the audio file starts, select the dropdown arrow and select an option:
-
In Click Sequence – Plays the audio file automatically with a click.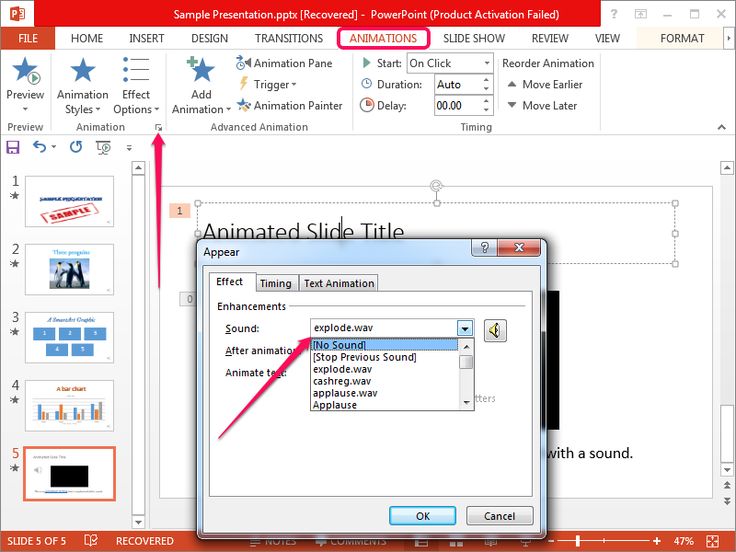
-
Automatically – Plays automatically once you advance to the slide that the audio file is on.
-
When Clicked On – Plays audio only when the icon is clicked on.
-
To choose how the audio plays in your presentation, select an option:
-
To have the audio play continuously across all slides in the background, select Play in Background.
Delete audio
Want more?
Add audio to your PowerPoint presentation
Play music for the duration of your slide show
Adding and removing sound in a PowerPoint presentation
Animation, video and sound
Animation, video and sound
Animation, video and sound
Add or remove sound in a PowerPoint presentation
- Add transitions between slides
Article nine0011 Animation of text and objects
Article - Using the Transform transition in PowerPoint
Article - Embedding a video from YouTube or another site
Article nine0013 - Add or remove sound in a PowerPoint presentation
Article - Screen Recording in PowerPoint
Article
Further: Sharing and co-authoring
nine0002 PowerPoint for Microsoft 365 PowerPoint for Microsoft 365 for Mac PowerPoint for the web PowerPoint 2021 PowerPoint 2021 for Mac PowerPoint 2019 PowerPoint 2019 for Mac PowerPoint 2016 PowerPoint 2016 for Mac PowerPoint 2013 PowerPoint 2010 More.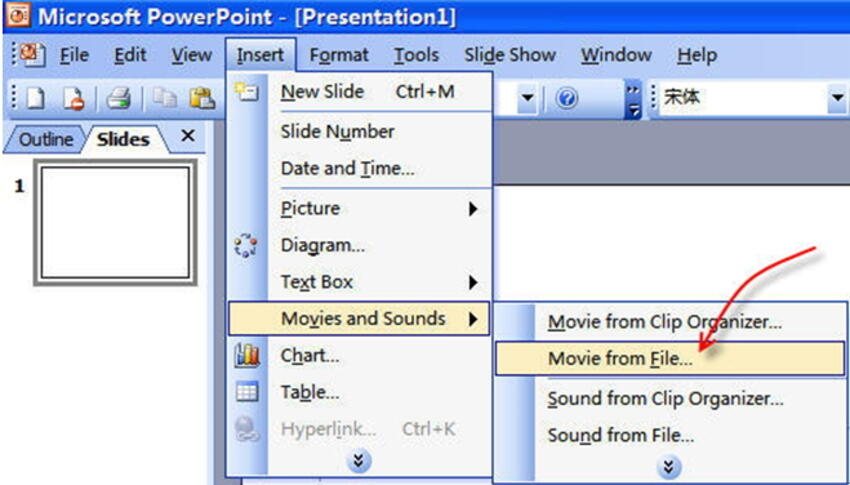 ..Less
 You can add an audio file, such as music, narration, or audio clips, to a PowerPoint presentation. In order for you to record and listen to audio files, your computer must be equipped with a sound card, microphone, and speakers. nine0003
2:00
Newer versions
- Which version are you using?
- Newer versions
- Office 2010
Adding an audio file from a computer
-
Select Insert > Sound .
-
Click Computer audio files .
-
In the Insert Audio dialog box, select the desired file.
- nine0002 Press button Insert .
Sound recording
-
Select Insert > Sound .
-
Select Record sound .
-
Enter a name for the sound file, click Record , and then dictate the text.
Note: To record sound, your device must be equipped with a microphone.
-
To listen to the recording, press the 9 button0055 Stop and then Play button .
-
Click Write to re-write the file, or click OK if you are satisfied.
-
To move a recording, select the sound icon and drag it to the desired location on the slide. nine0003
If there are several sound files on a slide, it is recommended to place the sound icon in the same place to make it easier to find.
-
Select Play .
Playback settings
nine0002 Click on the sound icon and open the tab Working with sound | Reproduction . Then choose the options you want: -
To trim an audio file, click the Audio Editing button, and then use the red and green sliders to trim the recording.
-
To adjust the fade in or fade out, change the values in section Decay duration .
-
To set the volume, press the Volume button and select the desired option.
-
To choose how to launch the sound file, click the drop-down arrow and choose the option you want:
-
In Click Sequence : Automatically play the sound file when clicked.
-
Automatic : Automatically play an audio file when you switch to a slide with it. nine0003
-
On click : Play sound only when the icon is clicked.
-
To specify how sound should be played in the presentation, select the appropriate checkboxes:
-
To have the sound play continuously in the background on all slides, click Play in Background .
Sound removal
nine0002 To delete a sound, select its icon on the slide and press the DELETE key.
Tasks
-
In normal mode, select the slide to which you want to add sound.
-
On tab Insert in the Multimedia group, click the arrow below the Sound button.
-
In the list, select Sound from File or Sound from Clip Organizer , find and select the desired audio clip, and then click the Insert button .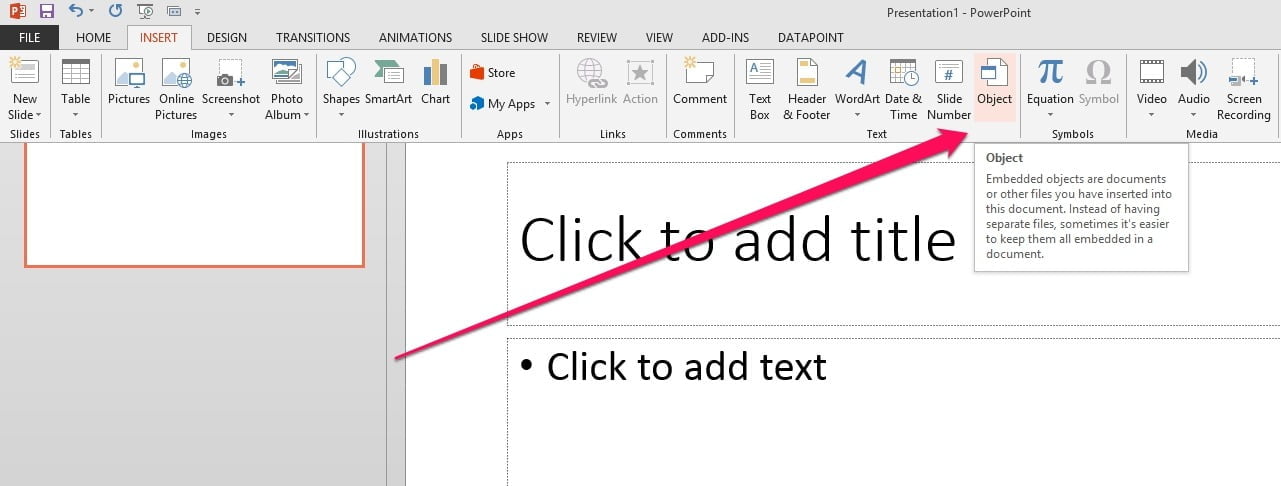
The sound icon and related controls appear on the slide.
-
In normal mode or slideshow mode click the icon and press the Play button to play the sound file. nine0003
-
In normal mode, select the slide to which you want to add sound.
-
On the Insert tab, in the Multimedia group, click the arrow below the 9 button0055 Sound .
-
Select Record audio from the list.
The dialog box Record sound opens.
- nine0002 In the Record Sound dialog box, click the Record button and start speaking or playing your sound file.
-
When you have finished recording, click the Stop button . Give the entry a name.
To listen to the recording, click the Play button . If you're happy with it, click the OK button to save your entry and add it to your slide. Otherwise, repeat steps 4 and 5.
The sound icon and related controls appear on the slide.
-
In normal mode or slideshow mode click the icon and press the Play button to play the sound file. nine0003
-
Click the audio icon on the slide.
-
Under Working with Sound on the tab Playback in the group Sound Options do one of the following:
-
To automatically start sound when a slide is displayed, in the Start list, select Automatic .
-
To start playback manually, in the Start list, select By clicking .
-
To ensure that the sound does not stop when you move to another slide, in the Start list, select For all slides .
-
To keep the sound playing continuously until you stop it, select checkbox Continuous .
Note: This will keep the sound playing until you move to the next slide.
See Play music throughout slideshow. nine0003
Important: Use this setting only if the sound is set to play automatically or you control how it starts in another way, such as with a trigger. (A trigger is a slide object, such as an image, shape, button, paragraph of text, or text box, that can trigger an action on click.) Note that the icon will always be visible unless you drag it off the slide. nine0003
-
Click the audio clip icon .
-
Under Working with Sound, on the Playback tab , in the Sound Options group, select the Hide when showing check box.
nine0218 To delete an audio recording or other audio file in PowerPoint, follow these steps:
-
Locate the slide with the audio file you want to delete.
-
In normal mode, click the audio file or CD icon and press DELETE. nine0003
You can add an audio file, such as music, narration, or audio clips, to a PowerPoint presentation. In order for you to record and listen to audio files, your computer must be equipped with a sound card, microphone, and speakers.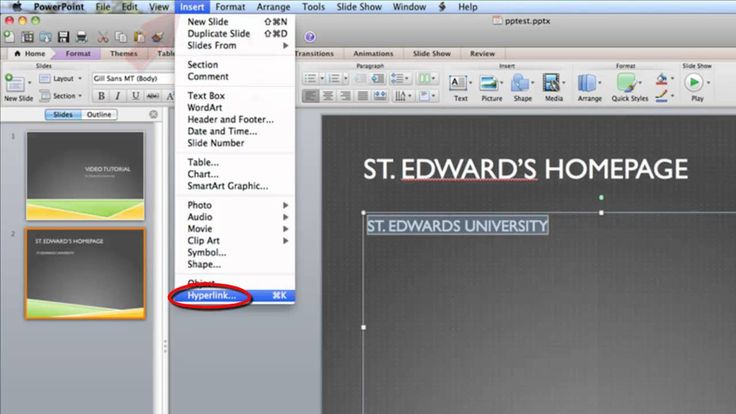
2:00
To add a music file or audio clip to your slideshow, select the desired slide and on the tab Box press button Sound . You can add sound to a single slide, set the sound to automatically start when a slide appears, or add a song that plays in the background for the duration of your presentation.
You can add your own narration or commentary to the entire presentation by recording it using the Slide Show tab . For more information, see Record a slideshow.
Adding an audio file to one slide
-
In normal mode, select the desired slide and click Insert > Sound .
-
Select Audio Explorer to insert audio from iTunes, or Audio from File to insert an audio clip from your computer.
nine0013 -
Select an audio clip. On the Audio Format tab, select the desired audio options.
-
Optional: You can change or edit the default audio file icon using the picture formatting buttons on the Audio Format tab to add a frame, border, or other formatting effect to the icon. nine0003
Sound listening
Auto play sound when slide appears
By default, in slideshow mode, sound is played on click.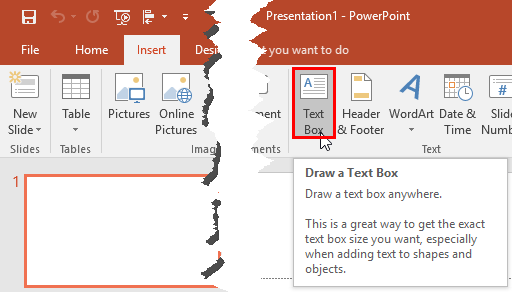 You can change this setting so that the sound plays automatically when the slide appears.
- nine0002 In normal mode, select a slide and add an audio clip to it, if you haven't already done so.
-
On the Audio Format tab on the right, click Launch > Auto .
Adding an audio file that plays during a presentation
nine0052 In normal mode, select the first slide of your presentation and add an audio clip to it, if you haven't already done so.
On the Audio Format tab on the right, click For all slides .
Adding an audio file that plays continuously
-
In normal mode, select a slide and add an audio clip to it, if you haven't already done so.
-
On the Audio Format tab on the right, select the Continuous check box.
(If only this checkbox is checked, the sound will play while the slide is displayed.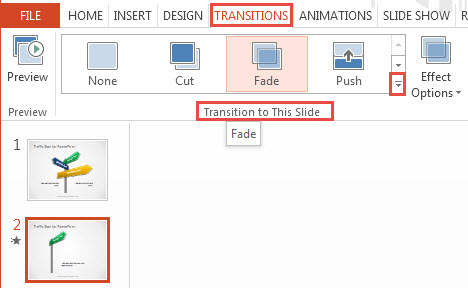 If the 9 checkboxes are checked0055 Continuous and Play for all slides , the sound will play until the end of the presentation.)
Hide sound icon
-
Click the audio clip icon.
-
On the PowerPoint ribbon on a tab Playback check the box Hide when showing .
Use this setting only if automatic sound playback is set. Note that the icon will always be visible unless you drag it off the slide.
Additional information
Recording a slideshow nine0003
PowerPoint for the web supported audio formats: MP3, WAV, M4A, AAC, and OGA
Maximum audio file size: 16 MB
Adding audio from your computer
-
On the tab Insert on the right, select Sound .
- nine0002 In the explorer, find the desired sound file and select Open .
Playback settings
Click the sound icon, and then select the Sound or Playback tab. Then choose the options you want:
-
To set the volume, press button Volume and select the desired option.
-
To choose how to start the sound file, click the arrow Start and choose one of the options:
-
Automatic : During a slideshow, the sound will play automatically when you switch to the slide it is on. nine0003
-
On click : During the slideshow, sound is played only when the icon is clicked.
-
To choose how audio is played in the presentation, select one or more options in section Sound parameters :
-
Play for all slides : One sound file will be played on all slides.
-
Play continuously : The sound will loop until you manually stop it by pressing the 9 button0055 Play/Pause .
-
Hide during live show : If audio is set to autoplay, you can hide the audio icon during live show so you don't have to click it.
-
nine0055 Rewind after playback : Use this setting if you want to play the sound multiple times on the same slide.![]()
-
To have the sound play continuously in the background on all slides, click Play in Background .
nine0002 Automatically play music or other sounds when a slide appears Play music across multiple slides in a slideshow
Recording a slideshow with narration and slideshow duration
Insert and play a video file from your computer
Depending on your version of PowerPoint, you can insert embedded video (default action) or link to video file stored on the computer.
-
Inserting an embedded video is useful, but increases the size of the presentation.
-
When using video links , the file size of the presentation does not increase, but the links may become invalid. We recommend that you store your presentations and videos that you link to in the same folder. nine0003
Supported video formats
In PowerPoint 2016 and newer versions, MP4 files with H.264 (or MPEG-4 AVC) encoded video and AAC audio are recommended.
For more information, see Audio and video file formats supported by PowerPoint.
nine0050 Embedding a video saved on a computer -
In normal mode, select the slide you want to add video to.
-
On the tab, Insert , click the arrow under the Video button and select Computer Video .
nine0013 -
In the Insert video window, select the video and click the Insert button.
Creating a link to a video saved on a computer
To avoid broken links, we recommend that you copy the video to the same folder as your presentation and then link to it.![]()
nine0052 In normal mode, click the slide where you want to add a video link.
On the tab, Insert , click the arrow under the Video button and select Computer Video .
In window Insert video select the desired video, click the down arrow next to the button Insert and select File Link .
PowerPoint 2016 and newer versions support video playback with multiple audio tracks, as well as closed captions and regular captions embedded in video files.![]() For more information, see Make accessible PowerPoint presentations. nine0003
For more information, see Make accessible PowerPoint presentations. nine0003
Finding the storage location of the linked video
If there is a video on the slide and you want to know where it is stored, on the File tab, select Details . Section Optimizing Media Files for Compatibility will provide information about all media files in the presentation, whether they are linked or embedded in the file. If there are video links in PowerPoint, a hyperlink will be displayed View links . Click it to open a dialog box that shows where all linked files are stored.
YouTube video
For information about how to embed a video from the YouTube website, see Embed or link to a video on YouTube.
Video Preview
When a video is selected on a slide, a toolbar appears below it with a play/pause button, a progress bar, forward/backward buttons, a timer, and a volume button.![]() Click the button Playback on the left side of this toolbar to preview the video.
Click the button Playback on the left side of this toolbar to preview the video.
Video auto play or click play
nine0002 By default, slideshow mode plays video in a sequence of clicks. This means that the video plays when you click anywhere on the slide to move to the next action (or press the Spacebar, Right Arrow, or other keys that move to the next action). This video trigger parameter is called In Click Sequence . However, you can choose to have the video play automatically when it appears on the screen, or play on click. nine0003
-
Highlight a video area.
-
On the ribbon, on the Video Tools - Playback tab, open the Start list and select the option you want.
| Parameter nine0797 | Description |
| In click sequence | nine0002 This is the default behavior as described above. The video plays when you click anywhere on the slide to move to the next step. |
| Automatic | nine0806 Video playback starts automatically.![]()
(If there are animation actions before it, they play first, and then the video automatically starts playing. If there are no other animation actions before the video on the slide, it starts playing automatically.)
| nine0002 On click | The video starts playing only when you click it. |
For more information about slideshow video playback options, see Set video playback options. nine0003
Supported video formats
PowerPoint 2013 recommends MP4 files with H.![]() 264 (or MPEG-4 AVC) encoded video and AAC audio.
264 (or MPEG-4 AVC) encoded video and AAC audio.
For more information, see Audio and video file formats supported by PowerPoint.
Embedding video saved on a computer
-
In normal mode, select the slide you want to add video to.
-
On the tab, Insert , click the arrow under the Video button and select Computer Video .
- nine0002 In the Insert video window, select the video and click the Insert button.
![]()
Creating a link to a video saved on a computer
To avoid broken links, we recommend that you copy the video to the same folder as your presentation and then link to it.
- nine0002 In normal mode, click the slide where you want to add a video link.
-
On the tab, Insert , click the arrow under the Video button and select Computer Video .
-
In the Insert Video window, select the desired video, click the down arrow next to the 9 button0055 Insert and select Link to file .![]()
Finding the storage location of the linked video
If there is a video on the slide and you want to know where it is stored, on the File tab, select Details . Section Optimizing Media Files for Compatibility will provide information about all media files in the presentation, whether they are linked or embedded in the file. If there are video links in PowerPoint, a hyperlink will be displayed View links . Click it to open a dialog box that shows where all linked files are stored.
YouTube video
For information about how to embed a video from the YouTube website, see Embed or link to a video on YouTube.
Video Preview
When a video is selected on a slide, a toolbar appears below it with a play/pause button, a progress bar, forward/backward buttons, a timer, and a volume button.![]() Click the button Playback on the left side of this toolbar to preview the video.
Click the button Playback on the left side of this toolbar to preview the video.
Video auto play or click play
nine0002 By default, in slideshow mode, the video plays when is clicked. However, if you wish, you can enable the automatic launch of the video when it appears on the screen. -
Highlight a video area.
-
On the PowerPoint ribbon, tab Video Tools - Playback open the list Launch and select Automatic .
For more information about slideshow video playback options, see Set video playback options.![]()
Important: Office 2010 is no longer supported . Move to Microsoft 365 to work remotely from any device and continue to receive support. nine0003
Update
Supported video formats
WMV files are recommended in PowerPoint 2010.
For more information, see Audio and video file formats supported by PowerPoint.
Embedding video saved on a computer
-
In normal view, click the slide where you want to embed the video.
-
On the Insert tab, in the Media Clip group, click the arrow below Video .![]()
-
Select Video from file , navigate to the folder with the desired video and select it. nine0003
-
On the Insert button, click the down arrow and select Insert .
Creating a link to a video saved on a computer
To avoid broken links, we recommend that you copy the video to the same folder as your presentation and then link to it. nine0003
-
On the Slides tab, in normal view, click the slide on which you want to add a video or animated GIF.![]()
-
On the Insert tab, in the Media Clip group, click the arrow below Video .
nine0053 Select Video from file , navigate to the folder with the desired video and select it.
-
On the Insert button, click the down arrow and select File Link .
nine0050 Search for storage location of linked video If there is a video on the slide and you want to know where it is stored, on the File tab, select Details .![]() Section Optimizing Media Files for Compatibility will provide information about all media files in the presentation, whether they are linked or embedded in the file. If there are video links in PowerPoint, a hyperlink will be displayed View links . Click it to open a dialog box that shows where all linked files are stored.
Section Optimizing Media Files for Compatibility will provide information about all media files in the presentation, whether they are linked or embedded in the file. If there are video links in PowerPoint, a hyperlink will be displayed View links . Click it to open a dialog box that shows where all linked files are stored.
Video preview
When a video is selected on a slide, a toolbar appears below it with a play/pause button, a progress bar, forward/backward buttons, a timer, and a volume button. Click the 9 button on the left side of this toolbar0055 Play to preview video.
Video auto play or click play
By default, in slideshow mode, the video plays when clicked . However, if you wish, you can enable the automatic launch of the video when it appears on the screen.![]()
-
Highlight a video area. nine0003
-
On the PowerPoint ribbon, on the Video Tools - Playback tab, open the Launch list and select Automatic .
For more information about slideshow video playback options, see Set video playback options.
nine0002 In PowerPoint 2016 for Mac and newer versions, MP4 files with H.264 (or MPEG-4 AVC) encoded video and AAC audio are recommended. For more information, see Audio and video file formats supported by PowerPoint.
For correct instructions, select the version of Office you are using:
Newer versions
- Which version of Office for Mac are you using?
- Newer versions
- 2011
Inserting video stored on a computer
-
In normal mode select the slide you want to add video to.
nine0013 -
On the Insert tab, click the Video button, and then select Movie from File .
-
In the dialog box Select Movie , select the file you want to insert.
- nine0002 If you want to embed a video on a slide, just click the Insert button.
![]()
-
If you want to add a video link to the slide, click Options in the lower left corner of the dialog box, select the Link to file check box, and then click the Insert button.
nine0029
After inserting the video into your presentation, you can add effects and select the playback mode (Automatic or On Click).
Tip: Starting with PowerPoint 2016 for Mac, you can play a video that contains multiple audio tracks. Closed captions and regular captions embedded in video files are also supported. For more information, see Make accessible PowerPoint presentations. nine0003
How to link to a movie file from a computer in PowerPoint 2011 for Mac
-
From menu View , select item Normal .
-
At the top of the Navigation Pane, select tab Slides and click the slide. Depending on the width of the Navigation Pane, it displays tabs and or icons Slides and Outline .
-
On the Home tab , in the Insert group, click the Multimedia button and select Movie from file .
nine0002 -
Click the desired movie file and select the link to file check box.
-
Press button Insert .
Embed movie in PowerPoint 2011 for Mac
-
From menu View , select item Normal .
-
Click the tab at the top of the Navigation Pane Slides and click the slide. Depending on the width of the Navigation Pane, it displays tabs and or icons Slides and Outline .
-
Do one of the following:
| Task nine0797 | Required action |
| Insert movie from file | nine0002 On the Home page tab, in the Insert group, click the Multimedia button and select Movie from file .![]() Select a movie file and click Insert . | nine0802
| Inserting a movie from the Movies, iMovie, iTunes, or Photo Booth folder | On the Home tab , in the Insert group, click the Multimedia button and select Movie Explorer . nine0002 Select iMovie , Movies , Photo Booth , or iTunes from the pop-up menu, and then click the movie and drag it onto the slide.![]() |