Purchases made through genuinely recommended links may earn a commission at no extra cost to you. Learn more.
If you’re wondering how to fix blurry Instagram photos, join the club. Tens of thousands of users upload their photo to Instagram only to find it to not look as great as when they first edited it. Me included!
Why does Instagram lower picture quality? There are two reasons that your photos look blurry on Instagram:
Luckily there are easy fixes to avoid image compression and make sure your image quality looks excellent when posting to Instagram. Here’s how to navigate this social media and upload quality photos all the time.
Pin this post on fixing your blurry Instagram photos for later.
Instagram Image Best Practices
How to Fix Blurry Instagram Photos
Adobe Lightroom Desktop
Adobe Lightroom Mobile
How to Upload High Quality Photos to Instagram
Hack Within the Instagram App to Make Instagram Photos and Carousels Even Clearer
Please note that this is a reader-supported site.
Purchases made through genuinely recommended links may earn a commission at no extra cost to you. Learn more.
For the majority of the time, people use their phone vertically meaning the long way up and down. They do not use it horizontally, which is side to side.
This is how users also use Instagram (vs. people watching YouTube may hold their mobile phone horizontally).
As a result, Instagram’s best practice to post portrait photos with the aspect ratio of 4:5. This makes the ideal photo size 1080px by 1350px. It will fill up most of the phone’s screen.
If you choose to post a square photo with an aspect ratio of 1:1, you’ll want a photo size of 1080px by 1080px.
If you choose to post a horizontal photo, which is not advised because of how users use a phone, then the long edge needs to be 1080px.
For the purpose of making your Instagram photos blurry to clear, we’re going to be referring to Instagram’s best practice of posting with an aspect ratio of 4:5 and size or resolution of 1080px wide by 1350x tall.
Let’s start off with learning how to fix blurry Instagram photos with Adobe Lightroom on desktop.
I’ll show you how to crop and size your images for the best Instagram size, but if you are new to Lightroom and really want to master it, I recommend this Adobe Lightroom course I took.
Don’t have Adobe Lightroom for desktop? Get it here.To maintain the aspect ratio of Instagram’s best practice, crop your image to 4 x 5 / 8 x 10.
Then go to Export your photo with these settings:
If you export your photos from Adobe Lightroom to Instagram often, you can even set this as a Preset on the left side.
Important: Not only do you need to export your photo from Lightroom with these settings, you need to transfer them from your computer without losing quality.
I load my photos onto Planoly via desktop, then post from the Planoly app on my phone. But you can also transfer photo via AirDrop or Dropbox.
To really get the maximum benefit out of Adobe Lightroom, take this Adobe Lightroom class I took. It is really worth the money, but if you’re on a budget, there are tons of free YouTube tutorials to follow.
Not everyone can afford a monthly subscription to Adobe Lightroom desktop and that’s ok! That’s because Adobe Lightroom Mobile is free and also quite powerful. You can still learn how to fix blurry Instagram photos in the mobile app.
Even though I pay for Adobe Lightroom on desktop, I still use the Adobe Lightroom Mobile on my photos sometimes! I actually like the selective coloring tool on mobile better than on desktop.
Here are the settings to fix your blurry Instagram photos on Adobe Lightroom Mobile.
Now you’re ready to post the photo to Instagram.
Did this help you? Help others too by Pinning or sharing it. Thank you!
Now that you’ve learned how to fix blurry Instagram photos by exporting them in accordance with Instagram’s best practice by keeping it under 1MB and transferring it to your phone in a way that it doesn’t lose any quality, it’s time to upload your photo to Instagram.

Pro Tip: If you click on ‘Advanced Settings’ at the very bottom, you can add in Alt Text. This not only makes your photos more accessible for people with visual impairment; this is like search engine optimizing your photo for Instagram and can help with your reach!
The above directions on export pixel size is the most important thing to do to avoid Instagram quality loss, but if you find that your photos are still blurry and you want to fix that within the app, follow this:
If you’re serious about content creating, Adobe Lightroom is a must. It’s not just a powerful way to edit photos but it’s also a super helpful tool to use to organize photos. Get Adobe Lightroom here.
Learning how to use Adobe Lightroom comes with a lot of trial and error. There are a lot of free tutorials on YouTube but the class I found the most helpful is this comprehensive Lightroom guide on CreativeLive.
I actually had a CreativeLive pass, which allowed me to view unlimited classes. They were really helpful in my beginner years of content creating in all sorts of areas: business management, marketing, and of course, photography.
Take the same Adobe Lightroom class I took.
I hope your photos are crisp and clear after reading this post on how to fix blurry Instagram photos. If you want to make Instagram your job, check out this post on how to become a paid influencer on Instagram.
Happy content creating!
Want to learn more? You can find more helpful blog posts here, get consistent page views to your blog with my SEO course, or follow me on social media to get daily tips:
 chetrit
Until next time,
Sarah Chetrit
Grow your blog the smart way with my SEO course here.
The pandemic situation forced everyone to maintain social distance, and so for this, people nearly locked themselves in homes, but what kept them in touch with each other by sitting miles away from friends and family? The answer is 'Internet,' different social media platforms, commonly referred to as 'communication platforms.'
It is commonly said, 'the more you interact, the more you learn.' This suits both humans to human and human to application interaction. Something similar happened with Instagram. The more people used it, and they realized that the photos look blurry.
The problem that how to fix blurry pictures on Instagram remain unresolved, but the good news is that the article will provide amazing and implementable solutions.
Recent Videos from Recoverit
View More >
Free Download | Win Free Download | Mac
The full of the fun platform is getting in trouble as photo results are affected by few factors, as discussed. People sometimes get annoyed by the bad photo quality and that the image looks blurry, and this is a very common complaint seen among all Instagram users.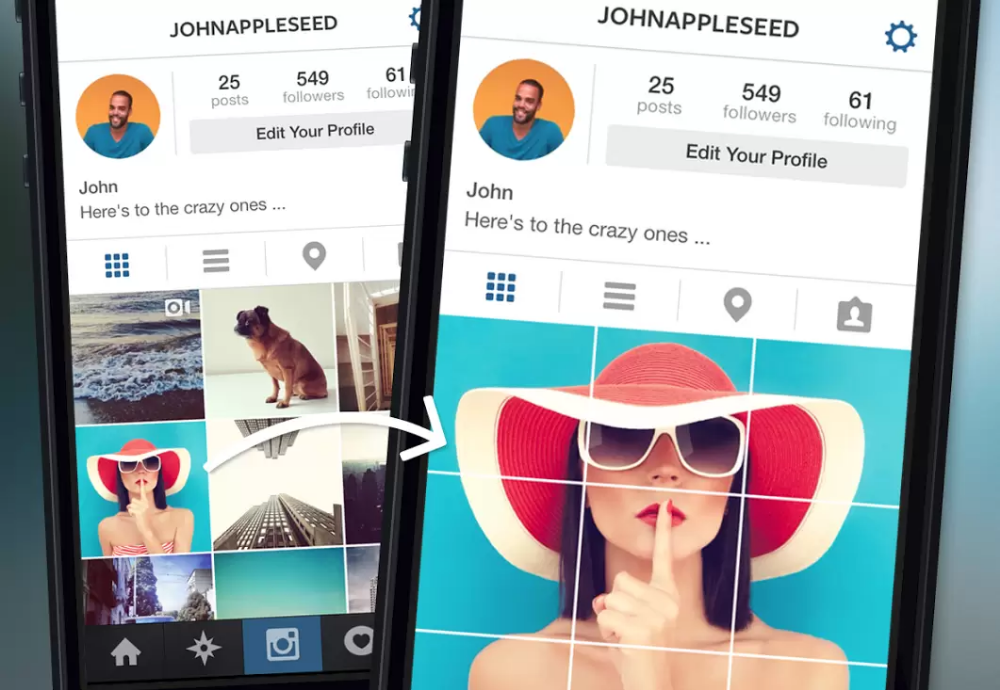
What people think when they see a blurry photo is how to fix blurry Instagram photos on Android but sadly, they don't have the answer because if they did, then the problem would have been resolved. So, to help you regarding how to fix blurry photos on Instagram few guiding methods are attached in the coming section;
You can fix the issue of blurry photos by adjusting settings on Instagram. You just have to turn off the data saving feature to get rid of blurry and low-quality images. Allow us to guide you;
 '
'Another unique solution to blurry images and to prevent huge quality loss is to maximize your phone's camera quality. Allow us to tell you how it's done;
Not everyone is aware of this magical tool. Those who already are, are in heaven because they can repair the photo within minutes, and those who have never heard about it, fastened their seat belts because the roller coaster of Wondershare Repairit is about to start.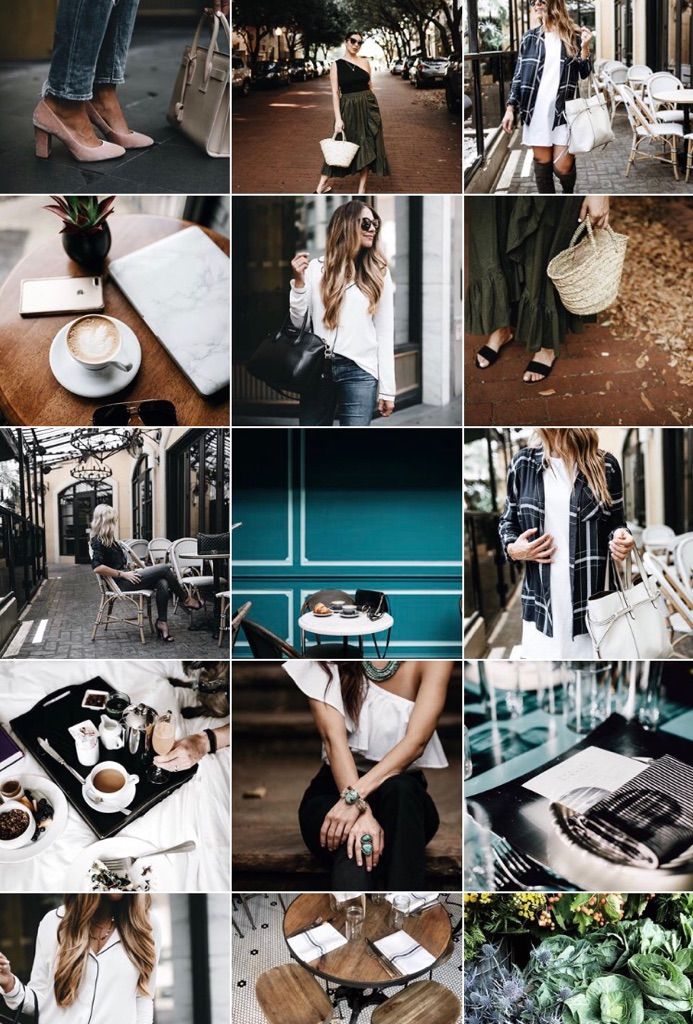 The offline tool to repair photos is excellent yet very easy to use. Let us show you its steps;
Free Download | Win Free Download | Mac
Step 1: Load File to Repair
The first and important step the user needs to do is to download and install the tool, and whenever you have to repair a photo, just launch it.
Once the tool is opened, you have to click on the 'Add' button that is visible in the center of the screen. This button will allow you to choose a local file from Mac or Windows system and load it onto the software to repair.
Step 2: Start Repair
After you have selected the files you want the software to repair, just click on the 'Repair' button to let the software start the repairing process. An indicator will be visible in the bottom left corner, showing the user the progress of the repair process.
The process will take few minutes to complete. Remember one thing, do not close the application during the repair process.
Step 3: Restore
When the process is completed, the system will show the user a list of all the repaired files. The user is now supposed to select the files they want to restore. As soon as the user is satisfied with the selected flies to restore, just click on the 'Save Repaired Files' button and let the software save the files.
Just select your desired location to save the repaired files.
The most commonly used social media platform that aids in providing information, entertainment, and interesting insiders about the life of different celebrities. The fun-oriented platform allows users to upload amazing content on their accounts. They can chat, face time friends, and even do live sessions.
A common complaint from different Instagram users is that the photo quality changes when you upload a photo. The photos generally get blurry after upload. But have you ever pondered on the reason why this happens? If not, then let's discuss few reasons why photos look blurry;
When uploading a photo on Instagram, the file size matters a lot. It does not trouble the uploading process, but it does affect the photo quality, and the image looks blurry. If the file size is over 1MB, then Instagram will compress it.
If you are uploading an image with an incorrect aspect ratio, then Instagram will compress and crop the photo. This way, the photo will be of the standard size that is acceptable to upload, but it damages the picture quality, and it looks blurry. The correct aspect is 4:5.
The default file format accepted by Instagram is JPEG (.jpg) extension. In case the user is uploading an image file in any format other than this format, then Instagram will covert the format to .jpg, and then the file will be uploaded. Hence, during the conversion, the file loses its quality.
Instagram is a mobile-based application, yet people also use it on other devices such as desktops, laptops, etc.![]() Uploading photos from other devices will definitely harm and reduce the photo quality because the application is predominantly mobile-based.
Uploading photos from other devices will definitely harm and reduce the photo quality because the application is predominantly mobile-based.
To avoid any problem when uploading a photo on Instagram, it's essential to check all the facts and factors that are required for upload. Things like photo size, file format, aspect ratio, and other minute elements that people generally ignore and don't bother but that cost them later.
Some tricks and tips that helped people escape from all the uploading problems and get more likes will be shared so that you can also get the most benefit like other people have been getting;
 91:1. The ideal image size for such a style is 1080px by 608px.
Any more related articles:
Providing the user with the best information, implementable solutions, and beneficial tips that will help the user to upload better quality images. Users can enjoy the amazing features offered by Instagram without any hurdle.
Free Download | Win Free Download | Mac
How do I change the upload quality on Instagram?
Multiple tips have been discussed in the above sections guiding for better upload quality.
How do I make my Instagram pictures clear?
By avoiding all the factors that cause an image to get blurry and also by following the solutions provided in the article, users can make Instagram pictures clear.
How do you recover permanently deleted Instagram?
According to Instagram policy, a mistakenly disabled account by Instagram or a user can be recovered, but a permanently deleted account cannot be recovered.
Can you recover deleted Instagram videos?
Yes, deleted Instagram videos can be recovered within 30 days of deleting.
Many people say that Instagram compresses photos and degrades the original quality of images. If you use the platform only to chat with friends, then the decrease in clarity may not interfere with the publication of frames. However, detail is important when you are promoting a brand and business, posting photos from photo shoots, and creating a beautiful feed. Today we will tell you what determines the clarity of the picture and how to upload a photo to Instagram without losing quality.
In order for photos to be displayed without cropping or compression, you must set the appropriate photo format and size. The rules of the social network spell out the required frame proportions and resolution for posts, stories, and even profile photos.
You can post photos in different orientations in the feed. You can upload a vertical, horizontal or square image. In the profile, all content will be displayed in the form of a square, but when you open a picture, Instagram will show the original frame without cropping.
To ensure that images do not lose quality, you need to set the correct aspect ratio:
What happens if I upload an image "as is" without setting the resolution? When posting photos with a width of less than 320 pixels, Instagram will automatically increase the image resolution. Because of this, digital noise and pixelated areas will appear in the photo.
When uploading large photos, the social network will reduce the width to 1080 pixels. In this case, the detail and contrast of the photo may decrease.
How publications will look in different layouts
In Stories, for the correct display of the image, you need to publish content with a vertical orientation. Horizontal or square footage will either be framed with black borders, or they will adjust to the predominant color of the image.
Required properties for stories:
And by the way, photos will be displayed in stories for 5 seconds. You won't be able to change the media duration.
How pictures look in different positions in Stories
The profile avatar in the social network is displayed as a circle, but a square picture is uploaded to the server itself. It's best to crop the shot yourself, as the platform automatically removes the edges of the image and can cut off important parts of the frame.
The size of the avatar depends on where the profile is opened:
Automatic cropping of photos with different aspect ratios
Basically, the quality depends on the original resolution of the image. Also, the following criteria affect the clarity of the photo:
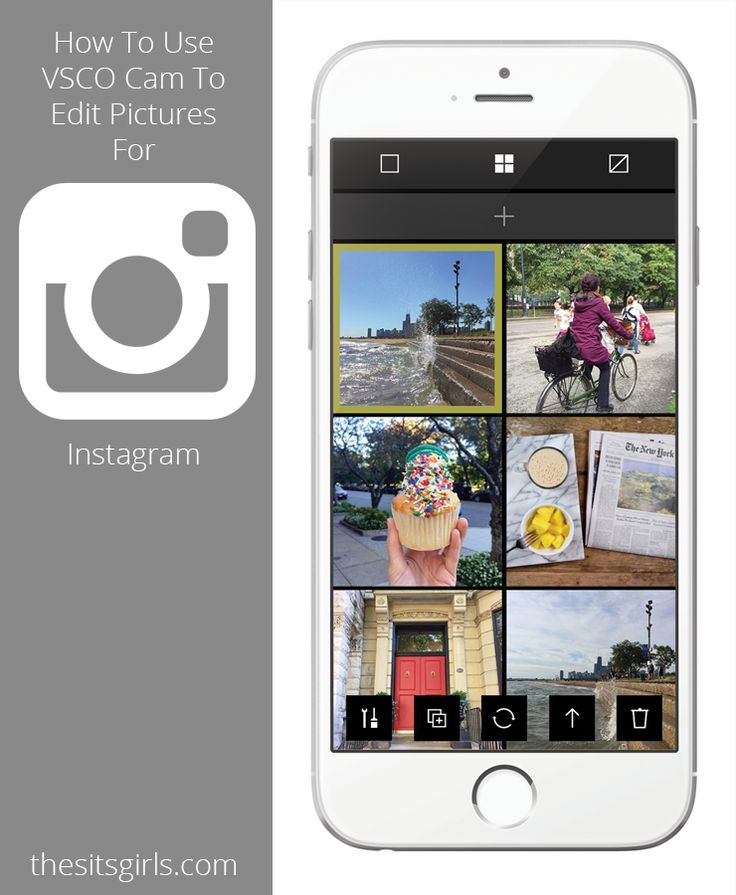
To optimize the image from your phone, you can use special applications. Good options for Android and iPhone would be InstaSize and NoCrop . For Android users, there is also a good software A Better Camera . All these utilities allow you to maintain the original proportions and upload pictures without white borders, help you avoid blurring the picture and scale the photo correctly.
We will look at how to post photos on Instagram without losing quality, using the example of the application A Better Camera . It will allow you to expand the standard capabilities of the main camera, set the appropriate aspect ratio and get high detail.
You can download the application for free from the Google Play Market. Then we act according to the algorithm:
1. You need to launch the application and swipe from top to bottom. In the menu that opens, select "Settings" and go to the "General settings" - "Shot size" section. Here you can choose the appropriate resolution for Instagram.
The higher the Mpix value, the higher the resolution.
2. Next, you need to go back and open the Screen Settings tab. You can display additional items in the start menu: battery power, grid, various modes, etc.
Options will allow you to control the quality of the photo
3. Then you need to exit the settings and swipe down again. Open the "Scenes" tab and specify the desired option: portrait, landscape, sports, etc. The software will automatically set the appropriate exposure, contrast and exposure settings. In fact, you need to choose a thematic filter in order to better convey the atmosphere of the frame and avoid graphical defects.
Available scenes
4. Click on the "Focus" option. If you need to shoot small objects, it is better to switch to the "Macro" mode. For other situations, "Auto" is suitable.
Available options
5. Next, you need to return to the start menu and click on the modes icon in the lower right corner. Here you can select automatic shooting, create a panorama, a tool for removing unwanted objects, applying an HDR effect, or night mode.
The option is marked on the picture
6. After saving all the settings, you need to tap on the screen in the place where the lens should be focused. Click on the camera icon to take a photo. The result will be saved to the gallery. Now you can upload it to the platform through the Instagram mobile app.
Now it's clearer how to upload photos to Instagram without quality loss. The original low resolution affects the clarity of the pictures. In such cases, Instagram will automatically enlarge the image and make it blurry and pixelated. A large image will in turn be reduced, and this can reduce the detail and contrast of the photo.
Before publishing, be sure to adjust the aspect ratio in the software, otherwise the frame will not be displayed correctly in the feed. You can use InstaSize, NoCrop and A Better Camera. To find other useful applications for working with photos and not only, it is necessary to read reviews of programs. So you can find the best solution for various tasks and get acquainted with all the features of the software.
If you follow the requirements of the social network, use special applications for optimization, you can guarantee a perfect image in the feed.
Android I/O Instagram iPhone As an advertisement
InstagramProduct belongs to an organization recognized as extremist in the Russian Federation.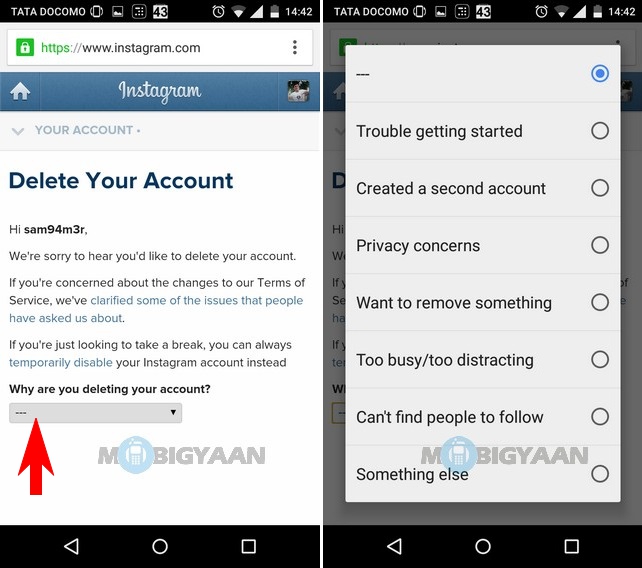
remains a social network about beautiful photos, so you can't do without good shots. Amplifer support manager and InstagramThe product belongs to an organization recognized as extremist in the Russian Federation. - Blogger Anastasia Chernykh has already told how to blog in InstagramThe product belongs to an organization recognized as extremist in the Russian Federation, and now explains how to learn how to take cool photos, find your own style and make publications more attractive.
You don't have to use a camera to take beautiful photos for Instagram* - your phone's camera will often suffice. But getting basic knowledge about photography is still worth it.
First, get familiar with the basic concepts:
This knowledge will help you avoid mistakes at the very beginning.
20% discount for the first two months in Amplifer using the promo code AMPLI20
The composition is responsible for how the objects in the photo are located - this helps to make the frame harmonious and interesting. If you are not going to do photography professionally, then basic knowledge will be enough for you. I'll tell you about two options for arranging objects in the frame that I use:
Rule of thirds . Divide the frame into 3 equal parts horizontally and vertically so that the main objects are located at or along the intersections of the lines.
The subject is at the intersection of lines
Diagonal rule . Draw a diagonal from one corner of the photo to the other. The diagonal from the lower left corner to the upper right is more “calm” and is called descending , and the opposite, from the lower right corner to the upper left - ascending , it is more "active".
An example of a composition with a descending diagonal
This means that if you arrange objects along an ascending diagonal, the frame will be more dynamic, and if you place it diagonally downward, it will be harmonious and peaceful.
An example of a composition with an ascending diagonal
You can turn on the grid in the camera settings on your smartphone - turn it on and it will be easier to deal with the composition.
A photo in good light is good for an avatar - it's an important part of your profile. Light is the basis of everything.![]() When it is good, the photo does not require additional processing.
When it is good, the photo does not require additional processing.
Good lighting on the left vs bad on the right
For beginner photographers, daylight will be a real help and will do most of the work - the frame will be rich, with natural light and shadows.
In winter it is better to take pictures from 10 am to 3 pm in clear weather, and in summer there is much more time - suitable light from 7 am to 9 pm. These recommendations are suitable for most residents of the European part of Russia.
Photographers have the concept of "golden hour" (Golden Hour) - this is the hour after sunrise and the hour before sunset. At this time, the light is soft and especially suitable for shooting.
Photos taken during the golden hour
Important: You can shoot during the daytime and when there is no sun. Moreover, taking pictures in bright sunny weather is much more difficult than in cloudy weather - extra shadows and sharpness appear.
And it is better to publish beautiful photos on Instagram* through Amplifer. Add a description, hashtags, and tags so you don't forget anything. Try 7 days free trial
Often your smartphone can do more than you think - be sure to explore the camera's settings and features and see what it has to offer. Portrait mode, stabilization, optical zoom, reticle or HDR will all help you when shooting.
For example, HDR is available on almost all smartphones - it creates several frames with different exposures and combines them into one shot, so the photo is clearer and more contrasty.
On the left is a photo without HDR, on the right is with HDR
Be sure to wipe the camera before shooting - such a trifle, but the frame will definitely be better 🙂
And to decorate your photo, try using apps to create beautiful "Stories" in InstagramThe product belongs to an organization recognized as extremist in the Russian Federation.
Applications help you correct light, remove excess, make your photo brighter, emphasize details and bring frames to a unified style. Here are my favorite apps and why:
VSCO is the most popular and easiest photo editing app. It has 15 free and more than 100 paid filters, you can edit the exposure, contrast, sharpness, saturation, add graininess.
Snapseed is a simple application for editing basic parameters with filters (“styles”). From interesting:
Lightroom is one of the coolest light and color correction applications that doesn't spoil the quality of the original. There are curves for editing here - they help distribute the brightness of each pixel in the photo.
In Photoshop Fix , you can not only edit light, colors, brightness, temperature, but also remove unnecessary details from photos using the Recovery tools.
Here you can choose point restoration or the stamp function - in the first case, you just need to swipe over the object and the program will delete it for you, and in the second case, you yourself choose from which part of the photo you will take the part for replacement.
Also in this application there is a Liquify function that will help you adjust the shape of objects and add volume. Do not abuse, please - real photos always look more interesting than retouched ones to the ideal.
Remove silhouettes of people in the background in Photoshop Fix
To maintain an account on Instagram*, try Amplifier: it publishes photos, videos and carousels to the feed, collects statistics and suggests the best time to post. 7 days free
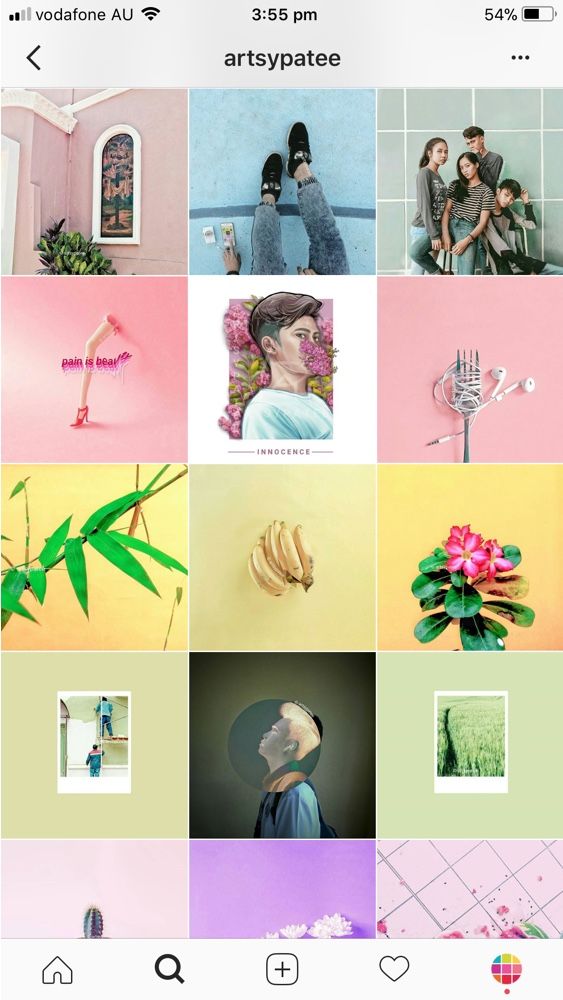
It's important to find your style - then your photos will catch on. Think about what profiles you enjoy looking at? Through which photos would you like to present yourself? What do you like to photograph?
And go in search of inspiration in InstagramThe product belongs to an organization recognized as extremist in the Russian Federation. and on Pinterest - find a few blogs whose style is close to you, save photos and take note of interesting ideas. Then try to repeat and turn on your fantasy. You should not get an exact copy, because each author brings something of his own to the frame 🙂
For example, I really like the profiles snova_nastia, vicky_od, kate_voina - sometimes I take note of ideas for a photo from them.
Publications snova_nastia
Another way to develop your style is to shoot everything that seems beautiful to you. Take 10-15 frames, process them and evaluate the result. What photos came out? What color is dominant? Is it possible to group them and get a beautiful picture?
Through the search for inspiration and daily practice, you will find what you can call your style 🙂
Nowadays, a person photographing food, the city or himself does not surprise anyone. There is nothing like stopping, taking a picture, setting the timer on your phone, or asking passers-by to take a picture of you.
Get ready to experiment and look for unusual angles in pursuit of a beautiful photo.
Feel free to ask friends or passers-by to take a photo. The main thing is to explain what you want to see in the frame - then everyone will be satisfied.
Try different styles and don't get stuck on one thing - shoot portraits, food layouts, selfies, architecture, landscapes. Don't be afraid to shoot close-ups - this way you can get more interesting angles.
The more diverse your content, the more interesting the feed looks, and the higher the engagement of readers will be - everyone will want to go to your feed, view an interesting frame and leave a comment.
InstagramProduct belongs to an organization recognized as extremist on the territory of the Russian Federation. and other popular social networks are conveniently managed in Amplifer. Make posts for all platforms in a convenient editor and schedule posts directly from your computer. Try a trial period of 7 days, no card needed
InstagramThe product belongs to an organization recognized as extremist in the territory of the Russian Federation.: