Instagram has become a powerful social media platform. The photo-sharing app will offer you several features to create and post beautiful images and videos and share them with your friends. To do this, however, your Instagram must be able to access your camera.
But you probably didn’t know this and already tapped on “Deny” when the prompt came up. You are now stuck with an app that won’t allow you to take photos and videos with loved ones.
Before you throw in the towel and ditch your IG app, here’s a step-by-step guide to navigating your device settings and manually enabling your camera to access your Instagram account.
Table of Contents
Relaunch Instagram to confirm it now has access to the camera. The easiest way to verify the access is by opening a new Story view.
When done, leave the settings and open Instagram.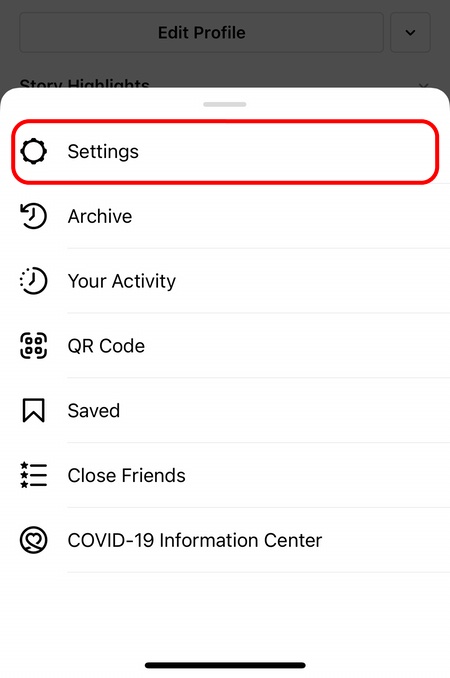 Confirm that you can now access your device camera on IG by tapping on the Story button.
If your device is running on Android, here’s how to update it.
How To Update Your Device’s Android Operating SystemYour android device will usually alert you whenever there’s an update available, but you can also be proactive and check if one is available and update your device.
Here’s how to check available android software updates and update your device:
If you have followed the above steps but still can’t get your camera working on IG, you need to check if your device’s camera is working in the first place.
To confirm, try taking pictures with the Camera app on your phone’s home page. If it’s not working, have that fixed first. Then follow the steps to allow it to access Instagram.
Instagram helps you and your friends share funny and memorable life moments with friends and relatives. Your newly installed Instagram app is perfect for that. It will allow you to take, edit and share pictures and videos with your friends on the app.
But that’s only possible if you have enabled camera access on your IG. If you didn’t do that immediately after launching the app, this article gives you a step-by-step guide on how to do it whether you are using an Android or iOS device.
Uggh? What’s happening with my phone?
Whenever I launch the Instagram app on my phone and create a reel directly from it, I can’t proceed with the recording process.
Well, it’s possible Instagram’s not granted access to your camera from the get-go.
So, if this is the case, then here’s how you can enable camera access on Instagram.
How to Enable Camera Access on Instagram Android
First, check if the phone’s software is updated. If Instagram still can’t access the camera, open “Settings” and tap “Apps.” Search for IG through the search icon and tap “Permissions.” Then, tap “Camera” and press “Allow only when using the app.” Make sure to activate the microphone as well.
Enabling Camera Access on Instagram Android — Step-by-step Guide
Remember when you first installed Instagram on your device?
As soon as you launched the app on your phone, you’ll notice a prompt asking you to allow Instagram to access your camera.
In most cases, you’ll press or tap the “Allow” button so you can easily create videos and take photos with Instagram.
But, in case you accidentally tapped the “Deny” button instead, don’t despair.
You can always manually fix the settings to enable Instagram to access your phone’s camera.
So, here’s how you get started with enabling Instagram’s access to your phone’s camera.
Note: Make sure to check your device’s software is updated. If not, then better update it first before you proceed with the steps you’ll find below.
Step 1: First, open “Settings” on your device. Usually, you’ll find the Settings icon on your home page.
If not, you can always swipe up to access the app drawer (if your phone has such a feature) and search for “Settings” through the search bar.
Once you locate the Settings app, tap to open it.
Step 2: Once you’re on “Settings,” keep scrolling until the Apps button comes into view. Press on the icon to access it.
However, if you’re using an iOS device, skip this step and proceed with Step 3.
Step 3: On the Apps page, tap the search icon on the screen’s upper right corner to type “Instagram” on the search bar.
But, on some devices, you need to locate the Manage apps option first before you can see all the phone’s apps.
Or, if you prefer to manually locate the Instagram app, just scroll down until you see it.
And once you find the app, press it.
Step 4: You’ll then see various settings under the Instagram app.
Choose Permissions (or App permissions in some devices) by tapping it.
Again, if you’re on iOS, skip this step and head directly to Step 5.
Step 5: On the Permissions page, press the Camera option and tap “Allow only when using the app.”
But, if you prefer not to automatically allow Instagram to access your camera, then, you can opt to tap “Ask every time.”
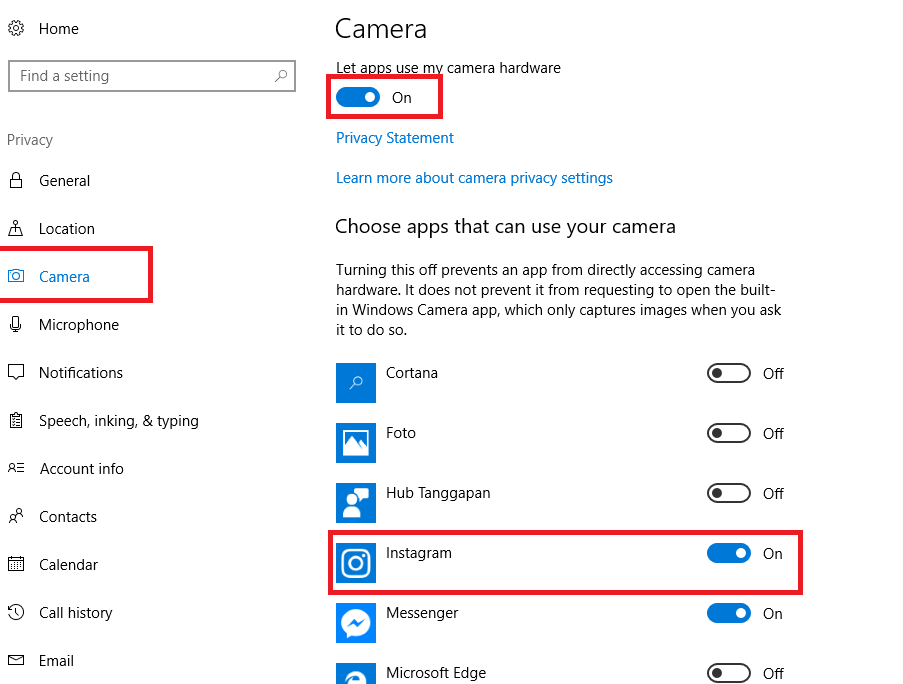
On iOS, however, you only need to switch the Camera toggle on if it’s not activated yet.
Step 6: After allowing Instagram to access your phone’s camera, head to the Microphone section and repeat the same process in Step 5.
Switch the Microphone app’s toggle on if you also find that it’s not activated as well.
And, after enabling all these permissions, head back to your Instagram app and launch it.
Creating a new story after tapping the Camera icon should proceed smoothly after enabling the camera access.
You can even upload the Instagram highlight covers you created in Canva if you have saved them on your phone’s gallery.
Or, you can feature the Instagram reels you created in Canva as well if you have one on your device.
How to Enable Camera Access on Instagram iOS
To enable camera access on Instagram on iOS, first, locate the Settings app on your home screen and tap it. Then, in the Apps section, scroll down and press the Instagram app once you find it. In the permissions list, make sure that the Camera toggle is on. Do the same for the Microphone app.
Enabling Camera Access on Instagram iOs — Step-by-step Guide
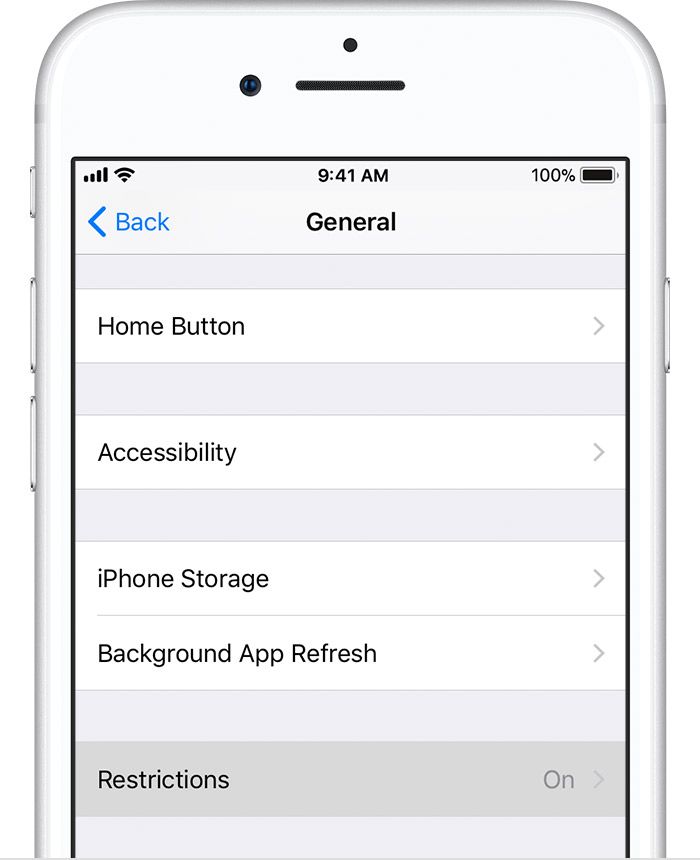
Step 1: On your iOS device’s home screen, tap the Settings app.
Step 2: Once you’re on the Settings page, you’ll see the applications list installed on your phone.
Locate the Instagram app by scrolling down the apps list. Tap on the “>” icon to proceed to the next page.
Step 3: Now, you’re inside the permissions page of the Instagram app where you’ll see the various apps that Instagram can access.
Locate the Camera app on the list, making sure that the toggle for the camera option’s on. You’ll know it’s on if you see the toggle turning green.
Then, while you’re on the permissions page, ensure the Microphone’s toggle is turned on as well.
And, just like in Android devices, exit the Settings app and launch Instagram again.
Tap the Your Story button on your Instagram feed, then the Camera icon to see if you can now create a story directly from the app itself.
So, what’re you waiting for? Enable the camera access on Instagram now!
Frequently Asked Questions about How to Enable Camera Access on Instagram
What’s the easiest way of allowing Instagram to access your device’s camera?
The easiest way of enabling Instagram to have camera access is to press the “Allow only when using app” option as soon as a prompt appears. This notification appears the first time you launch Instagram.
Where can I find the camera permissions for Instagram?
You can access the camera permissions for Instagram by tapping the Settings app first. Then, search for the Instagram app, tap it, and then locate the Camera permissions on the page. Turn the toggle on if you’re on iOS and press the “Allow only when using app” option to activate it.
Marcel
Hey guys! It’s me, Marcel, aka Maschi. On MaschiTuts, it’s all about tutorials! No matter the topic of the article, the goal always remains the same: Providing you guys with the most in-depth and helpful tutorials!
Instagram has been considered the most popular social network for several years. Its regular users are residents of the CIS countries and Europeans, but there are also Americans. Although now there are projects that in the last quarter overtook Instagram according to statistics, the latter still registers thousands of new users every day. When meeting, many have questions about its use. The most frequent ones are how to enable, disable the camera on Instagram. nine0003
In order to turn on the shooting mode on Instagram and start creating a story, you need:
Instagram allows you to take pictures with the main and front cameras. To switch between modes, you can double-click on any part of the display or on the icon with two circular arrows. The latter is located in the lower right corner of the display.
In either mode, you can take photos, selfies or short videos. In order to take a picture, you should quickly press the big button at the bottom center. For video, it should be clamped. Then a pink bar will appear along the diameter of the button, which will show how many seconds have already been taken. nine0003
You can apply various filters while shooting. In addition to the standard black and white, there are several more on the network that make the photo sharper or more blurry, distort the color.
Instagram allows you to take a photo and immediately send it as a profile post. To do this, click on the square with a plus at the bottom of the screen on a special panel. It is located just in the center. Here you can also upload an already created photo from the gallery and shoot a video by selecting the appropriate tabs. By default, the “Camera” tab opens, but this can be changed in the application settings. nine0003
In story creation mode, you can save created media files to your phone. To do this, click on the download icon in the lower left corner of the screen.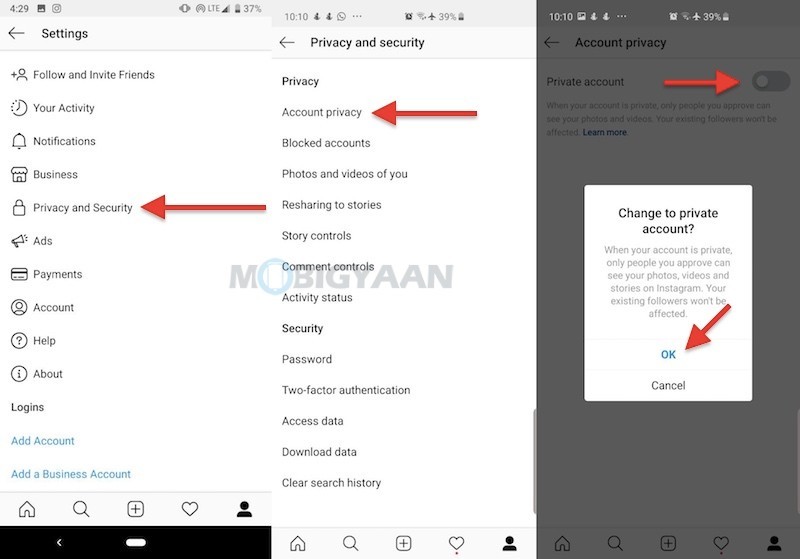 In the right corner there is a "Recipients" or "Share" button. It allows you to send media files in direct (private messages) to selected users.
To exit the mode of creating a publication or stories:
When posting, you can press "Back" all the time and the system will also return to the news feed, profile or notifications - depending on what was last opened. Before exiting any mode, Instagram will prompt you to save the created or edited post as a draft or on your phone. If you select the latter, a special folder will be created on the gadget.
The first time you open story creation or publish mode, an error may appear.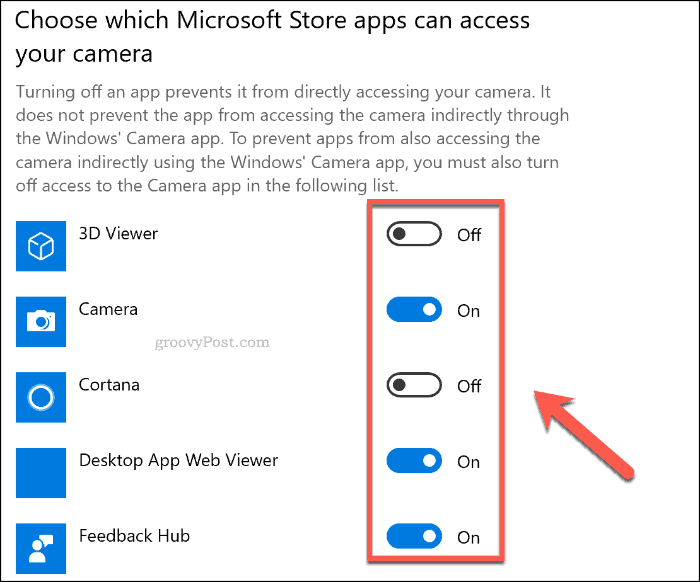 Depending on the phone model, it will be written differently, but the meaning is the same - the application was not granted access to the corresponding software. The user will be prompted to do so, to which they must agree.
In the case when the offer window to grant access does not appear, you should:
If the camera still does not turn on after the above steps, it is worth checking its operation. To do this, just turn on the standard application. If an error occurs here, you need:
 You may also have to uninstall all updates and download again;
 If the camera does not work only on Instagram, the reason for the failure of the first lies in the incompatibility of applications. In this case, you need to start uninstalling the programs you installed yourself one by one as they are unnecessary in order to understand what exactly affects the operation of the social network. It is also possible that another application is using the camera at the same time. nine0003
Using the camera on Instagram is quite simple. With just a couple of swipes or taps, you can create beautiful pictures or videos for your story.
Video on the topic of how to allow access to the camera on Instagram - instructions:
Read an article about the best camera applications on an Android smartphone here.
The Instagram social network allows you to shoot and edit your Stories through the application. Questions about how to turn on the camera on Instagram arise from many users who get acquainted with this social network. nine0003
If you need to send a picture to the feed, you can do this by clicking on the "Your story" button, which is located in the center, at the bottom of the frame. When you click the "Save" button, located at the bottom left, photos with all the changes from Instagram are downloaded to your phone. Using the "Recipients" item, you can create a list of recipients, this is convenient if you do not want to share a photo with everyone in a row, in which case it will be sent to Direct only to a select few.
There are other shooting modes in the application, they are located under the camera button. nine0003
This function creates the equivalent of Live Photos, which are short, continuously played clips consisting of a series of shots. Frames, go one after another, are played from beginning to end and back. Boomerangs are already losing their relevance, but some users still like to shoot them and come up with fresh ideas.
Once you figure out how to turn on your Instagram camera, you can shoot dramatic 3-second videos in this mode. There is a camera zoom function and music. As well as several shooting options, from the most romantic to the frighteningly tragic. nine0003
This is an option for creating movies that play backwards. Pretty good idea to diversify your posts.
In this mode, one press is enough to start a 15-second recording. At the same time, you do not need to hold the record button, it is very convenient.
Allows you to add information consisting of text in the History. You can choose the font you like, to switch between them just touch the name of the selected font at the top of the screen. And by clicking on the button that displays the background color, which is located at the bottom left, you can change it. nine0003
With this function, you can record Stories in real time, communicate with your audience, get instant feedback. But the broadcast time is limited, it lasts no more than 60 minutes. But users can see the comments and likes of the recording on the screen that come during it. Starting the broadcast is very simple, use the Instagram camera, read on how to turn it on. First of all, the desired mode is turned on, after which the inscription “On air” will appear. All subscribers who will be online will learn about the start of the broadcast from the notification received. nine0003
During the broadcast, you can write a message and attach it to the screen. In addition, you can turn off comments for all users by selecting the "Turn off comments" option. Another function of the broadcast is to conduct it together with other users.
To close the broadcast, select "End" and confirm this action. When you activate the "Save" item, a record without likes and comments will be downloaded, but the material will not be lost. You can watch it for another 24 hours. And if the broadcast is not saved, then in a day it will be deleted, without the possibility of recovery. nine0003
A brand new mode that allows you to take high quality photos and videos with your Instagram camera. It focuses the image on the face, while the background is blurred. Focus is available on the following devices: iPhone 6s, 6s+, 7, 7+, 8, 8+, and X, and select Android devices. To use it you need:
This feature creates visual filters that allow you to process faces, making Stories even more original and funnier. It is available in almost all shooting modes, to start you need to click on the smiley face on the right side of the record button, after that you will have to select the mask you like. They can independently change when the location of the camera, the surrounding space, and facial expressions of a person change.
Also read: How to make a menu on Instagram - tips
If the owners of these gadgets already know how to enable the camera on Instagram on Android, but there is no icon for adding a video, then the device's operating system needs to be updated.