Whether you want to add social proof to your content, support a blog with real examples, or extend your website's reach with a newsfeed, embedding content from other platforms can add a lot of value to your website.
But figuring out how to actually embed this content can be tricky.
In this post, you'll find a step-by-step guide to embedding social media and related content onto your website from Twitter, Facebook, Instagram, Pinterest, Google Calendar, YouTube, and SlideShare.
(Unfortunately, LinkedIn still doesn't allow embedding capabilities for specific posts -- although it does offer plugins so you can embed your LinkedIn profile or page.)
Click on a section name to scroll automatically to that section.
To embed a tweet onto your blog or website, you'll need to first find the tweet you want to display in its natural habitat -- Twitter. Locate the tweet in your Twitter newsfeed or on the Twitter user's profile. For this example, we'll embed a tweet from HubSpot's Twitter feed, as shown in the screenshots below.
Once you've found the tweet you want to embed, click the downward-facing arrow icon, located on the top-right of the tweet, as shown below.
Clicking this arrow icon will reveal a dropdown menu of options, including one called "Embed Tweet." Click this option.
Clicking "Embed Tweet" from the dropdown menu shown above will open the code box shown below. Under "Embed this Tweet," you'll see a string of text highlighted in blue. Use Command+C on your keyboard (or Control+C, if you're using a PC) to copy this code to your clipboard.
With this embed code copied to your clipboard, return to the website where you want to embed this tweet. Open the source code of this website (some content management systems have a "</>" icon where you can access this source code). Here, you'll paste the tweet's embed code into your HTML precisely where you want the tweet to appear.
Once you pasted this code into your HTML, however, you'll want to center-align this tweet so it doesn't automatically appear pushed up against the left or right side of your webpage. To correct this, add the text, 'tw-align-center' (without quotation marks) directly after "twitter-tweet" in the embed code. You can learn more about this method here.
Here's what the final code should look like:
<blockquote tw-align-center data-lang="en"><p lang="en" dir="ltr">Let us know! 👂<br>What type of content would you like to see from us this year?</p>— HubSpot (@HubSpot) <a href="https://twitter.com/HubSpot/status/1085634067679322114?ref_src=twsrc%5Etfw">January 16, 2019</a></blockquote>
<script async src="https://platform.twitter.com/widgets.js" charset="utf-8"></script>
That's it! This is what your embedded tweet will look like when you're done:
Let us know! 👂
— HubSpot (@HubSpot) January 16, 2019
What type of content would you like to see from us this year?
 Find the Facebook post you'd like to embed.
Similar to the steps to embed a tweet (listed above), embedding a Facebook post onto your blog or website starts on Facebook. Navigate to the post you want to embed from Facebook, on the Facebook user's profile page or your newsfeed. For this example, we'll embed a Facebook post from the HubSpot Academy, as shown in the screenshots below.
On the top-right of the Facebook post you want to embed, you'll see an ellipsis icon consisting of three small dots. Click this icon, as shown below.
Clicking the ellipsis icon shown below will reveal a dropdown menu of options, including one labeled "Embed." If the post you want to embed is a video, a similar option labeled "</> Embed" will appear further down on this menu. Click either option.
If you don't see an option to embed the post, then the post is not public and is not embeddable.
Clicking the "Embed" option shown above will open the box shown below. At the top of this box, just above the "Hide Preview" and "Advanced Settings" buttons, you'll see a line of coded text. Highlight and copy this code onto your computer's clipboard.
With this embed code copied to your clipboard, return to the website where you want to embed this Facebook post. Open the source code of this website (some content management systems have a "</>" icon where you can access this source code). Here, you'll paste the Facebook post's embed code into your HTML precisely where you want the post to appear.
Once you pasted this code into your HTML, however, you'll want to center-align the post so it doesn't automatically appear pushed up against the left or right side of your webpage. To correct this, wrap the code with '<center>' and '</center>' tags so the Facebook post displays in the center of your article or webpage.
Here's what the final code should look like:
<center><iframe src="https://www.facebook.com/plugins/post.php?href=https%3A%2F%2Fwww.facebook.com%2Fthehubspotacademy%2Fposts%2F741606746226328%3A0&width=500" scrolling="no" frameborder="0" allowTransparency="true" allow="encrypted-media"></iframe></center>
That's it! Here's what it'll look like when you're done:
Believe it or not, embedding a Facebook profile's entire feed onto your website is as easy as embedding a single post or video. And there's more than one way to do it.
The first way is to install a plugin or widget into your content management system (CMS). WordPress users, for example, have several Facebook feed plugins at their disposal. Here's how to use one:
Facebook has its very own Page Plugin, allowing you to produce embed code for any profile's individual Facebook feed and enter it into the HTML of your website. Here's how to use it:
To embed a Facebook feed into your blog or website, open Facebook's native Page Plugin tool here. Scroll down on this page until you see the section shown below.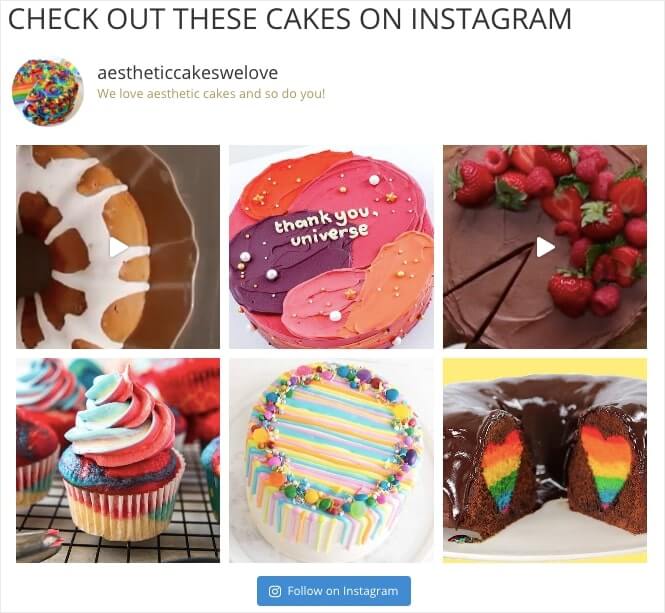
With this tool opened, create a new tab in your web browser and navigate to the Facebook profile whose feed you want to embed. Press Command+C on your keyboard (or Control+C, if you're using a PC) to copy the URL of this page to your computer's clipboard.
Return to the browser tab that has Facebook's Page Plugin open. Paste the URL from your clipboard into the top-left field, as shown in the screenshot below. For this example, we'll embed the Facebook feed of HubSpot's Facebook Business Page.
In addition to showing a profile's entire timeline, Facebook's Page Plugin also lets you display tabs to that profile's Events and/or Messenger account. By default, the Page Plugin tool will have "timeline" entered by itself.
To add either Events or Messenger tabs to your embedded Facebook feed, click over to the "Tabs" field on the top-right of the Page Plugin tool, as shown below.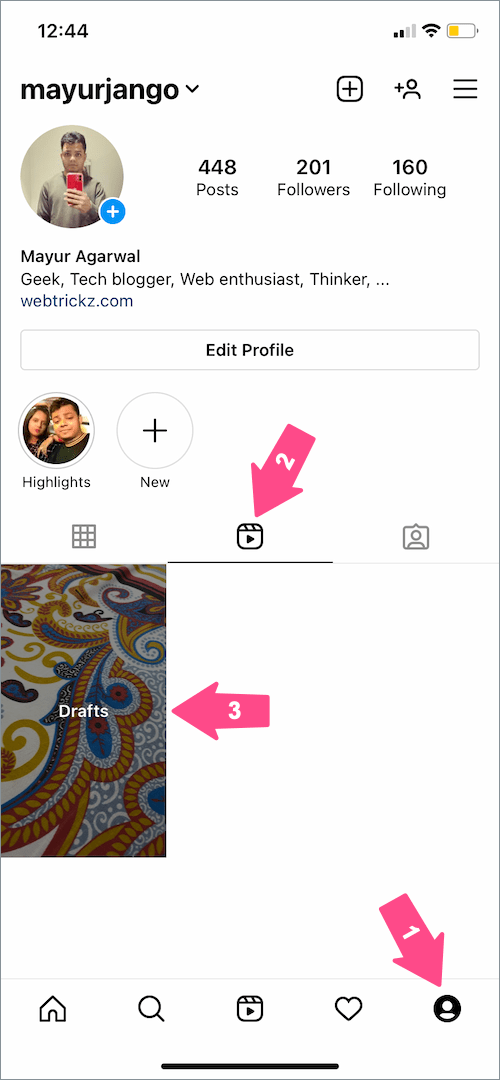 Add the words "events" and/or "messages" next to the word "timeline," all separated by commas.
If your website has specific dimensions that restrict the size of the media you embed, and you know what these dimensions are, enter them into the bottom two fields of the Facebook Page Plugin tool. You can enter a specific width in the left field and a specific height in the right.
By default, your Facebook feed will display at roughly 340x500, although you'll see recommended dimensions in the tool's preview text.
With all four of these fields filled in, simply click the blue "Get Code" button at the bottom of the tool, as shown in the screenshot above. This will open the code box shown below.
Be careful which code you select, though ... unless you're coding your website from scratch, the first tab (labeled "JavaScript SDK") does not have the code you want. Toggle over to the tab labeled "IFrame," as shown below. This text is ready-made for embedding into your blog or website's HTML editor.
Copy the code shown above to your clipboard. Then, navigate to the website where you want to embed this Facebook feed. Open the source code of your website (some content management systems have a "</>" icon where you can access this source code). Here, you'll paste the feed's embed code into your HTML precisely where you want it to appear.
Once you pasted this code into your HTML, however, you'll want to center-align the post so it doesn't automatically appear pushed up against the left or right side of your webpage. To correct this, wrap the code with '<center>' and '</center>' tags so the Facebook feed displays in the center of your article or webpage.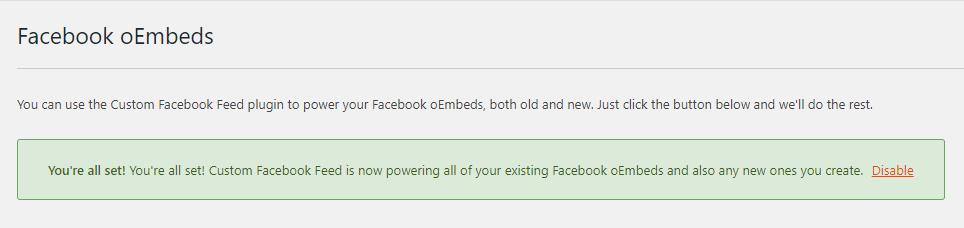
Here's what the final code should look like:
<center><iframe allow="encrypted-media" xml="lang" src="https://www.facebook.com/plugins/page.php?href=https%3A%2F%2Fwww.facebook.com%2Fhubspot&tabs=timeline%2C%20events%2C%20messages&width=340&height=500&small_header=false&adapt_container_width=true&hide_cover=false&show_facepile=true&appId" frameborder="0" scrolling="no"></iframe></center>
That's it! Here's what it'll look like when you're done:
Instagram is a favorite among marketers, but embedding an entire Instagram feed can be difficult. Here's how to embed an Instagram feed as well as individual posts to your website.
From the makers of the Custom Facebook Feed comes the Instagram Feed. Developed by Smash Balloon, this WordPress plugin makes it easy for WordPress-based websites to embed entire Instagram feeds from specific Instagram accounts.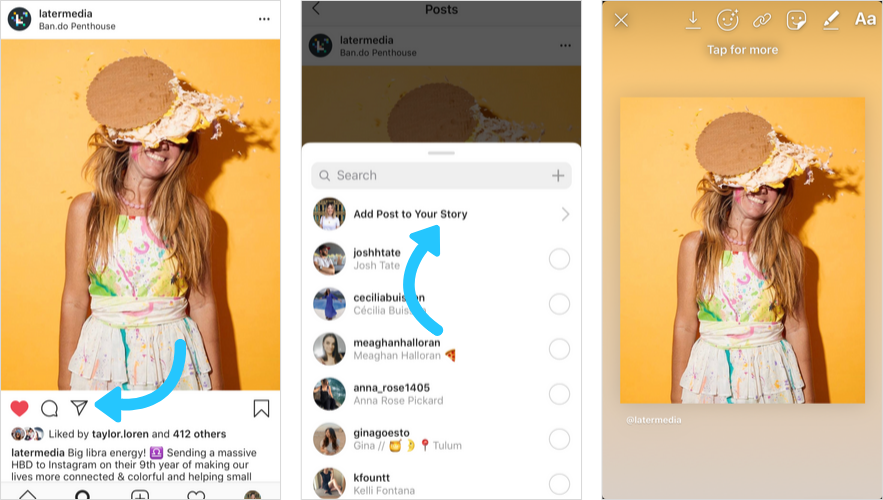 Here's how to use it:
According to this plugin's instructions on WordPress, you can display multiple Instagram feeds at the same time by entering text in the format of: '[instagram-feed num=6 cols=3]'. In that example, you would effectively embed six images each for three separate Instagram feeds.
To embed individual Instagram pictures, you need not look further than the native features of Instagram. Here's how to do it:
Important: In order to embed specific Instagram posts onto a blog or website, the Instagram account it belongs to cannot be set to private. To set an account to public, navigate to this profile and click "Edit Profile" > Privacy and Security. From this page, uncheck the "Private Account" option and you should be all set.
Navigate to the Instagram post you want to embed onto your website and click on it to enlarge the image. For this example, we'll embed an image from HubSpot's culture account, hubspotlife, as shown in the screenshots below.
With the post in its full view, look to the bottom-right of the comments section. Click the ellipsis icon, consisting of three small dots, as shown below.
Clicking the ellipsis icon shown above will open the box of options shown below. In this menu, select "Embed," the third button from the top.
Much like the instructions for Twitter and Facebook (listed above), this "Embed" button will produce another box carrying a sting of coded text. Once this box opens on your screen, highlight the code at the top, as shown below. Then, click the blue "Copy Embed Code" button at the bottom to copy this text to your computer's clipboard.
Once you pasted this code into your HTML, however, you'll want to center-align the Instagram post so it doesn't automatically appear pushed up against the left or right side of your webpage. To correct this, wrap the code with '<center>' and '</center>' tags so the image displays in the center of your article or webpage.
That's it! Here's what your embedded Instagram post will look like:
View this post on Instagram
We're excited to be named a Best Workplace in Technology by Great Place to Work thanks to employee feedback! We're proud of the company culture we've built as we've grown to over 2,500 employees globally to make HubSpot a place that people love to come to work every day.
Interested in learning more about our company culture? Check out the announcement here: https://www.greatplacetowork.com/best-workplaces/technology/2019 🧡 . Interested in adding to our culture? We're hiring! Check out our open jobs at https://www.hubspot.com/jobs 🙌
A post shared by HubSpot Life (@hubspotlife) on
To embed pinned content from Pinterest onto your blog or website, open Pinterest's widget builder, available here.
Scroll down until you see the Pin Widget option, as shown in the screenshot below.
Start by filling in the "Pin URL" field at the top of the tool with the URL of the pin you want to embed onto your website, as shown below.

While in Pinterest's Pin Widget, scroll down to the section just beneath the preview image of your pin, where you'll find two lines of coded text -- as shown below.
Open your website's HTML editor, and copy and paste the first line exactly where you'd like your Pinterest pin to appear on the page. Then, copy the second line of text and paste it into your website's HTML editor at the very bottom of the page.
Be careful not to paste this entire snippet more than once on a single webpage. If you want the pin to appear multiple times, you just need to copy the first line of code and paste it wherever you'd like it to appear on the page. And don't forget to repeat the following steps in each instance of the pin you decide to embed.
<!--pinterest-->
The code should look like this:
<a data-pin-do="embedPin" href="http://www. pinterest.com/pin/99360735500167749/"><!--pinterest--></a>
...
At bottom of page:
<script type="text/javascript" async src="//assets.pinterest.com/js/pinit.js"></script>
Here's what the final code should look like:
<center><a data-pin-do="embedPin" href="http://www.pinterest.com/pin/99360735500167749/"><!--pinterest--></a>
<!-- Please call pinit.js only once per page -->
<script type="text/javascript" async src="//assets.pinterest.com/js/pinit.js"></script></center>
That's it! Here's what it'll look like when you're done:
To add Pinterest Boards, the steps are generally the same as they are to embed individual pins -- explained above. Here's how it's done:
Copy and paste the bottom two lines of code into your website's HTML editor, and that's it! Here's what an embedded board looks like:
4. Center the embedded post by adding <center> and </center> around the whole HTML snippet.
Here's what the final code should look like:
<center><!-- Place this tag in your head or just before your close body tag. -->
-->
<script type="text/javascript" src="https://apis.google.com/js/plusone.js"></script>
<!-- Place this tag where you want the widget to render. -->
<div data-href="https://plus.google.com/110490539670062886957/posts/be2TCKDBMsG"></div></center>
That's it! Here's what it'll look like when you're done:
To embed a particular Google Calendar onto your blog or website, you'll need to use the web version of Google Calendar, rather than the mobile app.
Got it open? Let's embed it.
At the top of your Google Calendar, click the gear icon and select "Settings," as shown below.
Once you're in your calendar settings, look to the lefthand sidebar for the specific calendar you want to embed onto your website.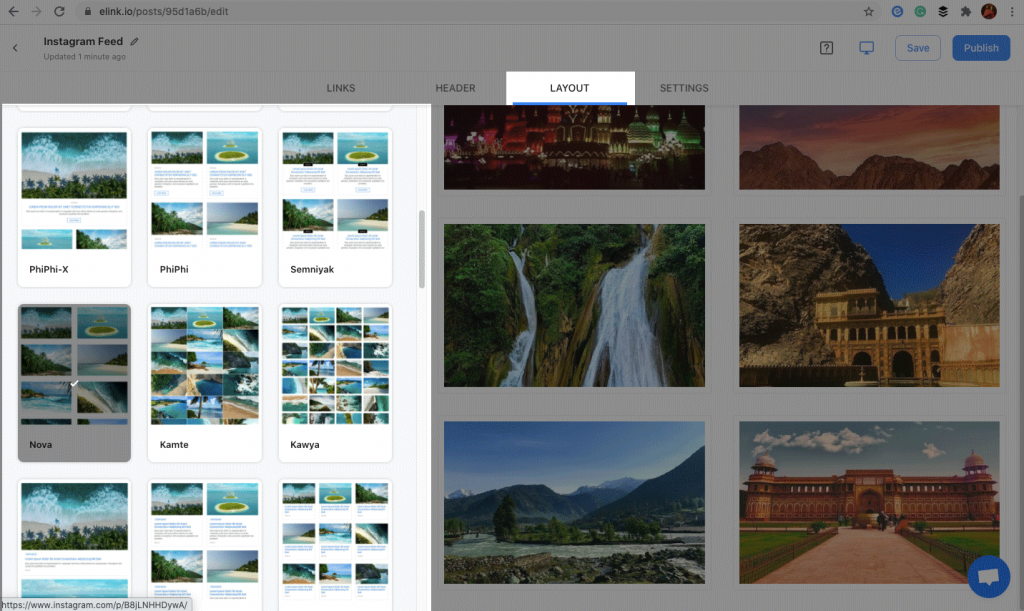 For this example, we'll embed HubSpot's National Holidays calendar.
Once you have your calendar selected, look to the right side of your settings and scroll down until you see the "Integrate calendar" section. (You can also simply click the option of the same name on the lefthand side under your chosen calendar.)
In the "Integrate calendar" section of your settings, find and click the "Customize" button, just above the "Embed code" line of text. This will open a larger window of options where you can change the size and color scheme of your calendar before embedding it.
If you're happy with how the calendar currently looks and don't need to make any aesthetic changes, you can simply copy this embed code to your clipboard.
Copy your embed code, from either inside the Customize window or from the Settings page, and paste it into your website's HTML editor. If you'd like, you can wrap this embed code in <center> and </center> tags to center-align your calendar within the margins of your website.
Embedding a YouTube video onto your blog or website is incredibly easy. To start, open YouTube and navigate to the video you want to embed. For this example, we'll embed a video about inbound marketing from HubSpot's INBOUND YouTube channel -- as shown in the screenshots below.
Beneath the video itself, look for the "Share" button, as shown below.
Clicking the "Share" button below your chosen YouTube video will open a small menu of options where you can share the video to various social networks. To the far left of these options, however, you'll also see a circular "Embed" button. Click this button.
The next window to appear will produce a large of box of coded text, as well as a few options to customize your video before you embed it. Under the embed code, for instance, you can set whether you want your video to start at a particular timestamp.
Once you have your settings exactly the way you want them, highlight the coded text at the top of the window. Then, click "Copy" on the bottom-right.
Here's what the final code should look like:
<center><iframe src="https://www.youtube.com/embed/mZxa3lrLhXM" frameborder="0" allow="accelerometer; autoplay; encrypted-media; gyroscope; picture-in-picture" allowfullscreen></iframe></center>
That's it! Here's what it'll look like when you're done:
If you want to customize your embedded SlideShare presentation or infographic, click "Customize" and the following options will appear, shown below. Choose the options you'd like, then copy the code in the "Embed" section and paste it in the HTML view of your website.
Here's what the final code should look like:
<center><iframe src="//www.slideshare.net/slideshow/embed_code/31128788" frameborder="0" marginwidth="0" marginheight="0" scrolling="no" allowfullscreen> </iframe> <div> <strong> <a href="https://www.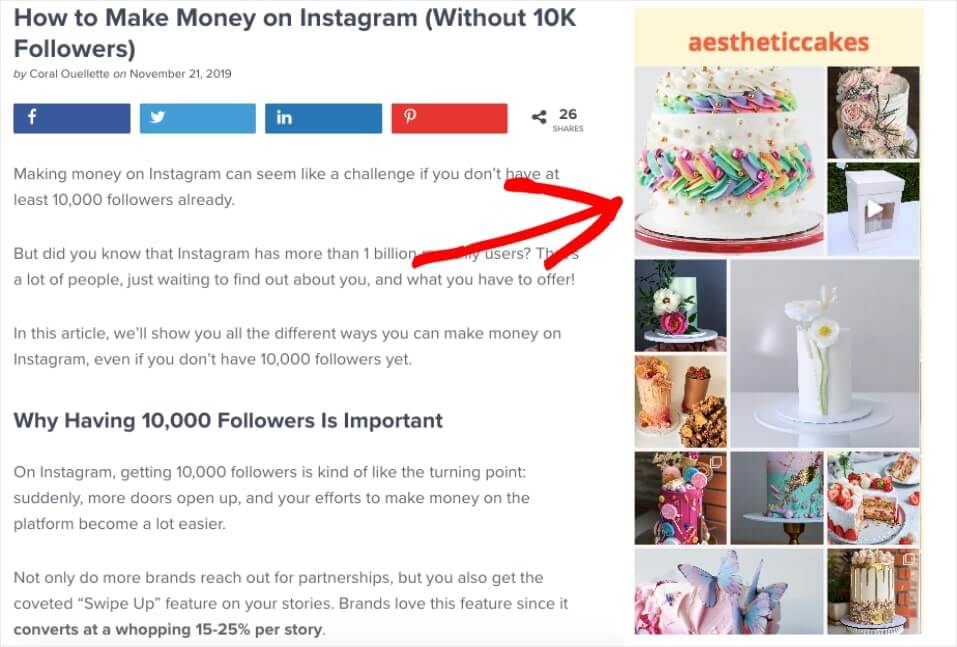 slideshare.net/HubSpot/a-sales-and-marketing-love-story" title="A Sales and Marketing Love Story" target="_blank">A Sales and Marketing Love Story</a> </strong> from <strong><a href="http://www.slideshare.net/HubSpot" target="_blank">HubSpot</a></strong></div></center>
That's it! Here's what it'll look like when you're done:
A Sales and Marketing Love Story from HubSpot
Some of these embed codes may need a little tweaking to look perfect on your blog or website, but using these steps, you should be off to great start. Happy embedding!
Topics: Social Media Marketing
Instagram posts need not remain on Instagram. After all, the point of an Instagram story, or photo, or video is to have it shared with as many people as possible, especially if you’re running a business.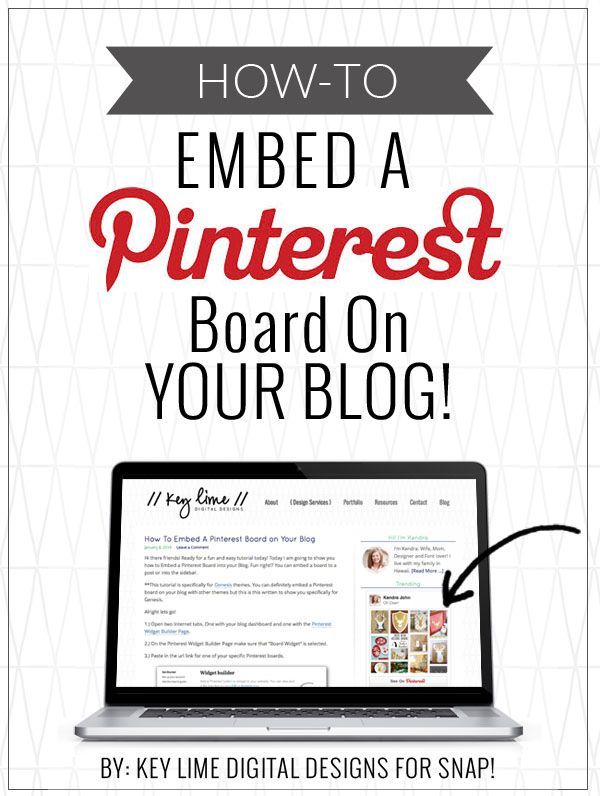 That’s why it’s important to learn how to embed Instagram posts on WordPress, or whatever website platform you use.
The opportunities are seemingly endless when it comes to republishing an Instagram feed, or just a few posts, to your blog or business website. Photographers can turn their feed into a beautiful portfolio. Online stores are able to feature and even sell products directly through an Instagram photo or feed. It’s also an option to embed individual Instagram posts on your blog, which is done on a regular basis for listicles and newspaper articles online.
So, what are you waiting for? Keep reading to learn more about the reasons to embed Instagram posts on your website, or skip ahead to your preferred method.
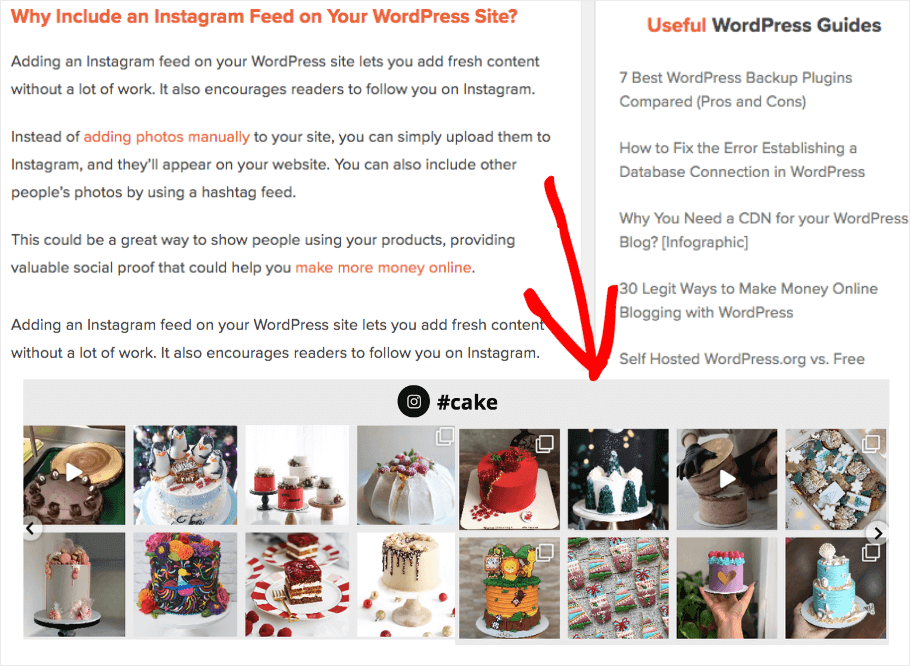
Here are just two examples of what Instagram embeds can look like:
Instagram posts embedded on a website, example 1:
Instagram posts embedded on a website, example 2:
Besides the fact that Instagram embedding is rather simple, it also has a myriad of other benefits:

Now that you know why it’s a great idea to embed Instagram posts, keep reading to learn how.
There are many reasons for embedding an individual Instagram post on your website. Online publications do it all the time when making listicles and roundups; think “The Best Christmas Presents for X” articles that pull suggestions from other company’s Instagram pages. (It’s also common to do this with Twitter and Facebook posts).
You also might want to share some news about your brand or a recent post from your own page to your blog or on a webpage.
If that’s the case, the process only takes a few steps.
To begin, locate an Instagram post you’d like to embed on your website. This could be one of your own posts or from another brand or person’s account; Instagram has no restrictions in this regard.
👉 Note: We highly recommend following copyright rules and only sharing images the legal and moral way.
Once you find the perfect Instagram post, click on the “…” settings icon for that particular post. Keep in mind that although this process is possible on a mobile device, it’s much easier to manage the links and embed codes on a computer.
This reveals a new popup area with several options.
Select the Embed button.
This module shows the embed code you’ll need to place the Instagram post on your website. You have the option to either include or remove the Instagram post’s caption.
Click on the Copy Embed Code button.
The button should change its text to read “Embed Code Copied!”
Now you have the embed code saved to your computer’s clipboard.
Go to the backend of your website. In this case, we’re using WordPress.
Open the post or page you’d like to edit.
Every website builder has its own way to embed HTML code; essentially you’re looking for an HTML editor or a drag-and-drop block to insert into your post or page.
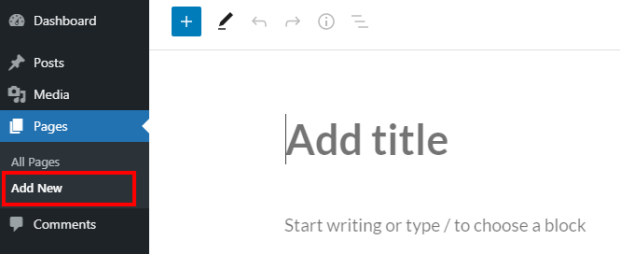
In the WordPress Gutenberg editor, there’s a “+” button to add a new block to your content area. Click that.
There are a few options here: The Custom HTML block or the Instagram block. We’ll show you both methods.
To paste the entirety of your embed code into WordPress, select the Custom HTML block.
You’ll see a field asking you to “Write HTML…” This is where you’ll paste the code you copied from Instagram before.
Instagram embed codes are rather long. You don’t need to know what the coding means, but the following screenshot gives you an idea of what the editor looks like after you’ve pasted embed coding from Instagram into the WordPress Custom HTML block.
To proceed, either click on the Update or Publish button for that page or post.
To check if the embed code worked, go to the frontend of that page or post to see how it looks.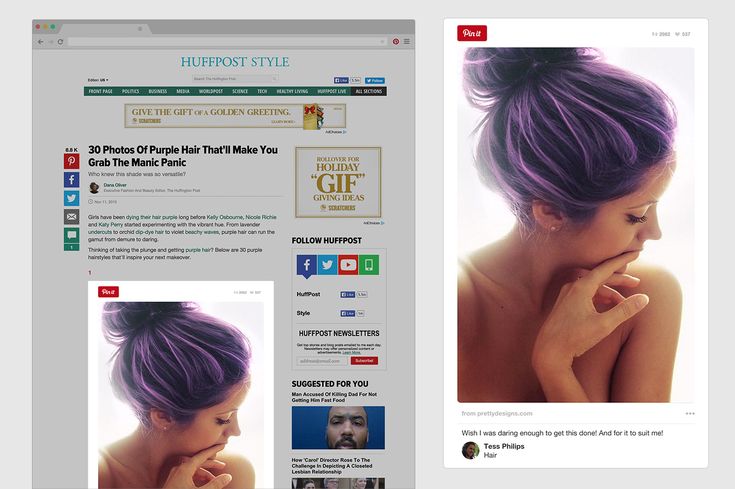
As you can see, our test site includes the original Instagram post from the business we wanted to highlight!
WordPress, and many other website builders, offer drag-and-drop blocks for social media sites like Instagram.
Therefore, you don’t always have to copy and paste the more complicated HTML code to make this process work well.
For this method, all you need is the Instagram post’s direct URL/link.
Go to the Instagram post of your choice and click that “…” settings button.
This time, choose the Copy Link button (instead of the Embed button from the previous method).
Back in WordPress, navigate to a page or post.
Opt to insert a drag-and-drop design block. Search for the Instagram block.
Choose the one called “Instagram.”
This block is a bit simpler than the Custom Embed code option.
All you have to do is paste in the link you previously copied.
It looks something like the next screenshot, just like a standard webpage URL – nice and short.
To activate the embedded Instagram post, click on the Embed button.
What’s great about the Instagram block from WordPress is that it provides a preview of your embedded content in the backend editor.
You can also preview the page or post or click the Publish button and look for the results on the frontend.
Another way to link Instagram to a website is by pulling your entire Instagram feed, essentially creating a dynamic content distribution area where everything that’s new from Instagram gets published to your site.
The Gutenberg editor from WordPress provides a simple block for showing your latest Instagram posts. There are also many other plugins to choose from if you’re looking for unique functionality or a different design.
In this method, you’ll learn how to insert your latest post using the WordPress Gutenberg editor. After that, we’ll cover plugin alternatives.
The idea is to pull all, or at least the recent, posts from the Instagram account you own, replicating the gallery layout you see on your Instagram page. This can be done for personal and business pages.
To start, go to the WordPress dashboard and create a page or post. It’s more common to include an Instagram feed on a page – especially a homepage – seeing as how that would keep the feed up there for as long as the page is published.
On the page or post, select the Add Block “+” button.
Search for the Latest Instagram Posts block. You can also scroll through the list of blocks to locate the right one.
Select the Latest Instagram Posts option.
The block gets dropped into the WordPress editor for you to modify.
The only option for this block is to click on the Connect to Instagram button.
Note: You must have full ownership of an Instagram account in order for this to work. You’re not allowed to share an entire Instagram feed if you’re not logged into that account, whether it’s for a personal or business account.
WordPress then tries to connect to your Instagram account in a new popup window.
Click on the Authorize button to indicate that you’d like to give WordPress access to your account. You may have to log into your separate business account if you only see the option to access your personal Instagram.
To finish the process, publish or preview the page.
Go to the frontend of that page to see the results.
There aren’t many settings to configure with the default Instagram Feed block from WordPress, but it provides a sleek gallery with your most recent posts.
If all you need is to embed an individual Instagram post, there’s really no need to use a plugin; simply copy the embed code into a page or use the WordPress blocks included with the Gutenberg editor.
However, there are several plugins that improve upon the design and functionality of the Instagram Recent Posts block from WordPress.
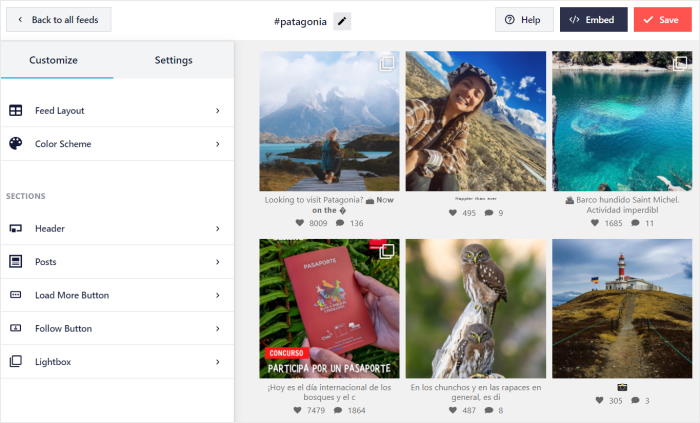
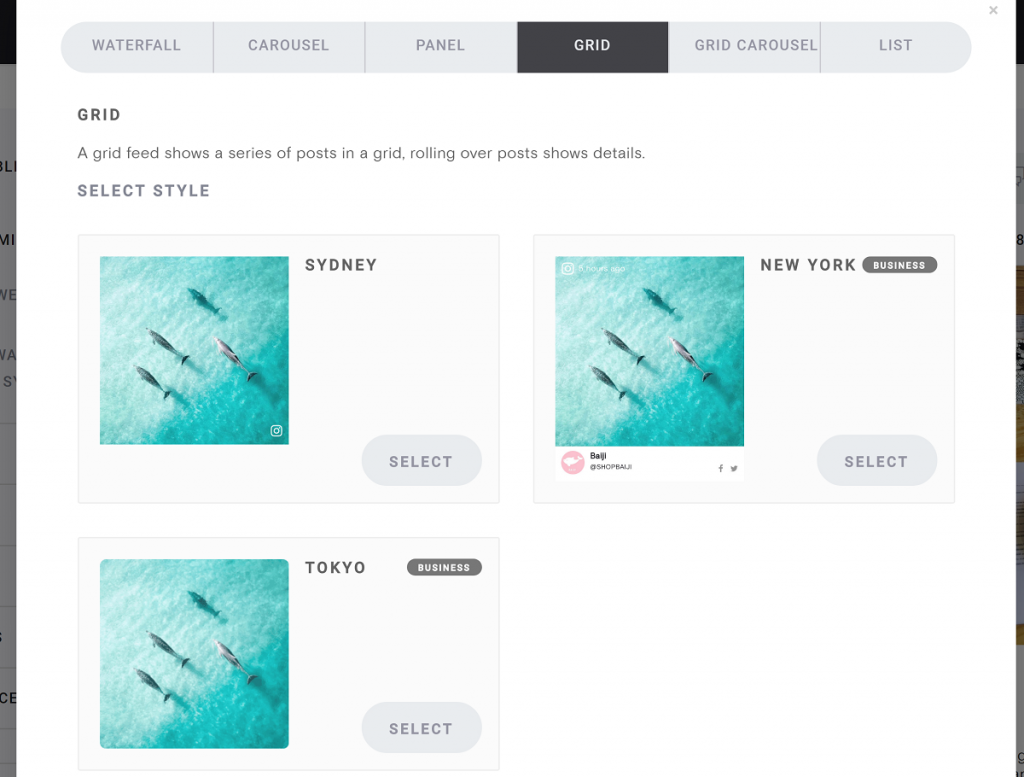
We encourage you to explore the many plugins available, but for this tutorial, we’ll use the Smash Balloon Social Photo Feed plugin, a reputable solution with support for more than just Instagram feeds.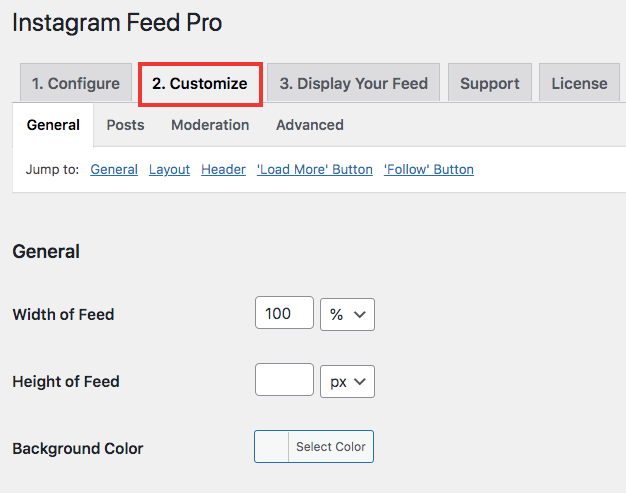
Install and activate the plugin on your WordPress site. If you have questions, read this guide on how to install a WordPress plugin.
Once Smash Balloon is activated in WordPress, go to Instagram Feed > Settings.
This walks you through the steps to configure your Instagram feed, customize it, and display it on your website.
👉 Note: You’ll notice some features are blurred out. You can unlock those features by upgrading to the premium Smash Balloon plugin.
Click the Connect an Instagram Account button.
Specify that you’re linking a Business account.
After that, push the Connect button.
This reroutes you to Facebook. Since Facebook owns Instagram many of the integrations go through Facebook first.
Select that you’d like to continue with your personal Facebook account.
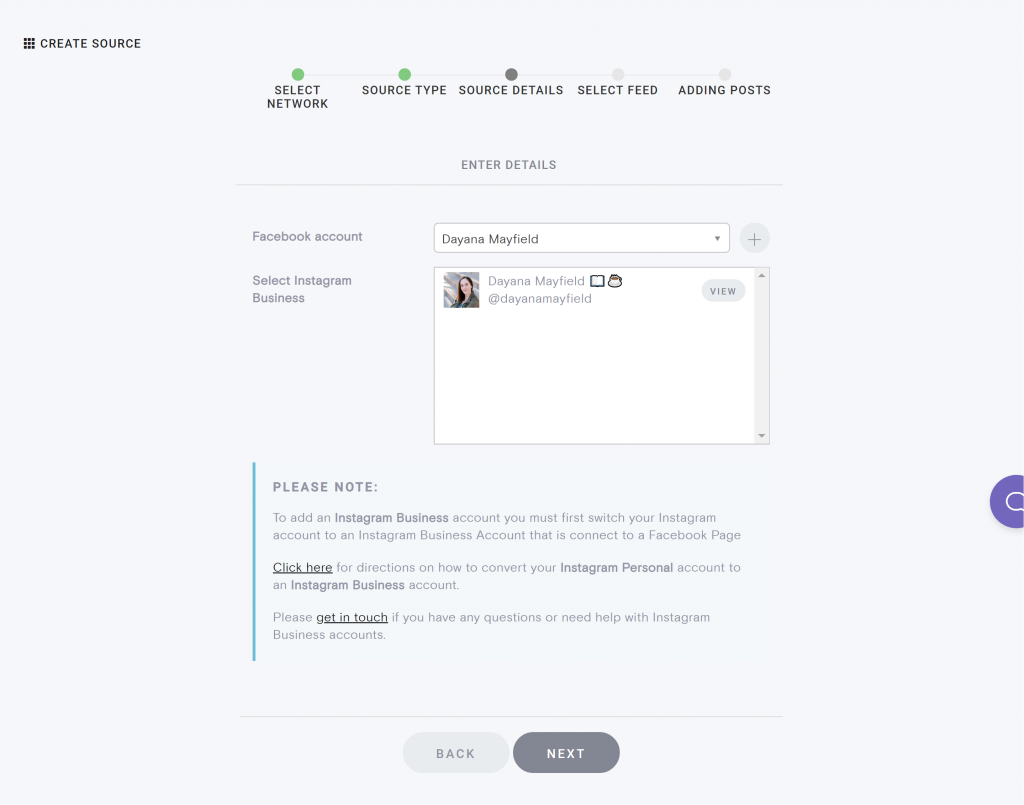
Choose an Instagram Business account that’s linked to your Facebook profile.
Read our guide on Instagram Business accounts if you have any questions.
Next up, decide which Facebook Business page is linked to that Instagram Business account.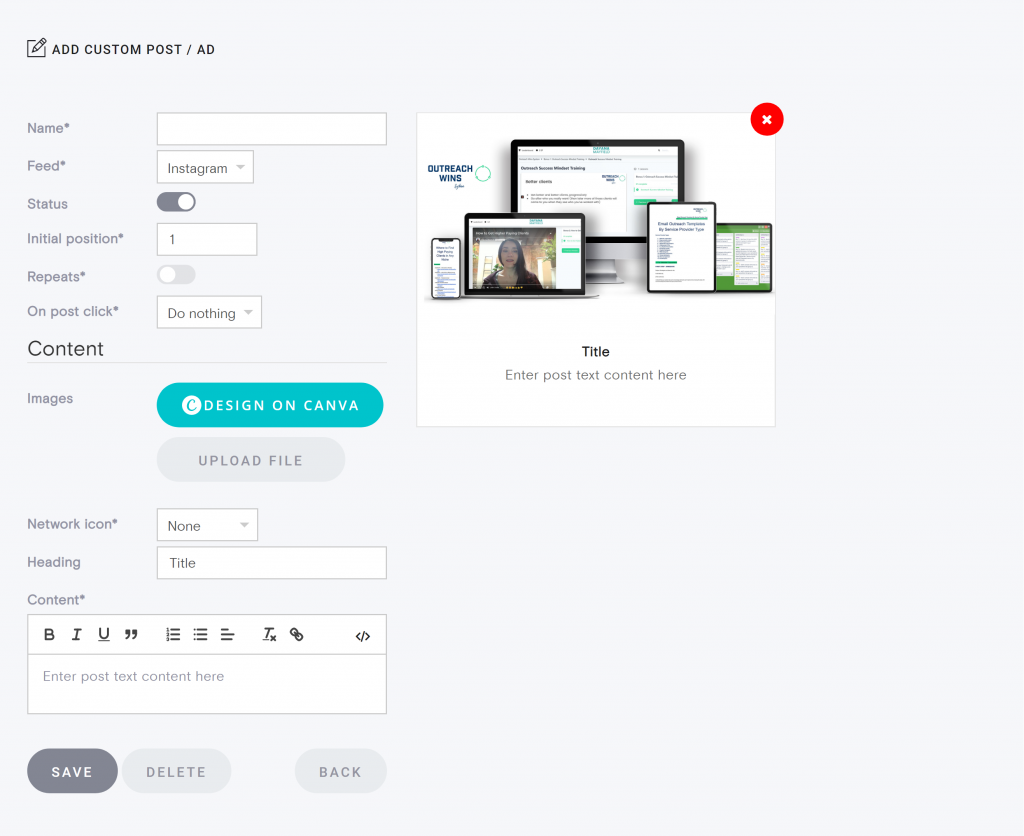 Again, these connections must be set up prior to completing this process.
Moving forward, tell Facebook that Smash Social is allowed to access profile information like the insights and photos on your Instagram page.
The next module should explain that the Smash Balloon plugin is now linked to Facebook and Instagram.
Click the OK button to go back to WordPress.
Back in WordPress, check the Instagram Business account your decided on before.
Click on the Connect Accounts button.
Now your Instagram account is saved into the plugin.
Make sure to click on the Add To Primary Feed button. This tells the plugin that the account specified will be shown.
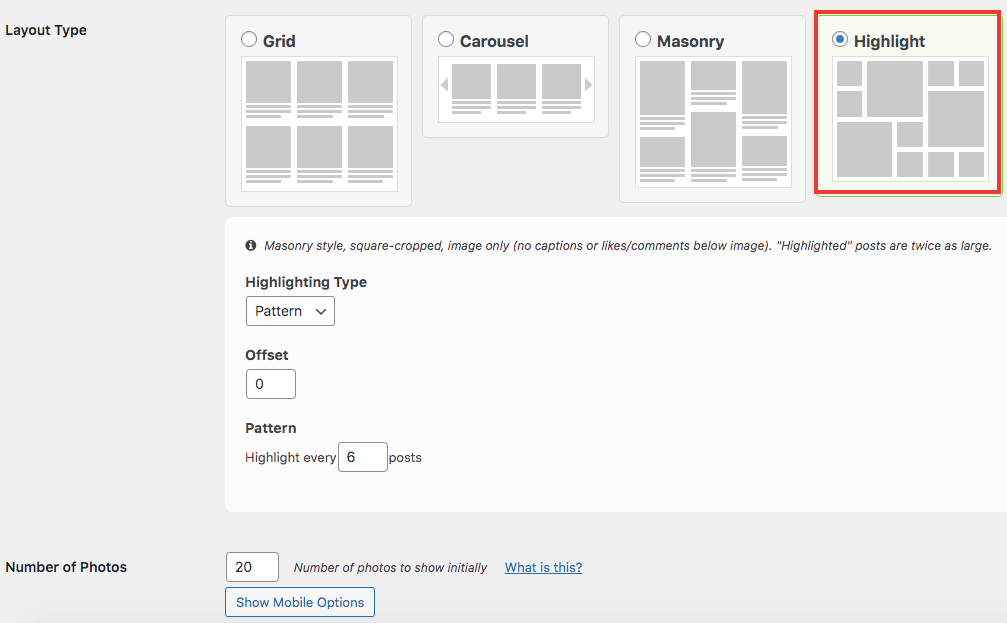
Select the Customize tab to change and activate settings.
We won’t go through all of these, but you have options to change things like the width of the feed, the background color, and more.
You can also modify the number of photos, columns, and how much padding shows between images.
As mentioned before, some features, like the unique layouts, require a premium subscription.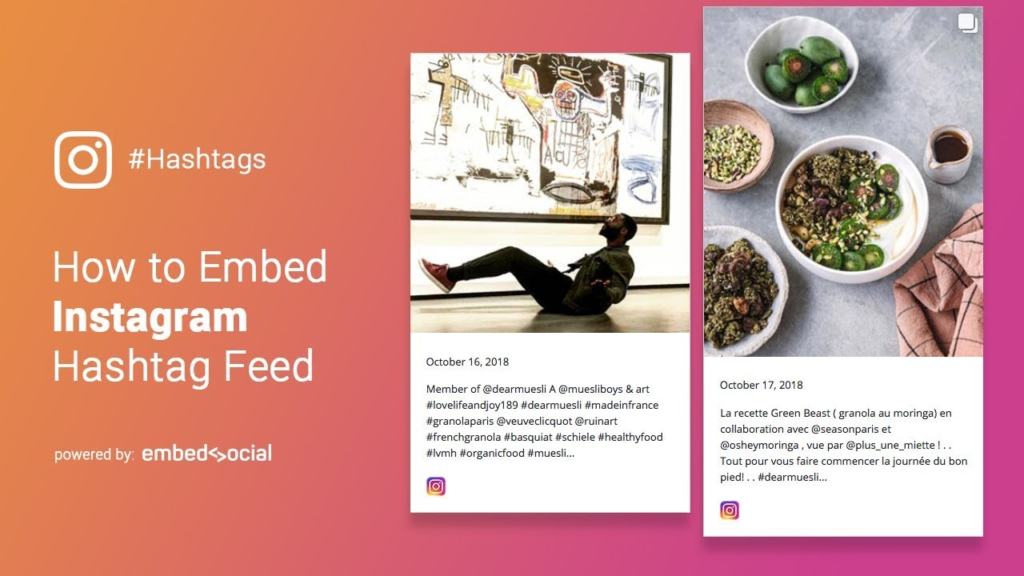
Click the Save Changes button whenever you adjust the settings.
Finally, click on the Display Feed tab to reveal the right shortcode.
Copy (Ctrl + C) that code to your computer’s clipboard.
Open a page or post in WordPress.
Click on the Add Block “+” button.
Locate the Shortcode block; select the block to insert it into your page.
Now, paste the shortcode from before into the Shortcode field provided.
Be sure to save the page.
You can then preview the page or click on the Publish button to see the results.
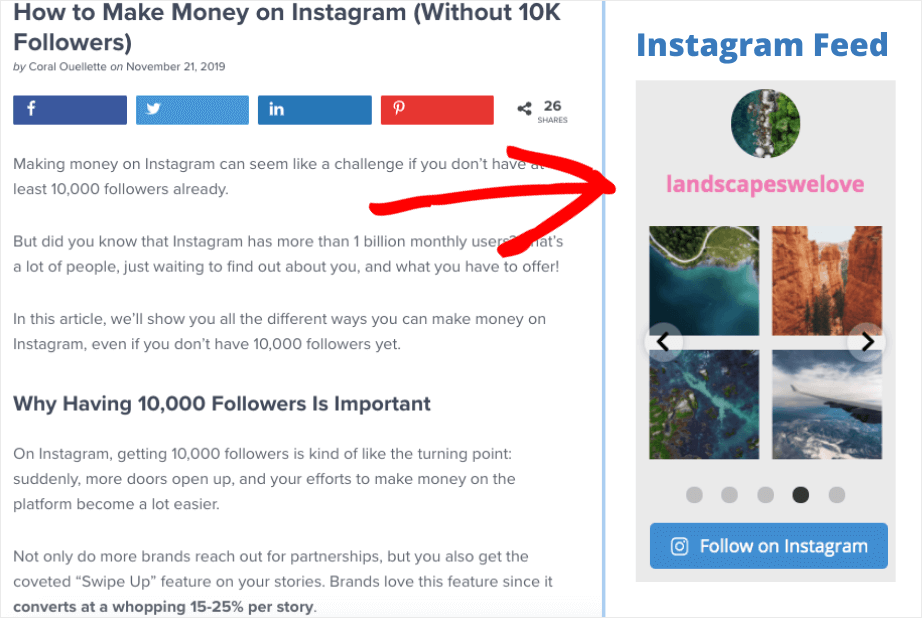
I only added three photos to this account, but as you can see the gallery shows up as planned!
What’s more, is that the design is a little more involved than the standard Instagram Recent Posts block from the WordPress Gutenberg editor.
In this one, you get a view of your profile photo, the name of the account, and a button for customers to visit your Instagram page.
Remember, Smash Balloon isn’t the only plugin that does a good job of embedding Instagram posts and feeds.
Here are some other great plugins to think about:
Also, feel free to peruse our list of the best Instagram WordPress plugins.
Go to top
Learning how to embed Instagram posts only takes the use of a simple embed code, a plugin, or a drag-and-drop website builder.
After that, you’ve successfully activated an Instagram feed or post on your website that’s interactive and useful for generating content well into the future.
Have any questions about Instagram embeds? Ask away in the comments section!
Do you want to make a post with photos on Instagram, but you have never done it before? Our small but useful guide on this topic may be useful to you.
Posting a new post on Instagram* takes a little time and is not difficult. How to add a post to Instagram* from your phone: first you need to go to your profile through the official application, then follow the steps. nine0003
 Up to 10 photos and videos can be uploaded. nine0010
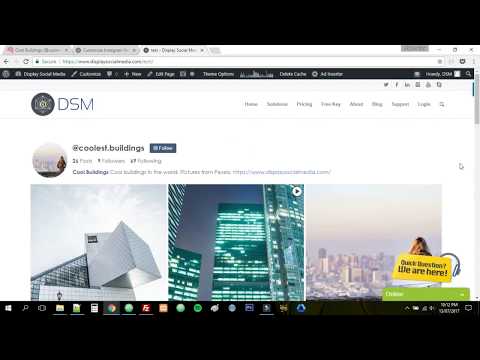
 " You can peep popular and not only hashtags there. nine0010
  Picture 13 shows a finished Instagram post*
 We looked at how to post on Instagram* from Android. If you have iOS, the intuitive process will be the same, just some functions will be called differently.
There is another way to post from your phone. This is very convenient, for example, when you scroll through your gallery and find a photo that you urgently need to share with other users.
Step by step how to add a post to Instagram* from your phone through the gallery:
You can also crop unwanted parts of the frame to make it more accentuated in the right place in the photo. Or do nothing, don't edit, just click on the blue arrow to go to the next block. nine0003 You can use any suitable hashtags and geotags of your choice
Our blog has a lot of articles about the benefits of hashtags and how to use them correctly in publications. For example:
And if you just need to quickly find hashtags for publication, you can use our bot "Gennady".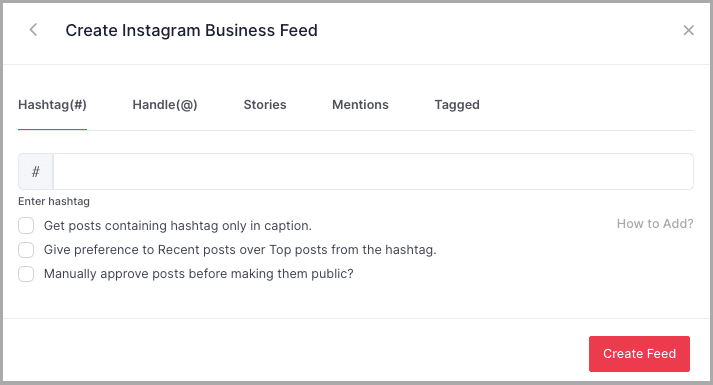 You give him a photo or a word for which you need to pick up hashtags, and he gives you a whole cloud of hashtags that can be attached to a post. But we digress. While we were thinking about hashtags, our post has already been published.
Let's say you tried both options, but the photo still doesn't want to be added. What to do in this case? Determine the cause and try to fix it:
 To fix this error, download the new version of the application from the Play Market or AppStore.
  nine0010
 We have figured out how to post to Instagram* from your phone using the Instagram* app or photo gallery. We talked about how to change settings, edit images and their number, add geotags and tag people. We studied why the photo might not be added to the post, and what to do in each of the cases. You can find more information about Instagram*, posts and promotion in our blog.
Instagram is a mobile social network. Therefore, all posts are made only from a mobile device. There are services for downloading records from a computer, including for delayed posting. But they don't always work well. You will have to constantly check whether the post is out or not. Plus, many of them do not have access to filters. And these services are often paid.
The main types of posts are:
To upload a photo to Instagram on your home page, click the plus icon on the bottom taskbar.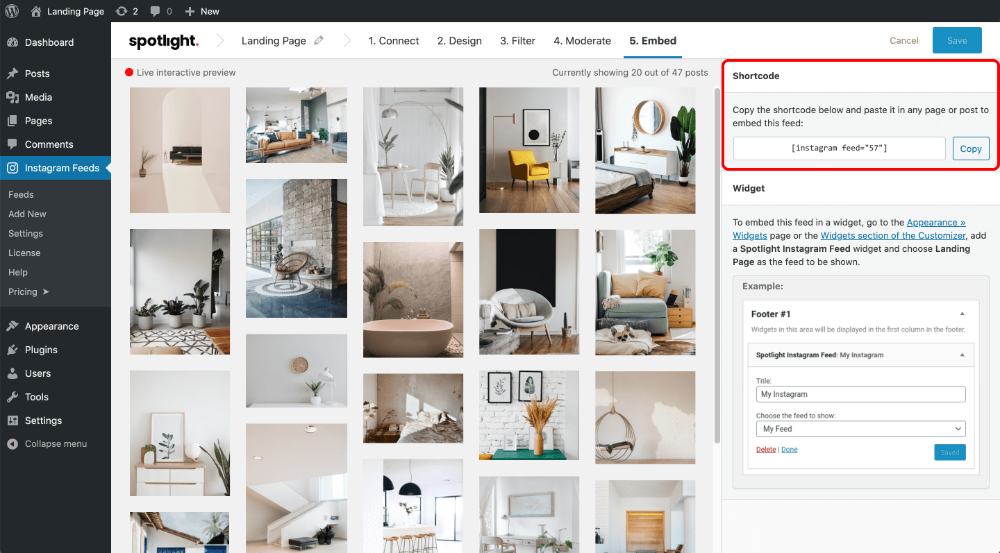
Next, you will be prompted to select a photo from the gallery.
You can also immediately take the desired photo or video with the camera.
After selecting the desired photo or picture, click next. Here you can select a ready-made filter. If you double-click on it, you can increase or decrease the filter settings by a percentage. We do not recommend you to use filters from Instagram, as they are not of very high quality. If you really want to take cool pictures, read our article on photo editing apps and give them a try. See, the difference is huge! nine0003
You can also change the basic characteristics of a photo in the Edit tab. These include the following functions:
 nine0010
After editing the images, click "Next" In the next window, add a description to the image and hashtags (you can put no more than 30), but we do not recommend getting carried away with high-frequency hashtags and using only branded or navigational ones. You can also add locations and label people or products in the photo. The same post can be shared on the social network to which your account is linked. In advanced settings, you can turn comments on or off. Next, click the "Share" button and that's it. The post is ready. nine0003
Target video course
Uploading a video is not much different from uploading images.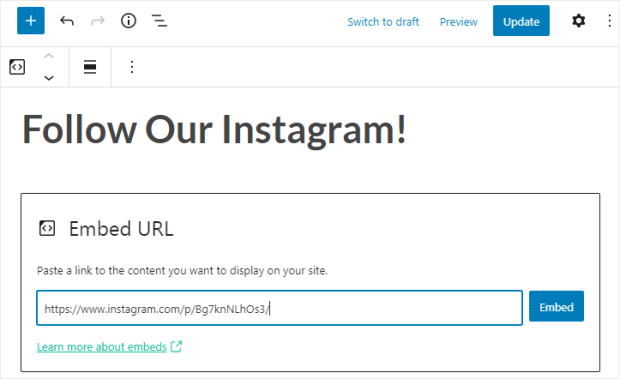 Choose from the gallery or shoot here and now. The main thing is that the video should be no longer than 1 minute.
Click Next. We trim the video, if necessary, using a kind of track in the "Trim" tab. nine0003
We apply filters, as in the photo. We select the cover - the one that will be shown at the start of the video - by video frames. Click "Next". We write a description, put down hashtags. You can’t designate people, but adding geolocation is quite possible. As with the photo, you can share it on other social networks and disable / enable comments.
To make a Carousel (several photos and/or videos in one post), you need to click on the corresponding icon. Select images or videos in the order you want them to be viewed. Further, everything is the same, except that a different filter can be applied to the elements of the carousel. nine0003
Collages are made using a special program from Instagram Layout.