In this tutorial, we’re going to learn how to draw the 2016 Instagram logo in Adobe Illustrator.
1. Create a new document.
2. Select the Rectangle Tool and hold Shift to draw a square. Give this shape a black fill and remove any strokes.
3. Using the handles inside the shapes’ corners, drag these towards the centre of the shape to round of the corners.
4. Next, source an image of the 2016 Instagram logo online (eg. Google), Copy and Paste this into Illustrator, and using the Eyedropper Tool, sample the 5 different colours used in the logo, and create swatches of these colours – blue, purple, red, orange, yellow.
5. With the square selected, go to Edit > Copy, and then go to Edit > Paste in Place.
6. Left-click holding Alt and Shift to scale this new square down in size towards the centre, and give the shape a thick stroke and remove the fill.
7. Select the Ellipse Tool, Left-click and hold Shift to create a circle.
8. Drag over all of the shapes created so far to select, and in the Align Palette, align all shapes horizontally and vertically. Give this circle the same stroke width as we did for the square in Step 6.
9. Create a new circle using the Ellipse Tool. Make this circle smaller, give this fill a white fill, and remove the stroke.
10. Select all shapes created so far, and go to Object > Expand, select Fill and Stroke, and click OK.
11. Select the black shape created in Step 2, and click on the Gradient Slider in the Gradient Palette.
12. Drag the blue swatch on to left side of the Gradient Slider. Drag the pink swatch on to the right side Gradient Slider, and drag the red swatch into the centre.
13. Select the Ellipse Tool and hold Shift to create a circle. Give this circle a fill colour using the orange swatch.
14. With the orange circle selected, go to Effect > Blur > Gaussian Blur, and blur the shape as far as you can, up until you see any hard edges appear. The goal is to softly blend this circle into the existing gradient.
15. Select the orange circle, and go to Edit > Copy, and then Edit > Paste in Place. Hold Alt and Shift to scale this new circle down in size towards the centre. Give this shape a fill colour using the yellow swatch, and apply to same Gaussian Blur effect as in Step 14. Select both circles and go to Object > Group, to group these two shapes together.
16. Select the gradient shape and go to Edit > Copy, and then Edit > Paste in Place, and position the orange and yellow circles in the bottom left corner of the gradient shape.
17. With the copy of the gradient shape selected, go to Object > Arrange > Bring to Front. Next, hold Shift to also select the orange and yellow circle group, and go to Object > Clipping Mask > Make. This will mask the circles inside the gradient shape/rounded rectangle.
18. Move the masked orange and yellow circle up so the edges line up with the gradient shape in the bottom-left corner.
19. Lastly, group all shapes with colour together by holding Shift to select, and then going to Object > Group, and then go to Object > Arrange > Send to Back, to make sure that the white Instagram logo is displayed on top of the colours.
Download Adobe Illustrator.
Design to Make Technology Human Previous post
45 Advertisements You Will Never Forget Next post
Hi there, in this video we're going to redraw the Instagram logo. Rounded corners, we're going to look at Corner options. We're going to look at this red Gradient in the background you can see in there. All right, let's go build it now in Adobe Illustrator.
To get started, let's go to 'File', 'Open'. We are going to open up, in your 'Exercise Files', 'Logo Exercise', there's a folder, there's one called '2 Instagram'. Click 'Open'. Remember, I've got Layers set up for you, there's a Background Layer. Turn the Eyeball on and off, that's what we're going to trace. And we're going to work on this redrawn Layer. So just make sure it is blue. We'll start with the outer square. I'm going to grab and hold down this tool here. We're going to grab the 'Rectangle Tool'. And in terms of Fill and Stroke, I'm going to have 'no' Fill. So this red line, and the Stroke's going to be 'black', and '1pt'. I'm going to start on the outside here, try and guess it, and drag it out.
Now remember, holding down Shift while dragging gives me a perfect rectangle. I'm going to try and guess it there. Grab your 'Black Arrow', you have to grab the edge. And try and align things up. You can use your keyboard. I'm just using the keys on my keyboard, just to bump it around, to get it close. That works for me. Next is the Corners, so with my 'Black Arrow', and this Liner around the outside selected, I can grab this inner bit. Just drag it until you feel like it lines up. Perfect. So that's going to be the inside line.
Next tool, we'll do this guy, in the inside here. I'm going to copy and paste him. So, 'Edit', 'Copy', 'Edit', 'Paste'. It kind of puts it in the middle of the screen. A nicer way to do it is to go 'Edit', 'Copy' then 'Edit', something called 'Paste in Place'. Nothing looks like it happens, but there's now just two copies right on top of each other. It means, now when I scale it, it's kind of right in the position I need it to be. So holding down Shift, and scaling the corner will do whatever-- from wherever, the corner down. If we hold 'Shift' and 'Option' on a Mac, or 'Alt' on a PC, it will scale in from the center.
Now, there's a couple of things you need to know when you're Scaling. Especially when you've done this kind of corner thing. So if I have nothing selected, there are times when you want the Scale Corners to work and sometimes you don't want it to work. In this case, watch this, by default it's off, right? So if I have it like this, and I scale it down, look what's going to happen. I'm going to get down and you can see, it eventually turns into a circle because it's trying to remember the radius you had over here. So you might want to turn on Scale Corners. So when it gets smaller they scale along with your shrinking, or your transformation. So there’s times for both. Both of them don't work in this instance because they've done like a special radius in the middle here.
So I'm just trying to get it, so it is almost per-- like I'm just trying to align it up in the middle of this white line here. Now what you might find is, under 'View', there's one called 'Smart Guides'. That can be really helpful sometimes, and real painful sometimes. It's a little painful when you're doing really small adjustments. I'm just doing this. The weird thing about this logo, it's maybe I've got a bunked version, but it's a little bit taller. It's not square, square on the outside, but not in the center here. That either annoys me-- I don't know, they've got a way up anyway. So, I'm going to drag it down. I could drag it down, then drag it at the top here, but what you can do is, you can hold down 'Alt', and drag both of them. Can you see, the top gets bigger and smaller at the same time. Not making much sense, but you get the idea, right?
We've got the lines lining up. Now go off, back with my 'Black Arrow', grab these dots, and kind of drag them into, like they're in the center there. Awesome! So that will be that guy. Let's click and hold down the 'Rectangle Tool', and let's do the center part. The thing with the Ellipse Tool is, normally you drag from the top, kind of right down. That's how people do it. You hold down the 'Alt' key on a PC, or 'Option' key on a Mac. It drags from the center. If you hold 'Shift' as well, you kind of get a perfect circle. I'm not pretending that's right in the middle. I'm just kind of hoping it there. What I can do is, select everything with my 'Black Arrow' over here, in 'Properties Panel', I'm going to go to 'Align Center'. I might go 'Align Vertically' as well. So we've got most of the bits. I'm going to draw this guy out, stuff in the center. Holding 'Shift' and 'Alt' on a PC, or 'Option' on a Mac. It's all looking pretty good.
The easy bits, let's do this line in the center here. I'm going to just leave it as black for the moment and just keep increasing the Weight of it till I feel like we got it. This one here, increase this side as well. So I feel like we got different weights. This guy here is just going to have a Fill color. So 'no' Stroke around the outside, and we're going to have a Fill of, it's going to be 'white'. Awesome! I'm going to change these two to white now as well. So I've 'Shift' clicked at both of them, 'Black Arrow', click the first one. Hold 'Shift' on your keyboard, click the second one. And over here, you guys are now going to be 'white'. The interesting part is the Gradient on the inside. So I'm going to select this outside guy, and I want 'no' Stroke now. I want a 'Fill color'. We're going to start with just this plain old Gradient. So, ugly old linear black and white Gradient.
What you might find if you've just done that, is that yours might be like this, in front of everything. You might have to select it, go to 'Arrange', 'Send to Back'. So let's look at the colors. First of all, we'll get the colors, then we'll apply them. So stealing colors from a logo, we use the 'Eyedropper Tool'. I got nothing selected. So I've got my 'Black Arrow', clicked in the background. I'm going to grab my 'Eye Dropper Tool', and I'm going to grab the-- that looks like a Radial, kind of coming out of here. I'm going to find the center of it. And you can see down here, it's picked that color. I used the Eye Dropper Tool. Over here, my Fill, what I'm going to do is, see this turned up new page thing? This is a new Swatch. I'm going to give it a name. I'm not going to give it a name, just going to click 'OK'.
You'll see, it appears like a pre-mixed Swatch. It's going to be handy later on. So back to the 'Eye Dropper Tool', I'm going to click this outside color. Back to 'Properties', and I'm going to click on here and say 'Add to Swatches'. I'm not going to worry about the naming. Then there's this kind of intermediatary color. This is a bit of a guess, right? So, 'Eye Dropper Tool', I'm going to pick this kind of red. Looks like it's about there, in between. 'Properties', and you, my friend are now part of the game. So we have three colors. Now I want to apply them to this Gradient. So with it selected, with my 'Black Arrow', go to' 'Window', let's go to 'Gradient'. And in here, we're going to go from Linear to 'Radial'. That's kind of part of it. That's moved the box out of the way.
I'll grab that little slip along the top there, and move it. Now we're going to use the 'Gradient Tool', there it is there because the center of rotation is in the center. And what I want to do is grab the middle and drag it to roughly where it looks like it is in the logo there. Now this outside option here, I drag it to the right. It kind of increases. I'm going to increase it. I'm just guessing again. Looks like it kind of wraps into there. Now this bit comes into place. It starts at white, and ends in black. So what I'm going to do is double click the 'white box' and say, it starts with you. Click that off, double click the 'black box', and it ends with you.
Now we need to put in a middle Gradient. It's really easy. Anywhere along this line, I'm going to put it in the middle. You can see, my cursor changes to the White Arrow. Hit the '+'. Adds another Swatch. You can delete it by dragging it off, if you accidentally do it. We got it selected, I'm going to double click it. And I'm going to say, there's my magic middle Gradient. And it's not bad. It's pretty close, right? I'm kind of looking back and forth. Yes, it looks all right. That is how to redraw the Instagram logo in Illustrator CC. All right, let's get on to the logo redraw.
By Milena Anderson Reading 5 min.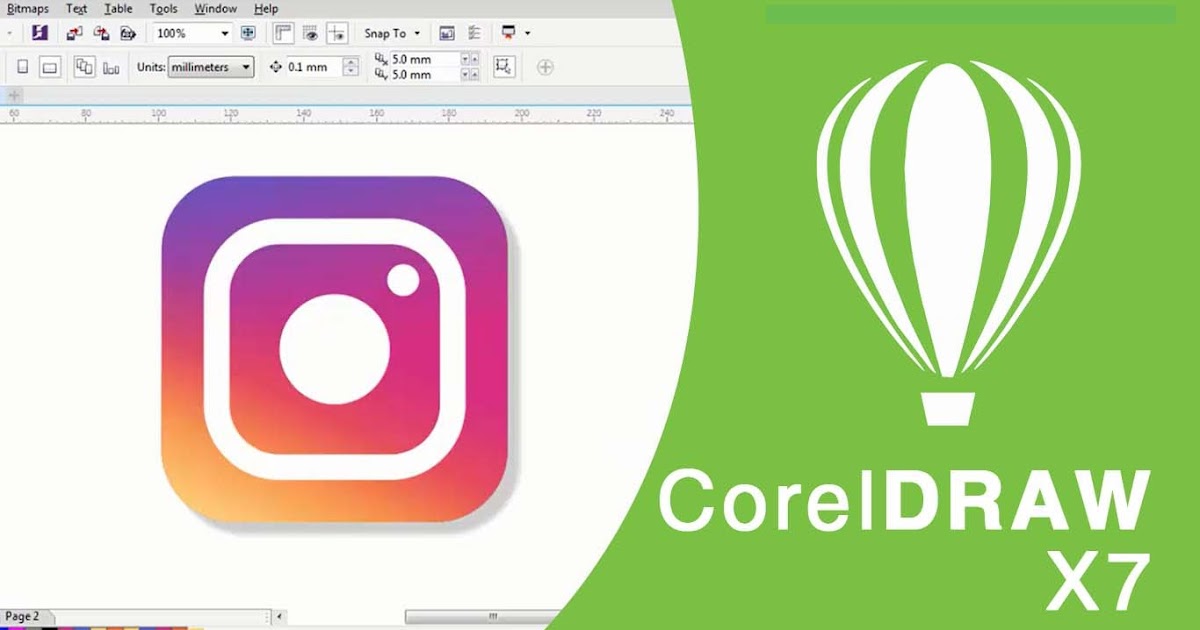 Views 13
Short answer
How to make a logo for Instagram?
There are several different ways to make a logo for Instagram. One way is to create a simple text logo using a font that stands out and is easy to read. Another option is to create a logo based on an image, using graphics or icons that represent the brand. Whichever route you take, make sure branding is consistent across all channels, including your website and social media profiles. nine0003
How do you draw Instagram?
There is no single way to draw Instagram because the application can be customized in many ways. However, some basic steps you can take to create an Instagram pic include opening the app and selecting a photo or video to post, then adding filters and editing tools as desired. You can also add text or pictures to your message using the various tools available in the app. nine0003
How to create an Instagram logo in Illustrator?
There are several ways to create an Instagram logo in Illustrator. One way is to use the Grid tool to create a square and then use the Rectangle tool to create a rectangle that is slightly smaller than the square. You can then use the Pathfinder Tool to merge the two shapes and then use the Ellipse Tool to create a round shape in the center of the square. Finally, you can use the Text tool to add text to the logo. nine0003
How do you draw on Instagram 2022?
To draw on Instagram in 2022, you will need a phone or tablet with an internet connection and the Instagram app installed. Once you open the Instagram app, you can select the pencil icon at the bottom of the screen to start drawing.
How can I create a logo myself?
There are several different ways to create your own logo. One way is to use a logo maker or a website. These programs and websites usually have pre-made logos that you can choose from, or you can create your own logo using the program's tools. Another way to create a logo is to draw it yourself. If you are not very good at drawing, there are many online tutorials that will teach you how to make a simple professional looking logo..
How to make a free Instagram logo?
There are several ways to make a free Instagram logo. One way is to use a free online logo maker. There are many such websites available and they allow you to create a logo by entering text and choosing from a range of icons and fonts. Another way is to use a free online vector editor. These editors allow you to create logos by drawing shapes and adding text. Finally, you can also create a logo with a free online photo editor. nine0003
What is the Instagram logo?
The Instagram logo is a simple retro camera. This has been the case since the app was first released in 2010.
How to circle something on Instagram?
To circle something on Instagram, first open the app and find the post or photo you want to circle. Click on the three dots in the upper right corner of the post and select "Copy Link". Then open a new browser tab and paste the link into the address bar. Once the message has loaded, tap on the three dots in the top right corner of the message and select Add to Circle. nine0003
What color is the Instagram logo?
Black and white Instagram logo.
How do I add pictures to an image?
There are several different ways to add patterns to an image. One way is to use an app on your phone or computer that lets you draw over the image. Another way is to find a free online tool that will allow you to draw on a picture. Finally, you can also use Photoshop or another photo editing program to add drawings to the image.![]() nine0003
nine0003
How to make an Instagram Gradient in Illustrator?
Open Illustrator and create a new document.
Draw a rectangle on the artboard.
With the rectangle selected, go to the Gradient panel and click the gradient slider to create a linear gradient.
Click the stopwatch icon next to the first color swatch to make it active.
Change the color of the gradient to yellow.
6.
How big is your Instagram profile picture?
Instagram profile pictures are square and measure 128 by 128 pixels.
How to draw an Instagram story?
There are several ways to draw an Instagram story. One way is to use the drawing tool built into the app. This tool allows you to draw in different colors and thicknesses. You can also add stickers and text to your drawings.
Another way to add pictures to your story is to use an app called Inkwell. Inkwell allows you to create more complex drawings and add filters to them.![]() nine0003
nine0003
How do you post your Instagram stories?
There is no one-size-fits-all answer to this question, as the best way to post your stories on Instagram depends on the type of content you share. However, a few tips on how to post your stories effectively include using different types of media (e.g. photos, videos, boomerangs), using text overlays and stickers, and alternating between horizontal and vertical layouts. nine0003
How do I achieve playback on Instagram?
To get replay on Instagram, you need to have an Instagram Business account. If you have a business account, you can enable playback by going to "Settings" and selecting "Playback".
nine0002 By Milena Anderson Reading 5 min. Views 4 Posted by
Short answer
How to draw the Instagram logo in Paint?
To get the Instagram logo in paint, you can either download it as a vector or find a high resolution image online. Once you have the image, open a new document in Paint and use the Paste tool to paste the image into the document. Then use the Freeform tool to outline the logo. Once you've stroked the logo, select the Fill tool and choose a color for your logo. nine0003
How to draw a simple logo?
There are many ways to draw a simple logo. One way is to use a basic geometric shape such as a circle, square, or triangle. You can also use a simple symbol or icon. Once you have the basic shape, you can add details like lines or curves to make it look more like a logo. You can also add text if you like. Finally, you can choose a color or colors for your logo. nine0003
How to create an Instagram logo in Illustrator?
Open Illustrator and create a new document.
Select the Rectangle tool and draw a rectangle on the artboard.
With the rectangle selected, go to the properties panel and change the Width to 1080px and Height to 1920px.
Go to the File menu and select Save As.
In the "Save As" dialog box, navigate to the folder where you want to save the file and name it "InstagramLogo". . nine0003
How to draw a logo?
There are several different ways to draw a logo. One way is to use a program like Adobe Illustrator which allows you to create vector illustrations. Another way is to use a program like Photoshop to create a bitmap. If you are not familiar with any of these programs, there are also online tools that let you create logos for free.
Where to draw on Instagram?
There is no clear answer to this question as it depends on the user's preferences. Some people draw or paint on their photos within the Instagram app itself, while others use external apps like Adobe Photoshop or Illustrator and then post the finished product to Instagram.
How do you draw on Instagram?
There are several ways to draw on Instagram.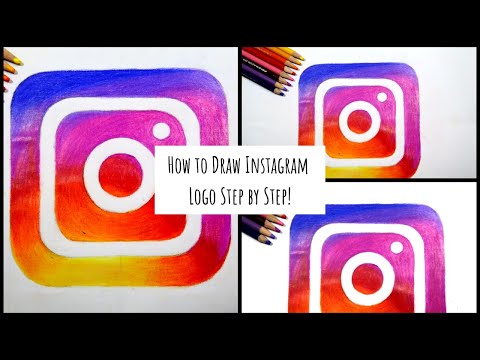 The easiest way is to use the drawing tools built into the application. You can use different colors and thicknesses to create your drawings. nine0075 Another way to draw on Instagram is to use a third party app. There are a number of applications available that allow you to add drawings and text to your photos. These apps can be downloaded for free from the App Store or Google Play.
How to sketch a logo?
There are several different ways to create a logo sketch. One way is to use software such as Adobe Illustrator or Inkscape. Another way is to use a vector drawing program like Sketch. You can also sketch the logo by hand using pencil and paper. nine0003
Can you draw your own logo?
Yes, you can draw your own logo. However, it is important to remember that a good logo should be simple, memorable and versatile. If you are not confident in your drawing skills, you can hire a professional designer to create a logo for you.
How to turn a drawing into a logo?
There are several ways to turn a picture into a logo. One way is to scan the drawing and then use graphic design software to vectorize it. This will create a vector image that can be scaled up or down without quality loss. You can also create a logo by hand-drawing it in a vector program such as Adobe Illustrator. nine0003
How can I create a logo for free?
There are several ways to create a logo for free. One way is to use a free online logo maker. These websites allow you to create a logo by entering your company name and selecting a template. You can then customize the logo by changing the font, color, and size. Another way to create a free logo is to use a free vector editor like Inkscape. With Inkscape, you can create a logo by drawing it yourself or by finding a free vector image. nine0003
Where can I draw my own logo?
There are many places to find free or low cost logo designs. Some popular options include graphic design websites like Fiverr and Upwork or website logo design contests like 99designs. If you have experience in design, you can also create your own logo using software such as Adobe Photoshop or Illustrator.
What application can I use to create a logo? nine0003
There are many places to find free or inexpensive logo designs. Some popular options include graphic design websites like Fiverr and Upwork or website logo design contests like 99designs. If you have experience in design, you can also create your own logo using software such as Adobe Photoshop or Illustrator.
There are a number of applications that you can use to create a logo. Some popular options include Adobe Illustrator, Inkscape and Sketch..
What is the font of the Instagram logo?
The Instagram logo is a proprietary font designed by the company. It's called Instagram Sans.
How to make a gradient on Instagram?
To create a gradient on Instagram, you need a third party app.