Everyone is talking about how the Instagram algorithm loves Reels, and that using the format can improve engagement and reach.
But getting started with such a creative medium can be intimidating. We’re here to help with an Instagram Reels tutorial that will help you master 11 essential editing tools and skills needed to create engaging content.
Keep reading to find out how to edit your videos for best results and kickstart your growth. Or, if you prefer, watch the video version right here:
1. Add music to Reels
2. Add text to the beat
3. Make multi-scene how-to Reels
4. Record Reels hands-free
5. Find your favorite Reels filter
6. Use the Align tool
7. Make timelapse Reels
8. Add voiceover to Reels
9. Use the Remix feature
10. Use the green screen effect
11. Use Reels templates
Bonus: 14 Time-Saving Hacks for Instagram Power Users. Get the list of secret shortcuts Hootsuite’s own social media team uses to create thumb-stopping content.
1. Add music to ReelsWhen browsing the Reels tab on Instagram, you’ll notice that most videos have audio clips — most often songs or voiceover — playing over them. Adding music to Reels is one of the basic editing skills you should know if you want to create engaging content.
How to add music to Reels
 Add text to the beat
Adding captions to your video content serves multiple purposes:
One common move on Reels is to have text appear and disappear on the beat — follow the step-by-step instruction below to make it happen!
How to add captions to Reels
The beauty of Reels is that you can quickly stitch together clips to create a mini movie. You can use your Instagram camera to record fresh content or start with pre-recorded video clips.
Combining multiple clips will allow you to create engaging how-to videos and share some of your expertise with your Instagram audience.
No need to hold down the record button for the duration of your recording. The hands-free function allows for you to capture a moment from further than an arms-length away.
If you’ve got a fashion brand and want to show off your latest outfits in a full-body shot, or offer a mural-painting service and want to capture a moment of your production process, give hands-free recording a whirl!
Bonus: 14 Time-Saving Hacks for Instagram Power Users. Get the list of secret shortcuts Hootsuite’s own social media team uses to create thumb-stopping content.
Download now
How to record Reels hands-free
One of Instagram’s coolest features is its huge library of filters and AR effects. And with Reels, you’ve got access to them all.
When creating Reels, don’t be afraid to get a little silly and use effects that capture the spirit of your brand, whether that’s an over-the-top beauty filter or an avant-garde blur effect.
How to add filters to Reels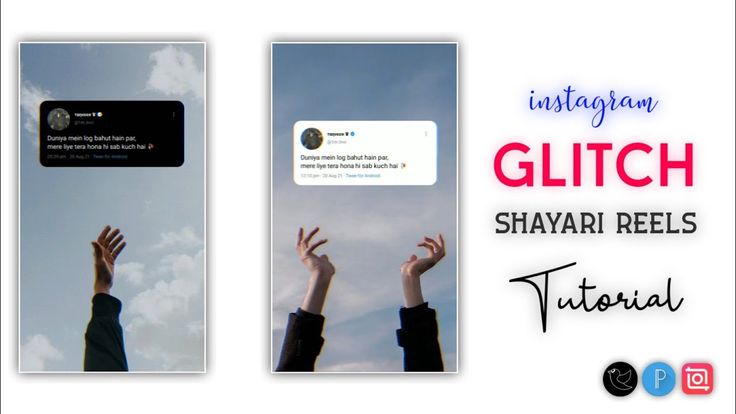 See one you like? Tap Try It to test it out right away. Want to save it for future use? Tap the down arrow icon (save to camera) to add it to your filter rolodex.
The Align tool will allow you to add (or remove!) an object or person between scenes of your Real to create a fun appearing (or disappearing!) effect.
By starting a scene exactly where the previous scene ended, it’ll appear as if your outfit change (or begrudging boyfriend or statement hat) has magically popped into frame.
How to use the Align tool
Have something longer than 60 seconds to share? With timelapse recordings, you can squeeze more into your Reels.
Use timelapse videos to demonstrate a process, whether it’s pulling together an easy smoothie recipe or sharing your oh-so-Marie-Kondo folding technique.
The voiceover feature allows you to record voice overtop of a fully recorded video — a nice way to add an overarching narrative to a compilation of clips.
Maybe you’re explaining some more background info about a new makeup line you just launched, or sharing details about a sale overtop of cute shots of your boutique: if you’ve got something to say, this is your time to shine!
How to do the challenge Record your visual content using all your newly acquired filter, music, or speed-manipulation skills and tap the arrow icon to proceed to the editing screen.
Instagram recently added a Remix feature to Reels… so now’s your chance to record a video side-by-side with another Reel. Browse other Reels to find something that inspires you to comment, contribute or react, and start your beautiful duet.
How to Remix another creator’s Reel
The green screen effect in Reels is a game-changer. Get playful with the background of your choosing — video or photo! — to add a fun, faraway locale or a branded graphic behind you.
How to do the challenge
 Tap Share To when you’re ready to post.
Instagram Reels templates allow you to create a Reel using pre-set music and clip durations from existing Reels. You can use templates from any Reels that have music and at least three clips. Reels templates mean you can jump on trends faster than ever — no more wasting time editing clips or selecting music to match!
How to use Reels templates
Easily schedule and manage Reels alongside all your other content from Hootsuite’s super simple dashboard.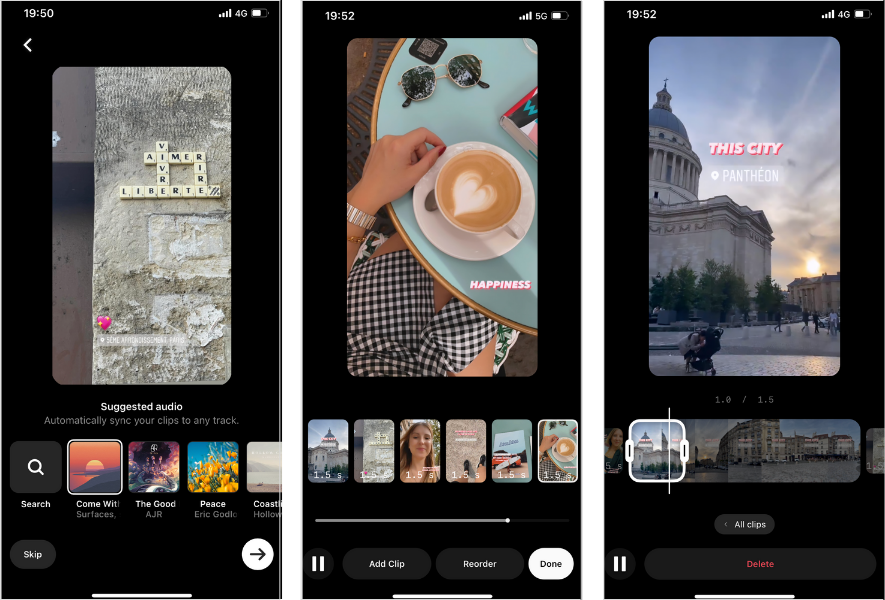 Schedule Reels to go live while you’re OOO, post at the best possible time (even if you’re fast asleep), and monitor your reach, likes, shares, and more.
Get Started
Save time and stress less with easy Reels scheduling and performance monitoring from Hootsuite. Trust us, it’s reely easy.
Free 30-Day Trial
Instagram Reels has now become one of the hottest types of posts in the leading visual platform. Just like TikTok, this feature allows users to upload and watch bite-sized video clips (e.g., social videos, tutorial videos, even dance videos), whether it's for entertaining or educational purposes.
Since it makes the content much easier and quicker to consume, businesses use Instagram Reels to amp up their Instagram marketing game, boost engagement, strengthen brand awareness, book more appointments, and even increase the potential to go viral on the platform.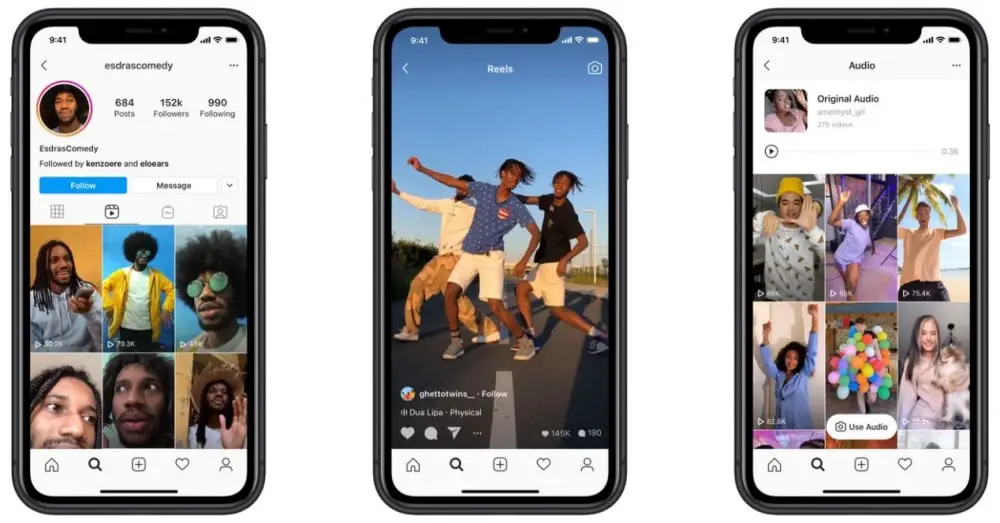
That being said, more and more users and businesses are jumping into the Reels bandwagon, as a new growth hacking tactic, making it harder for you to create one that stands out and grab viewer's attention in the feed. It means creating mediocre, bland, or lackluster videos will more than likely put you to waste.
Since the Reels itself still has some limited in-app editing tools, you need to leverage some tools "outside" the app to ensure that your Reels will be appealing and engaging for users. Not to mention that Reels often glitches when users edit their videos through the feature that can result in de-synced visuals and audio.
That's why using video editing tools for Instagram Reels comes in handy for many users. In this article, we'll be highlighting top tools that can help you create better-looking Instagram Reels in a faster way and with less hassle.
Curator.io is an easy-to-customize aggregator that lets you pull from over a dozen sources. If you'd like to give Curator. io's free forever plan a spin sign up today.
You know Reels work best for vertical videos. But, when you want to upload horizontal videos, you can use InShot to take care of the editing process. It adds bars on top of below the horizontal video so it becomes vertical. You can change the video aspect ratio to 9:16 (the recommended ratio for Reels) with a few taps.
InShot also allows you to add transitions, titles, and custom text captions that can help you produce beautiful Reels. It also allows you to trim your footage, splice it up, speed up clips, add filters or background music, and more. InShot is a very easy-to-use tool like any of the ringtone makers.
Clips allows you to add fun, eye-catching built-in captions to your Reels effortlessly. If you want to create 15-second Reels where your captions appear as you speak (just like subtitles), you're going to want to use this tool. Clips does a really good job at accurately transcribing what you are saying.
The captions are customizable and you can choose the color, font, size of your text. Clips is also great if you want to make a Reel with an intro message or outro message that shows up at the beginning or end of a video clip.
It's super easy to use and helps viewers to understand your content is all about even when they mute the sound. Not to mention that this tool also allows you to add emojis, animated characters, fun stickers, and more.
Curator.io is an easy-to-customize aggregator that lets you pull from over a dozen sources. If you'd like to give Curator.io's free forever plan a spin sign up today.
Most professionals and content creators know about Canva's features for photo editing and graphic creation, but did you know that the platform offers a video editor too? It works great for making super high quality Instagram Reels that will perform well in the algorithm.
Here are its top features:
Adobe Rush is a well-known social video editor. This tool has almost every basic feature you need for creating simple and straightforward social videos, including Reels. It has built-in templates for Instagram Reels that you can choose from.
Its easy-to-use interface allows users to export videos in HD quality with just one click, so this app works well if you want the convenience of publishing your content on Instagram Reels right away without any hassle.
If you are a perfectionist yourself and want your Reels to look flawless, professional-looking, and high-resolution, you might need to use KineMaster. The tool has everything you need for creating professional-looking content, including sound effects and record voice-overs (a feature Instagram Reels is still lacking).
You can use it to trim clips from a prerecorded event or create unique animations with its easy drag & drop interface. It also offers features like shape masks (to add shapes/logos), text overlays, transitions between scenes, and motion graphics.
Filmora is a quite popular video editing tool. The company then established a mobile version called FIlmoraGo that allows users to edit and create stunning videos at their fingertips. You can add animated text, stickers, text overlays, etc., to make your Reels more eye-catching.
The tool also provides you with a royalty-free music library, so you can use the right background music to set the Reels tone and evoke viewers' emotions with your content.
Splice could be your go-to Reels tool if you're a fan of Hollywood-style effects or transitions. This easy-to-use professional editing tool provides you with a number of cinematic effects, including the ability to change or customize background videos. Other well-known features include dynamic transition styles, pan and zoom effect, trendy filters and effects.
Editing your Reels on Splice can enhance the quality of it. It makes your Reels video even more catchy and attractive -- just like being filmed and captured by a professional videographer.
WeVideo is another video editing tool that enables you to create professional-looking video reels. It has the most intuitive interface out of all these tools, with a full-screen preview and timeline for editing your footage.
It supports 4K resolution and provides you with a green screen effect to help you make such videos more aesthetically pleasing. Plus, it has a library of royalty-free music, sound effects, and stock video clips to help you pump up the visual for your Reels.
WeVideo allows users with all different levels of expertise to create professional Reels videos for personal use or online sharing. The best part about WeVideo is its cloud service which makes it so you can access your work from anywhere and on any device.
Curator.io is an easy-to-customize aggregator that lets you pull from over a dozen sources. If you'd like to give Curator.io's free forever plan a spin sign up today.
Now that Instagram users are spending more and more time scrolling through Reels to see quick videos, leveraging the feature for marketing campaigns has never been more important.
However, editing straightly in Reels is not always such a smooth process as the native Reels editor itself is still lacking and fairly limited. So, it falls on you as the marketer to create a video that will stand out from other clips.
You need to go beyond the app to craft eye-pleasing and stand-out clips to catch more eyeballs. With those seven best Instagram Reels tools mentioned above, you now have some choices not to improve your Reels visuals but also higher your chances to level up your editing skills. Keep in mind that a number of people use computers to look at Instagram Reels so make sure these videos appear well on monitors as well.
About the author
Andre Oentoro is the founder of Breadnbeyond, an award-winning explainer video company. He helps businesses increase conversion rates, close more sales, and get positive ROI from explainer videos (in that order).
Curator.io is an easy-to-customize aggregator that lets you pull from over a dozen sources. If you'd like to give Curator.io's free forever plan a spin sign up today.
Make Your Page Interesting and Encourage Followers to Visit Your Page or Website More Often for Shopping
Fresh Posts Regularly
Get Our Social Media Content Marketing: How To get into the head of subscribers and make them fall in love with your brand.
Subscribe to the newsletter and get a book as a gift!
More and more Instagram platforms are using video to promote their profile and increase the activity of their followers. They are prioritized in impressions on the recommendations page because they evoke more emotions in people than a regular photo. But in order for the video to be beautiful and interesting, you need to be able to edit it: cut out unnecessary fragments, overlay music, add text. How to do this - we will tell below. nine0003
There are many software for editing content on the market, but cropping video for Instagram is available online in the application itself.
Duration limit - 1 minute in the feed, 15 seconds in Stories. You can apply effects in the same way as photographs: they are the same. In the new IGTV format - vertical and pre-prepared videos - the duration of the video can be 60 minutes for bloggers and stars, 14 minutes for simple instagrammers. This is a new way to promote influencers, companies and ordinary users. nine0003
 nine0021
 Instagram videos are often processed on the phone because it is fast and convenient. It is rare that someone uploads a video to a computer and seriously edits each frame. But if the need still arises, here are some editing programs:
All programs run on Windows and MacOs platforms. nine0003

Download link:
The video editor supports trailer and movie modes. The first contains patterns and is shorter in duration compared to the second. When cutting, the film mode is used. Downloads an unlimited number of video tracks from the gallery. The application cuts, separates the sound, duplicates or deletes fragments, works with playback speed, inserts transitions between pieces. Adds text, has a color correction mode. nine0003
Disadvantages: overlays music from iTunes and recorded audio only. With the rest of the files, there may be problems due to copyright: artists block the use of their songs.
Download: https://apps.apple.com/en/app/glitché/id634467171.
Clear and simple interface. Supports interesting effects. Imposes non-standard filters that are very different from VSCO. It becomes very difficult to predict the outcome. Great for creative works that want to stand out with brightness and audacity of processing.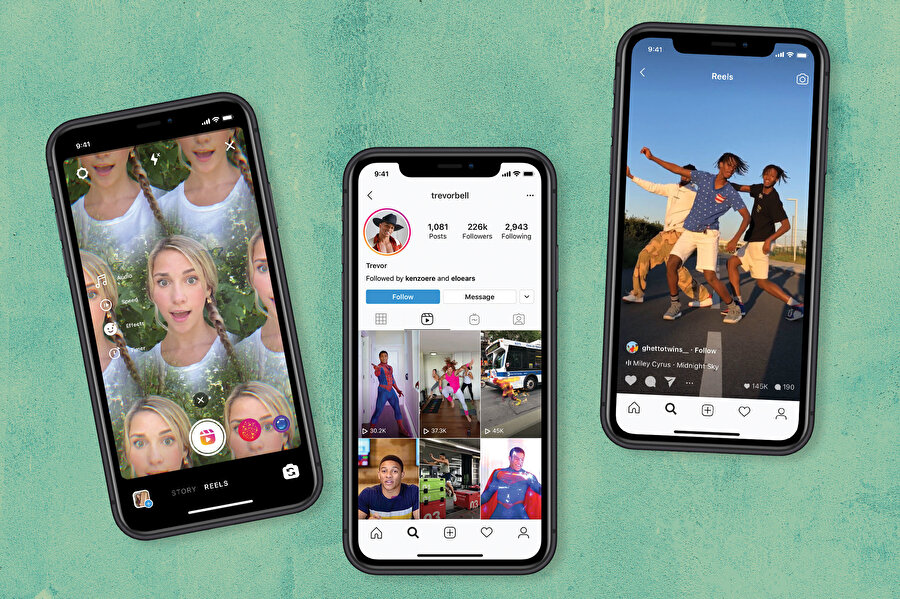 nine0003
Download: https://apps.apple.com/ru/app/8mm-vintage-camera/id406541444.
Application with lots of retro effects. There is a paid and free version.
Download: https://apps.apple.com/en/app/unfold-create-stories/id1247275033.
Creates a movie for stories. Combines static and dynamic on one screen, superimposes text. Contains free and paid collages. The format is 9:16 right away, no need to change the aspect ratio: the result is ready for uploading to Stories. nine0003
Download: https://apps.apple.com/en/app/filmmaker-pro/id1082956994.
You can create countless projects for free. It is possible to overlay several audio tracks: it is important when you need to combine the voice of the announcer and the background music. Changes the positions of objects. Works with brightness, contrast, saturation and white balance. Great functionality for processing.
Download: https://apps. apple.com/en/app/camcorder-record-home-video-in-vhs/id1036066107. nine0003
Free app with no ads. Records in 80s, 90s format. Suitable for creating a retro atmosphere.
Download: https://apps.apple.com/ru/app/snow-ar-camera/id1022267439.
Offers a variety of filters and special effects. It is convenient to use when a person needs a little retouching: hides bags under the eyes, smoothes the skin.
Download: https://apps.apple.com/ru/app/lomotif/id884009993.
Automatically corrects the movie, saving you time wasted editing. Trims video for Instagram, adjusts titles, creates slideshows and slow-motion. Has a set of filters.
Download: https://apps.apple.com/en/app/splice-is-a-video-editor-and-app/id409838725.
Professional video editor. Synchronizes the video with the rhythm of the song automatically. Also supports adding text, filters, changing speed. Has a large free music collection. nine0003
Download: https://play. google.com/store/apps/details?id=com.camerasideas.instashot.
The top rated editor on Google Play is 4.7. Free features, complete lack of watermarks make it attractive for processing. Adds stickers, filters and special effects. Supports most formats, convert to MP4. There is a choice of aspect ratio, which is very convenient for Instagram: the video will not be cut off during upload, because it will be in the right format right away. Supports quality up to 1080p. Among the shortcomings: a large number of advertising and no change in playback speed. Marked with an "Editor's Choice" sign. nine0003
Download: https://play.google.com/store/apps/details?id=com.nexstreaming.app.kinemasterfree.
One of the most powerful applications with a Russian interface, which even bloggers use. However, one of the downsides of the free version is the watermark. It can only be removed when purchasing a license. Works with 1080p videos. Supports multi-layer structure. Available for a limited number of devices.
Free version: https://play.google.com/store/apps/details?id=com.xvideostudio.videoeditor.
Paid: https://play.google.com/store/apps/details?id=com.xvideostudio.videoeditorpro.
Lite version: https://play.google.com/store/apps/details?id=com.xvideostudio.videoeditorlite.
Offers completely free functionality, does not cut down on downloadable material. Recognizes a face, applies filters, has Instagram effects. Smoothes and brightens the skin, removes excess spots and bags under the eyes. It is possible to reduce the size of the final video. Adds free music. nine0003
Download: https://play.google.com/store/apps/details?id=com.cyberlink.powerdirector.DRA140225_01.
Offers a large arsenal of video and audio effects, downloads the video not only from the device, but also from the cloud. Slow motion support. Able to create collages for Instagram. Of the minuses of the application: you can get 1080p quality after paying the tariff. Does not convert to other formats. Power-consuming application is not suitable for every device. nine0003
The application automatically creates a slideshow of selected images and music. Functions: light correction, transitions, slow motion. Music can be added to the video. Supports export to the desktop version of Premiere Pro CC so you can pick up where you left off. Included in the Editor's Choice List.
Download: https://play.google.com/store/apps/details?id=com.quvideo.xiaoying.
The new version loads multiple video clips at once and has an improved music collection. Creates slideshows, supports standard and advanced editing tools. Over
1,000 special effects, speed control, animated texts, background blur. The templates are available separately and do not need to be downloaded with the application. Of the shortcomings, it should be noted that the video is saved in SD format and a large amount of advertising.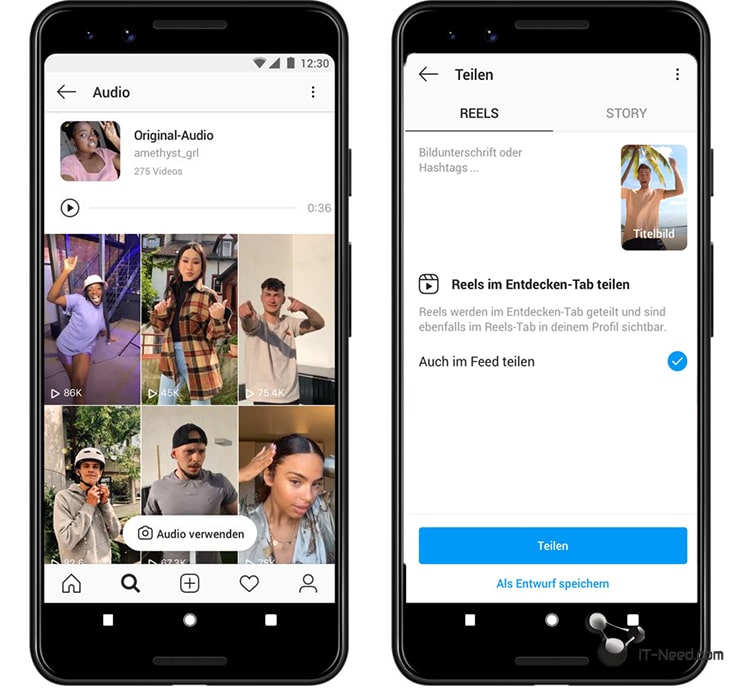
Download: https://play.google.com/store/apps/details?id=com.funcamerastudio.videomaker.
Simple video editor with professional settings. Changes voice. Exports in 720p and 1080p without limitation. There are square themes. Saves the audio track in mp3 format. nine0003
Download: https://play.google.com/store/apps/details?id=com.camerasideas.trimmer.
Free program without ads. Merge clips into one. Cutting, slicing, dividing into parts, changing speeds. Doesn't put a watermark on the video. Changes the original audio volume. Has color correction settings. You can change the aspect ratio. Background change is available.
Download: https://play.google.com/store/apps/details?id=com.picadelic.fxguru. nine0003
Stabilizes the roller when shot with shaky hands. The set of special effects in the free version is very limited: they are purchased separately by the piece. Supports shooting in high quality.
Download: https://play.google.com/store/apps/details?id=com.wevideo.mobile.android.
Overlay filters and special effects available. Reads videos with non-standard codes. Clear and simple interface. Does not support Full HD. Puts a watermark on the video, which can be removed only after payment. nine0003
Video processing for Instagram is possible online in the application or using third-party software with standard and advanced functionality. Videos are popular with social network users: they are lively and bring more emotions than a regular photo.
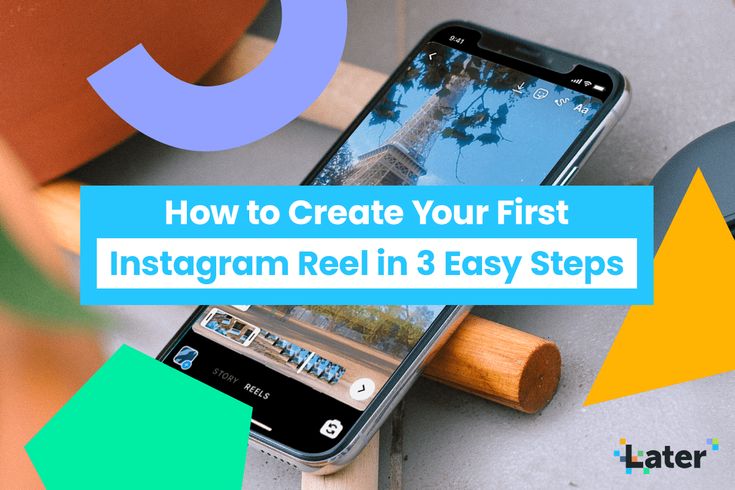
Instagram was one of the first tech giants to take major action after the fall of TikTok in many markets and exploit the void left by the Chinese content-sharing platform. As a result, Instagram introduced Instagram Reels, where people can find, create and share short videos. Reels differ from regular Instagram videos in their small size.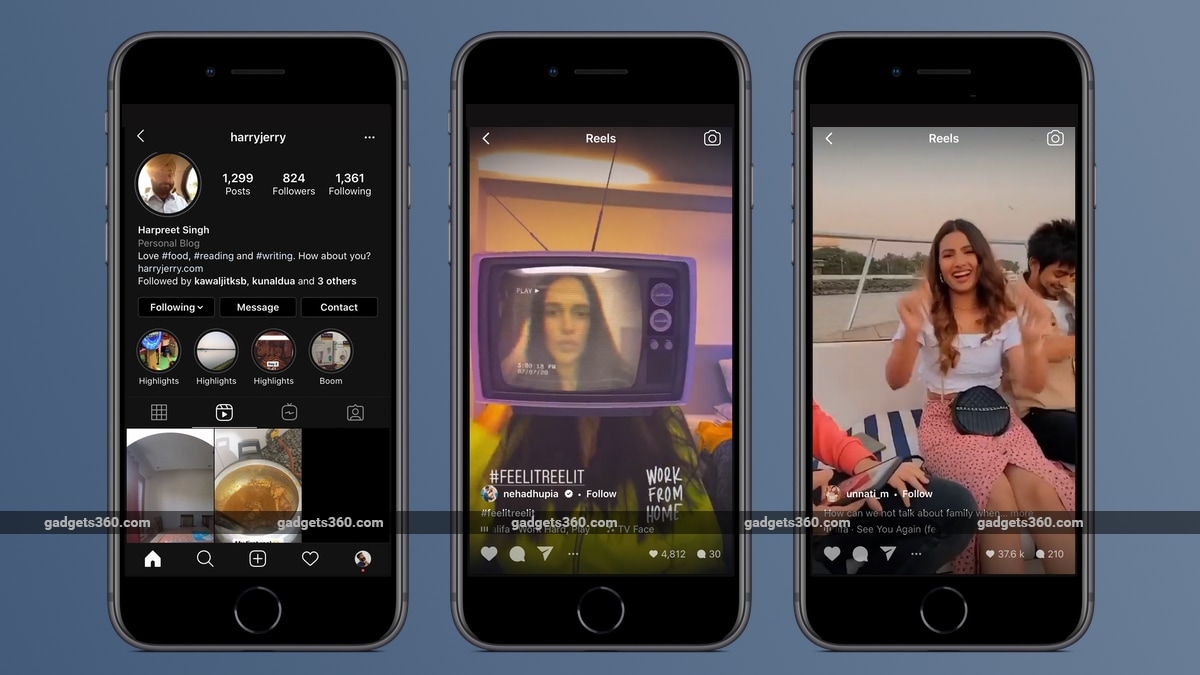 nine0003
If you are new to Instagram, you should check out our previous explanation of what Instagram Reels are. In this tutorial, we will see how to record Instagram Reels content. Well, we have divided the whole process into three steps. The first thing you need to get started with Instagram Reels is an active Instagram account. You can create private and public reels on the platform.
Private reels are visible to those who follow your Insta account whereas Public videos Get recommendations for others who watch Reels. In addition, Instagram uses several algorithms to shortlist videos and place them under the "Featured" label.
At this point, you need to select several aspects of your Instagram Reels, such as the music you want to use, the video playback speed, and the filters you want to set. Do it

By now you are already in the recording interface for Instagram Reels. Before you start recording video, you have the option to edit the following options:
 nine0021
 Once you've set them up, you're ready to record Instagram videos. nine0003
 In the lower right corner, there is also an option to adjust the length and trim the video. nine0021
 Now you've pretty much done your Instagram Reels video.
Once you've shared Instagram clips in general, you can also share them elsewhere. Most importantly, you can share it on your Instagram story, which can attract more viewers.
As you can see, it doesn't take you more than a few seconds to record an Instagram Reels video and post it. However, it would be better to consider that the simple process means that more and more people are joining the platform.