Device Links
As an Instagram user, you will know that adding a location to your posts makes them more easily discoverable. Assigning a foreign location to a post helps boost engagement while creating a personalized location makes your business easy to find.
If you want to know how to change the location on your Instagram posts, you have come to the right place. In this article, we look at how to do just that on several different devices. Let’s take a look.
Editing the location on an Instagram post using your iPhone is straightforward. If you wanted to edit a post to add a location, these are the steps you would take:
Your post will now save with the chosen location. If you want to change this location, these are the steps you should follow:
If you use an Android device, changing the location on an Instagram post takes only a few quick steps. To add a location to an existing post, do this:
Your post now has a location added to it. If you later decide to change this to reflect someplace else, you would follow these steps:
Instagram on your PC offers limited interaction. You can view posts, like, and even comment on them. View people’s stories, send private messages, and even save those images you like the most. What the web version of Instagram won’t allow you to do is upload or edit posts.
Unfortunately, changing or adding a location to an Instagram post is part of the list of things you can’t do. If you want to amend the location of your post, you will need to do it via the mobile app.
Yes, you can. The location tag you create could be for anywhere, such as your business address. Or you could create a fictional place and create a tag for there too, for example, “My House.” To do this, you will need to use both Facebook and Instagram, as they are interlinked and owned by the same company. Creating a custom location on Instagram is simple and requires only a few steps:
1. Launch your Facebook app and sign in.
2. Create a post by tapping on “What’s on your mind.”
3. Select “Check In.”
4. In the search bar, type the name of the location you want to create. If a location with the same name already exists, you will need to change yours slightly to make yours unique.
5. Press “Search” or “Done.”
6. Scroll to the bottom of the screen and tap “Add [Name of your location].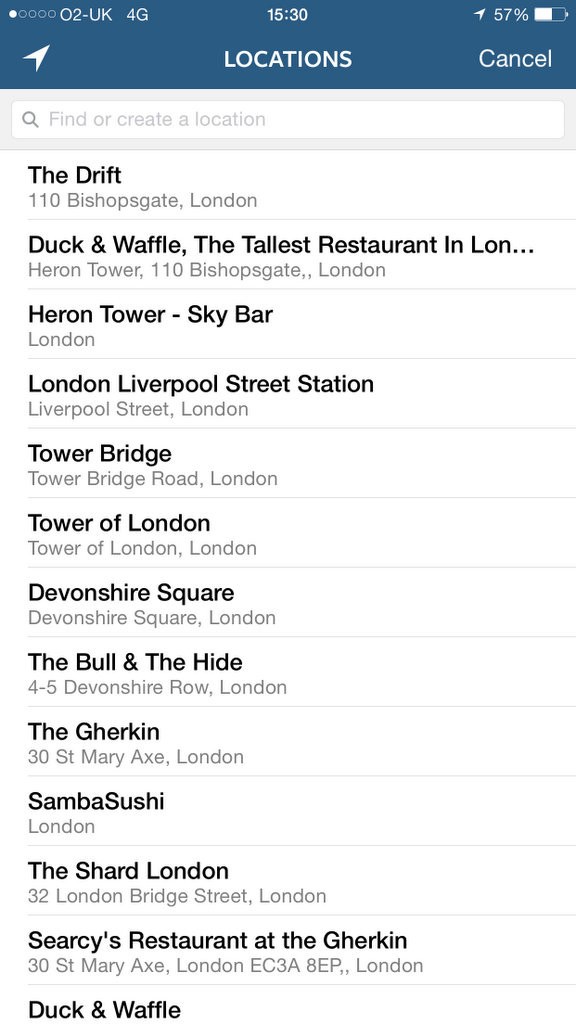 ”
”
7. Fill in the “Place name,” “Address,” and “City,” and then tap “Save Custom Place.”
8. You can now navigate out of Facebook.
The next step is to use this location in Instagram:
1. Open your Instagram app.
2. Navigate to the post you want to change the location on and tap on it to open it.
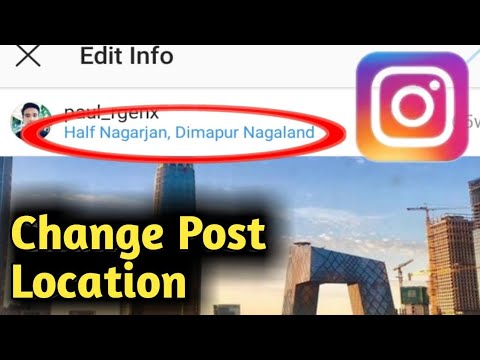
3. Click the three-dot icon at the top right of the screen and choose “Edit.”
4. Select the existing location under your username.
5. In the search bar, type in the name of the new location you have just created on Facebook.
6. When it comes up, tap it to select it.
7. Tap “Done.”
You have now added your custom location to your Instagram post.
Now that you know how to change the location of your Instagram posts, you may be considering which ones to use. If you want to increase the traffic to your posts, it is better to use locations that users frequently explore and have a high tag rate. Some of these include London, Italy, Paris, New York, California, Los Angeles, and France.
Changing the location on your Instagram posts becomes quick and easy once you know how. The benefits of doing this are numerous, especially if you are an influencer or run an Instagram business account.
By following the simple steps in this article, you will soon be changing locations like a pro. Now all you need to consider is which location to choose.
Have you changed the location of your Instagram posts before? Did you use a process similar to those provided in this guide? Or, did you use a different method? Let us know in the comments section below.
Alexandra | May 9, 2021
Let’s create your own unique, custom Instagram location!
As you know, you can now tag a location when you schedule your Instagram posts with Preview.
A lot of you asked:
“Can I create my own custom location tag for Instagram?”
Yes you can!
I’m going to show you how to do it.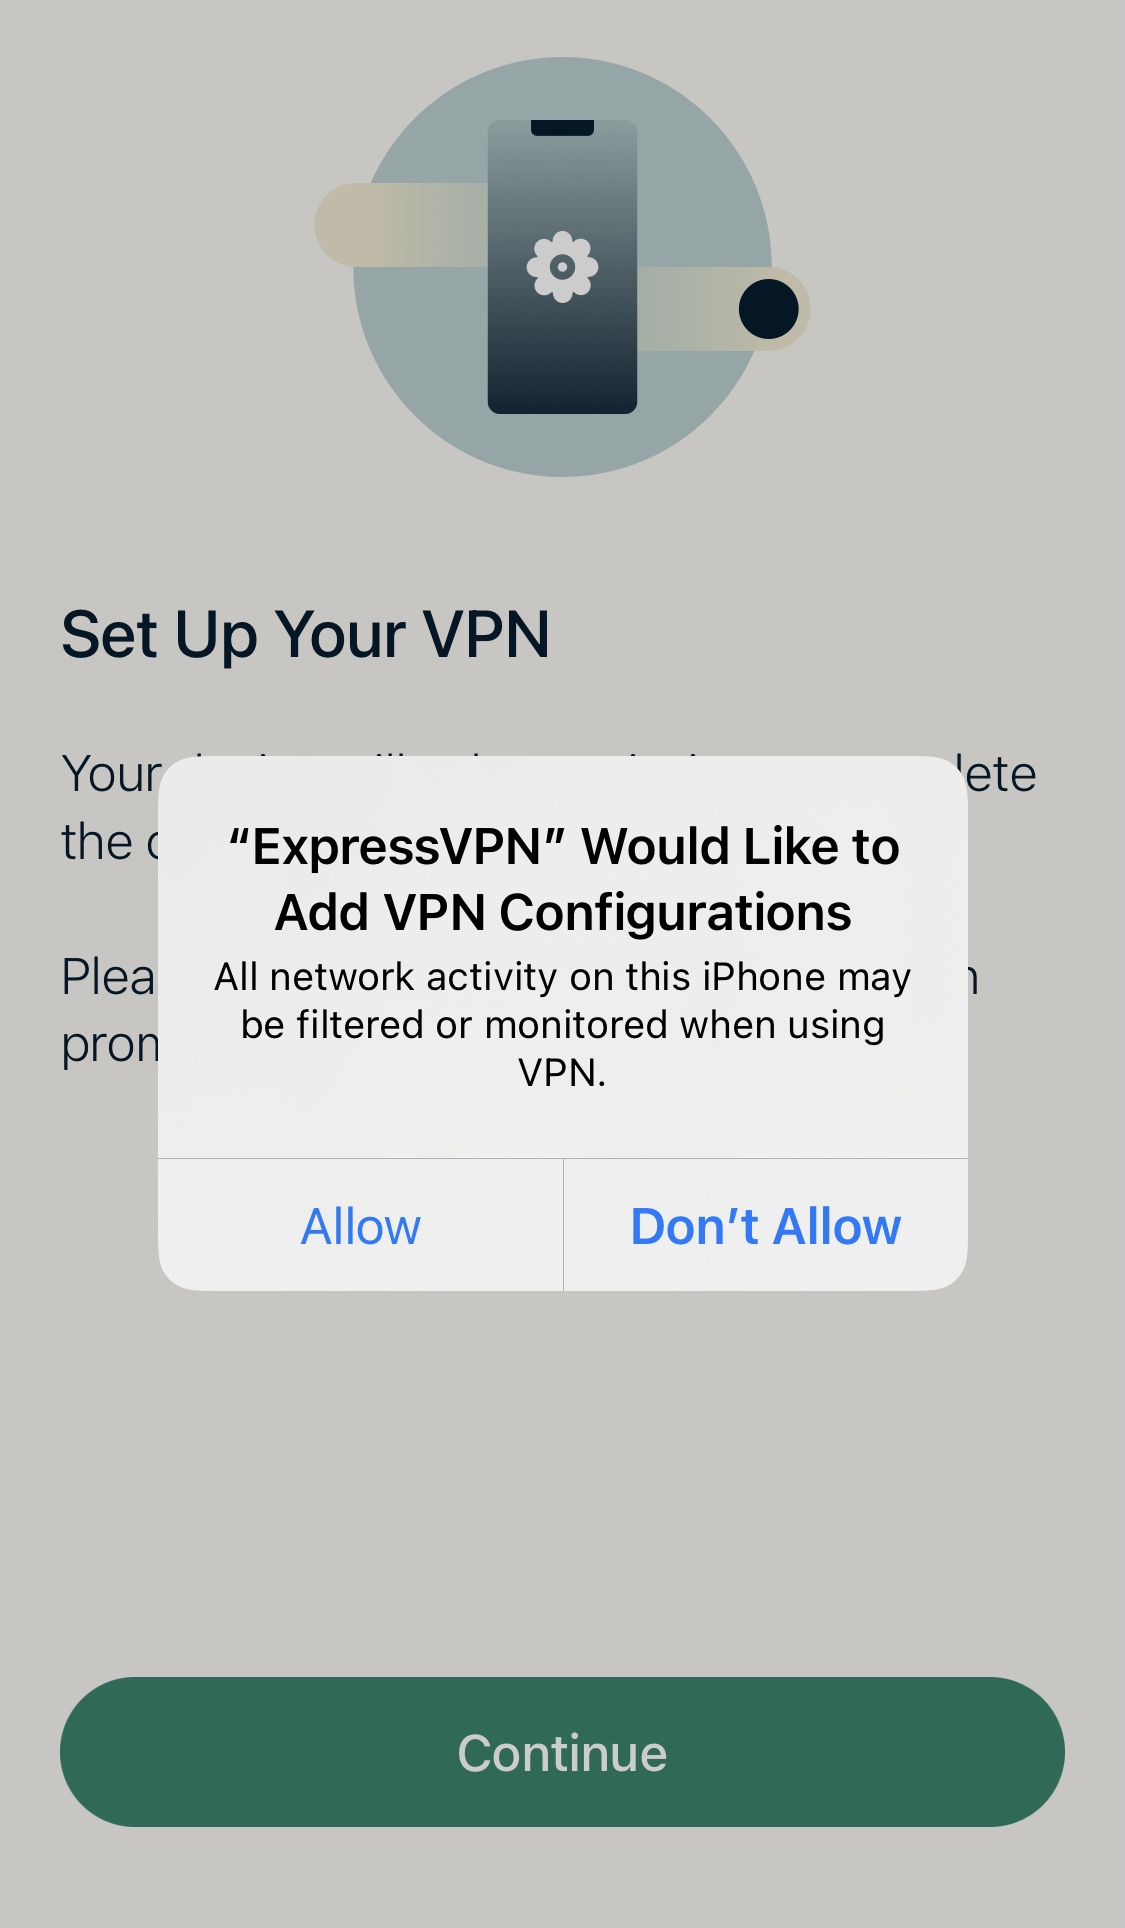
The location can be anything:
Follow these 4 steps.
Click here to use it
You need to set up your location tag on Facebook.
Facebook and Instagram are linked. As you may know, Instagram is owned by Facebook.
So you need to go through Facebook first to create your new location.
Type a location name exactly as you want it to appear on Instagram. Pay attention to spaces, capital letters and punctuations.
Tap “Search“.
Chances are your new “location” does not exist. Or maybe some people have already registered a location with a similar name as you – which is fine.
If you’re not fine with that, here’s a quick tip.
Quick tip:
If someone has already taken the name of your location and you want to have a unique name, you can get very creative.
For example, if “Coffee” is taken, you can try “Coffee Official”, “The Official Coffee”, “This is Your Coffee”, “Where You Feel Alive”, “The London Coffee Shop”, etc…
Use your location name for marketing purposes.
If it’s something different, people will look at it and be intrigued! Take your time to brainstorm.
Once you’re happy with the location name:
 Go on Instagram or Preview to use your new custom location
Next time you post on Instagram or schedule a post in Preview, use your new location.
Did this trick work for you?
More tips:
Click here to use it
Social networks
0 164.074 3 minutes to read
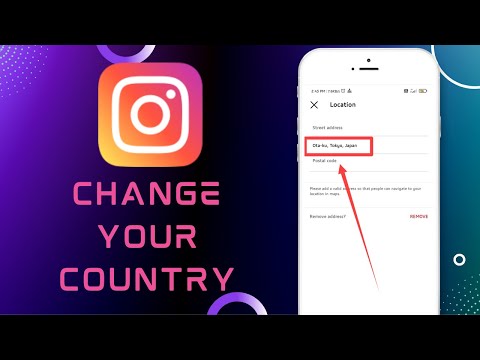
It's no secret that one of the platforms that has received wide recognition from social media users in 2020 is Instagram. The fact is that for some time he tried to make significant changes that would allow him to better interact with his users. In the next lesson we want to show you how you should learn to easily change the location of my country on Instagram.
It is a reality that the amount of content that is uploaded daily on Instagram is increasing, so we can say that this is the social network that is in vogue. At first it was used almost exclusively for uploading photos, now it is the most common way to upload photos. communicate with your subscribers through private messages, better known as DM.
Other innovations that made this massive use possible this application publishes its stories. For this reason, we want to bring you more articles that will teach you how to use its various features. And also this guide to help you is easy to change my country location on Instagram.
So You Can Change My Country Location On Instagram Easily, We Are Going To Recommend You To Use An App You Can Free Download From Play Store. With this tool, we will be able to log into the Instagram app, giving the impression that we are doing it from another country. nine0003
We will do this via a VPN and this will allow us to change my country location at any time. The app is called Secure VPN and you can download it from the pledge after which we leave here. But if you prefer to download another application, you have every right to do so.
Then you need to download and install the application on your mobile phone, now when you open the application you go to the top right side of the screen and press the flag icon. So you can choose the VPN of the country you want. It is highly recommended that you always select the United States, as the news is primarily about that country. nine0003
By selecting United States, connection will start to be established immédiatement and then Connected will appear. Indicating that the connection was established from this country, we now need to open the Instagram social network from another country. We will do this in the following way, which we will explain to you below.
This procedure is very easy to follow if you set up your VPN . The next step is to completely uninstall the Instagram app and clear all data and cache. Once this is done, we will install it again, follow the same steps as the first installation. nine0003
What we get from this operation is that the installation you perform does this by taking as the location the one that will be retrieved from the VPN. In other words, it will accept location settings in the country of your choice, and the safest thing is that you will be able to use features that you did not have before because they were not available in your home region.
After the installation is completed Instagram app, We will now log into our account and log in. You will now be in your account, but in a different location, and if you enter stories, you will find that you have a large number of stickers available that you could not find before. nine0003
This is a good solution for cases where certain application features are not allowed. Please note that some features are available depending on your region. So in a few steps, they were able to learn to easily change my country's location on Instagram.
You can create a geolocation for Instagram through the Facebook mobile application and linked profiles. Before using the settings, you need to install both social networks and specify in the settings: " Connect ".
Contents
To specify geolocation, the smartphone owner must be sure that his phone supports this function. Location sharing is located in the notification bar on Android and in the privacy settings on iOS.
How to make geolocation on Instagram :
If the Facebook account is linked to Instagram, the new location information will also appear in the second list. Geolocation may not work if the entry was added recently. There is also a problem - the point has been deleted. The user needs to wait about an hour for the information to be updated. nine0003
Information about the new point is added to the general list, but binding to a specific place is based on data from the smartphone. That is, by specifying the place "Cafe" from where there was a connection to Wi-Fi or mobile Internet, regardless of the name, the place on the map will be indicated.
When creating a geolocation via Facebook, the user can specify any name, information on added points is not moderated.
Additional settings for geolocation :
To add a geolocation on Instagram :
Changes are made to the " Edit post " section on Facebook and Instagram. In the first case, the profile owner can create an unlimited number of places. In the case of Instagram, you can change the geolocation to any other.
Instructions on how to set up geolocation on Instagram:
If the user did not add a geo when publishing, the following will appear above the post: Add location. By clicking on the section, an editing window will appear and the ability to select available geolocations. The list depends on the connection type: Wi-Fi or mobile data.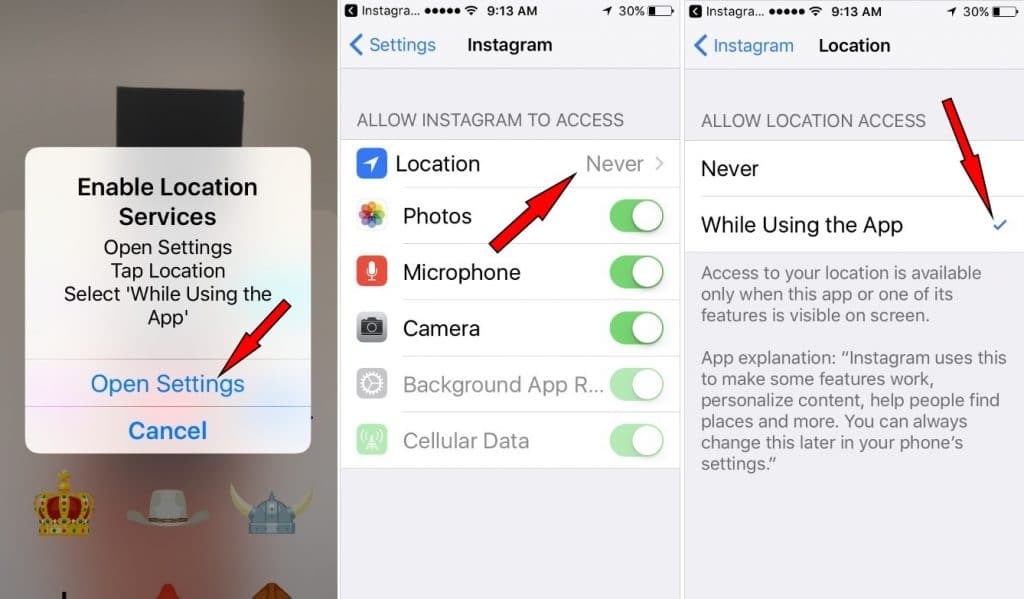 Also, the correctness of the results is affected by VPN and other anonymous access services. nine0003
You can set up geolocation on Instagram based on your current geographic location. That is, the first places in the list will be those places that are located next to the user.
Popular and unusual geolocations on Instagram are associated with major historical monuments.
This list includes:
These places are considered the most visited by travelers and young people. Instagram users often use fictitious data to indicate their current location.
The list of funny geolocations includes those that were invented by the authors of blogs and popular pages. Among them there are also real places, like the village Hamsters and Pots . Often indicate in the geo settlement " Cheerful life ", which is also located in Russia. The same hit: village Antibes from the Kemerovo region and Paris from the Chelyabinsk region.
A separate function that will help you find a settlement or a historical monument is search by geolocation.
To find a city or institution:
A map will appear on the page showing the approximate geographic location of the object. Below is a list of photos and videos that were taken at this location. Categories of publications are divided into two parts: TOP and recent. The first contains the posts that received the most likes. In the second - pictures that appeared less than an hour ago. Updating sections depends on the popularity of the place and the number of mentions in posts.