All social media platforms are trying to follow the short video trend, so is Instagram. That’s why Instagram Reels has been introduced.
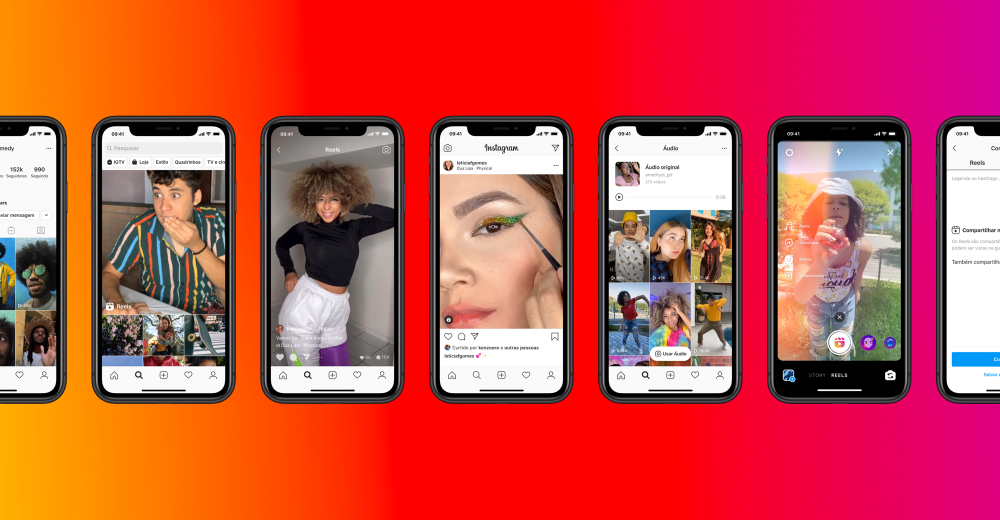
Instagram Reels are full-screen vertical videos that can be up to 90 seconds long. They can be entertaining, immersive videos where you can share your personal life, express your brand story, or increase transactions.
Generally speaking, users upload reels on Instagram via mobile phones. However, if you are one of the users who are handing a company’s IG account, you will surely need to upload Reels on Instagram from PC.
Can't Miss: How to Use Instagram Reels, How to Create an Instagram Reels >
Preview
显示名称
Use This Template
Preview
显示名称
Use This Template
Preview
Daily Motivation Instagram Reels
Use This Template
Instagram officially announced that all videos posted below 10 minutes will be seen as reels. So, it is possible to upload reels on Instagram from PC. Here are several possible ways to post reels on Instagram on PC. Check them out.
Step 1
Launch any browser and go to instagram.com, sign up your account.
Upload Instagram Reels on PC - Log In
Step 2
Click on the “+” icon.
Step 3
Click Select from computer.
Upload Instagram Reels on PC - UPload
Step 4
Choose the video that you want to upload on Instagram as reels. (please do make sure your video is in 9:16 aspect ratio.)
Step 5
Follow the prompts to trim the video, select a cover photo, write a caption, add location to upload. The video will be directly uploaded as Instagram Reels.
1. If you are uploading an Instagram Reel on PC directly with above method, you will not be able to choose an audio like you do on your phone while uploading. We suggest you edit the Instagram Reel well before posting via PC.
2. This method is not guaranteed. For Instagram users in some areas, this feature might take a while to reach your country.
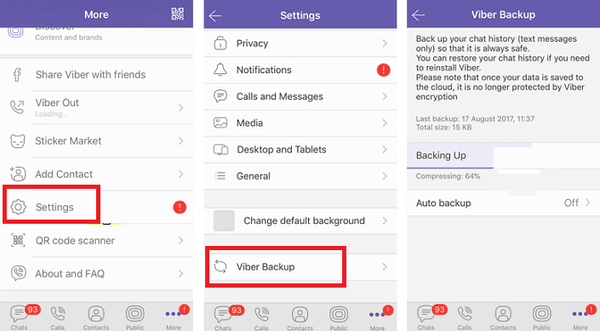
Some extension can turn your PC screen to the Instagram interface. The best to go is Inssist. It is free, and allows you to publish Stories, Videos, IGTVs and a varieties of other features. What’s better, Inssist doesn’t spy on you nor send data from your computer, please feel safe to use it.
Step 1
Launch your Google and search for Inssist. Download it and add the extension on your browser.
Step 2
Find Inssist and click it. Log in your Instagram account. Maybe a security code is needed.
Step 3
Click the + icon, choose Reels. Choose a video from your computer.
Step 4
Click on Next. You will be able to pick a cover for the Instagram Reel, add description, hashtags.
Step 5
Share the Instagram Reels.
Post Instagram Reels on PC with Inssist
1. Can You Post an Instagram Reels on PC?
Yes, you can surely post an Instagram Reels on PC. Instagram allows you to upload videos via PC and any video shorter than 10 minutes will be Instagram Reels.
2. Does Instagram Reels support 4K video?
No, Instagram Reels doesn’t support 4K video. There is no way that you can upload a 4K video to Instagram Reels.
3. Why Instagram Reels look blurry?
There might be the Internet connection issues. Make sure you have good Internet connection. In order to upload your videos faster, Instagram will compress your video and upload. A few minutes later, Instagram will replace the blurry video with your original video. For more reasons, please refer to: Instagram Video Quality Bad, How to Fix >
The Bottom Line
That’s all for how to upload videos to Instagram Reels. If you find this post helpful, please do like and share this post with others. You will never know who you are helping.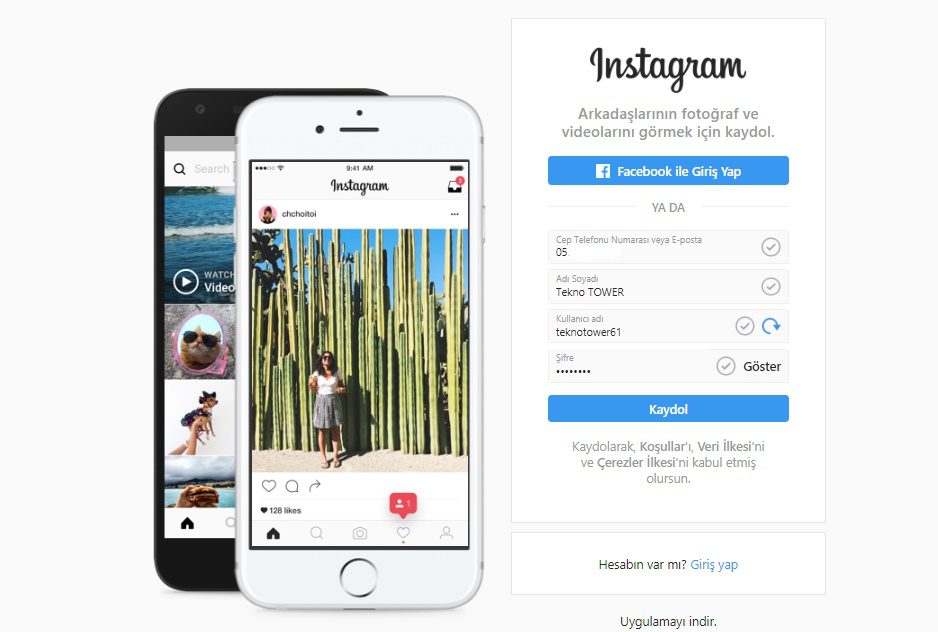
Elena /
Member of PearlMountain Limited. Has a mania for video editing. Love to share photo/video shooting tips and ideas.
Posting content from your computer to Instagram seemed like a far-fetched dream just a couple of years ago. But since the release of Instagram Reels and the recent updates to the platform, you can finally upload your Instagram Reels and other video content right from your computer.
Whilst Instagram was initially built to be used on iPhone and Android phones, that isn’t the case in 2022. Instead, Instagram is giving users the ability to publish content directly from their Mac or Windows computer (perfect for anyone who is batching their content creation or wanting to streamline their content creation workflows).
In this guide, we‘ll uncover all of the best practice strategies when using the Instagram desktop version. Plus, we‘ve added our favorite tips to seamlessly create and upload content from your computer to your Instagram account.
Contents
Reels 101: Instagram Video specificationsBut first, there are some specifications you need to keep in mind when posting your Reels or videos to Instagram. Here’s a quick summary of all the Instagram video sizes and specifications you need to follow in 2022:
Now that’s out of the way, ready to dive in? Let’s do it.
How to Make Your Own ReelContent creation is one of the main elements of growing a business on Instagram. Creating fun, engaging and informative content will ensure your audience builds trust with your brand and remembers you when they’re ready to make a sale.
Plus, by posting consistent content your business will be seen as a leader or expert in your field. By utilizing Reels in your Instagram strategy, you’ll be able to expand your reach, boost your discoverability and increase your chances of going viral on the platform.
Plus, with Instagram moving to a new full-screen feed experience, now is the time to prioritize producing dynamic, vertical video content (a.k.a. Instagram Reels!).
Here’s an easy 10-step tutorial on creating a Reel:
To really elevate your Reels and boost the professionalism of your Instagram content, here are two handy hacks that will improve the quality of your content:
In 2022, you have a plethora of editing choices to create your Reel content. Here are our top picks for video editing to create crisp, engaging, and fun Reels videos (in no particular order).
Adobe Premiere Rush is the baby brother to Premiere Pro and is a simplified version of Adobe’s flagship software. Rush allows users to easily trim and splice videos together. You can also add titles, motion graphics, audio and other graphic elements. Adobe Premiere Rush is a paid tool and sits under the Creative Cloud Suite. A single plan costs US$9.99 per month.
FilmoraWondershare Filmora is an all-in-one video editing software that can be used on a desktop. Filmora has an easy-to-use interface that allows you to create beautiful Reels. With Filmora, you can use color grading, speed control, video stabilization, audio equalizer, split-screen, scene detection and more!
It can be used on Windows or Mac and has both free and paid versions. The annual plan costs US$49.99 for individuals.
iMovieiMovie is a fantastic choice for anyone looking for free video editing software that comes with high-quality features. iMovie is one of the few software that has 4K videos on its free version. This is the perfect choice for beginners looking to easily splice together their Instagram Reels. iMovie comes with a clean interface, video transition tools, and audio editing.
Open Shot is another free piece of software that gives experienced editors the creative freedom to edit videos without needing a paid version. This tool is best for clip resizing, scaling, trimming, snapping, and rotation. The OpenShot drag-and-drop functionality for easily adding video, audio, or image files, plus you can color grade your Reels as well.
The Instagram AppLast but not least is the Instagram App itself. Instagram is continually improving the editing features for Instagram Reels. Once you have recorded some footage, you can either pre-load it into Reels or record it straight from the app. From here, you can add text, stickers, and audio. This is an awesome option for those who want to keep things centralized and easy right from the app.
Now the bit you’ve been waiting for: how to post Instagram Reels (without using the mobile app).
There are quite a few workarounds you can use to upload your Reels and video content from a laptop or computer, without using a mobile device. This can come in the form of the Instagram Browser version, Facebook Creator Studio or using a third-party app.
Let’s take a look at each of these options and their pros and cons.
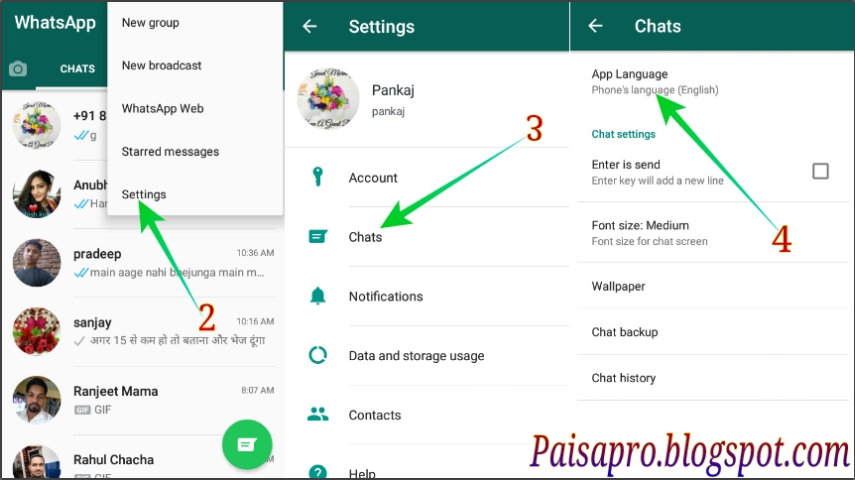
Option 1. Instagram Browser VersionWith the updates to Instagram’s desktop version, creators and brands can now upload directly from the web browser, no matter their location. Here’s a quick guide to get you started.
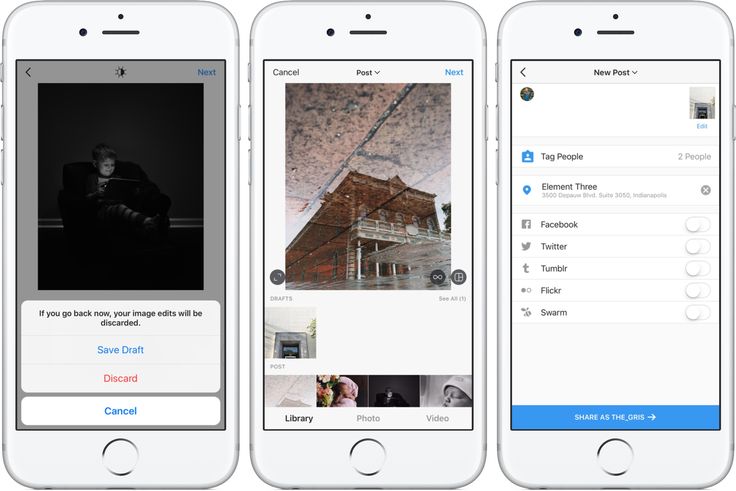
Step 1. Open Instagram.com. Then log into your account as usual.
Step 2. Once you have logged in, you’ll see your feed, stories, and the button options in the top right corner.
Step 3. Click on the ‘+’ button. Here, you can edit the photos and add your caption and hashtags.
Step 4. You can also tag people, add your location, add alt text and access advanced settings.
Step 5. Then you’re ready to post videos to your Instagram account!
So, is the Instagram desktop site better than the app experience on mobile phones? Here’s what you need to know.
Pros: The Instagram website version allows users to add captions, locations, tags, and hashtags. Additionally, this option is easily accessible from any browser (including Safari, Google Chrome, Firefox, Bing, etc.).
Cons: The web version has many limitations that make it difficult to use Instagram. There are limited photo-cropping options and minimal add-ons when clicking share, and you won’t be able to schedule content or upload Instagram Stories.
Option 2. Facebook Creator StudioIn August 2019, Facebook announced that creators and businesses could link their Facebook Business Page to upload content to Instagram from the Creator Studio.![]() This new feature enables businesses to manage their Instagram accounts from a desktop browser.
This new feature enables businesses to manage their Instagram accounts from a desktop browser.
Here’s what you need to know to use the Facebook Creator Studio:
Step 1. Connect to the Facebook Creator Studio with your Facebook Credentials.
Step 2. Navigate to the Instagram Icon and click on Instagram Studio.
Step 3. From here, you can upload, schedule and publish posts. You can upload your content by clicking in the top-left corner to select the content you’d like to upload.
Step 4. You can also get powerful insights into your content’s success from the studio!
Pros: The Creator Studio allows you to draft, publish and track a wide range of Instagram content, such as feed posts and Instagram videos (or long-form videos, previously IGTVs).
Cons: Unfortunately, uploading Reels is not a feature yet added to the Creator Studio. You also won’t be able to create carousel posts, upload stories or edit your content once it’s been scheduled.
Option 3. Using a Chrome Extension
1. Deskgram (Mac)
Deskgram is one of the more popular options for uploading your Reel content via the desktop app. It seamlessly integrates with Chrome, and you can upload a range of different content right from the extension. The only downside of Deskgram is that it is for Mac users, but fret not! Window users can use the second option below.
2. Desktopify (Windows and Mac)
Desktopify is a simple Chrome extension from which both Windows and Mac users can benefit. You can upload videos in different formats, download Instagram content, and engage with other accounts. You can upload your video content from Dropbox, Google Drive or your computer desktop.
Pros: Using a Chrome extension is a great way to upload and publish different Instagram content. They are generally free to use, so they are suitable for beginners and small businesses.
Cons: There are no” in-app” editing tools on these extensions, so you’ll have to edit your Instagram Reels or feed posts outside the extension and then upload them to the Chrome extension. They also don’t have analytics on Instagram videos, so you’ll need to check this on other platforms!
This is by far our favourite option for uploading your Reels to Instagram. Using a third-party app, you can upload Reels directly from your desktop, with all of the bells and whistles to ensure your audience sees your content.
When growing your business with social media, there’s nothing more refreshing than having a singular all-in-one platform to help you do this. With Instagram scheduling and a myriad other social media platforms like TikTok, Facebook, YouTube and more, creating content, scheduling, and tracking performance can be done from one browser.
Sked Social is the number #1 Instagram Scheduling tool, easily upload your Reels, turn on Push Notifications and get an alert when it’s time to post! It’s never been so easy to grow an Instagram account on social media in 2022.
Best Practices when Posting Instagram Reels from Your ComputerLaunched in 2020, Reels have gone from strength to strength over the past two years. With creativity knowing no bounds over on Reels, businesses and creators have the opportunity to wow their audience.
But with more than 500 million people active on Instagram, it’s a question as to how you’ll stand out from the sea of content flooding the platform every day. We’ve rounded up the best practice tips and tricks for producing a successful Reel!

Instagram has migrated from a photo-sharing platform to a marketing machine, with excellent features geared toward business growth. There are now a million and one benefits to using Instagram to grow your business in 2022. As we can’t list a million benefits, we’ll pick out some of our favourite Reel benefits:
There you have it! Some of the best hacks for posting your Instagram Reels from the desktop browser and utilizing different desktop apps for Instagram.
And why not streamline your social media strategy even further by scheduling your Instagram stories ahead of time? Yup, you can plan, schedule ahead and then relax, all with the help of Instagram’s number scheduling tool: Sked Social.
With Sked, you can plan visually beautiful content, track analytics, and cross-post to Facebook, LinkedIn, TikTok and more! Start your free trial today.
Menu
Contents
Instagram is becoming a video platform more and more. The popularity of IGTV, short videos and stories is gaining momentum. To be trending on Instagram, switch to the video format. And we will show you how to upload the finished material from your computer to your Instagram profile.
Instagram wants to conquer all possible directions in the Internet space. Videos are becoming one of the most active and developing areas.
To take advantage of the possibilities of using videos on your page, consider the following nuances:
Video format can be shared on Instagram if it is captured and saved as MP4.
The following methods will help to publish content in video format:
With Inssist, you can share videos or photos, send messages to Direct, schedule posts, and view profile analytics.
 Type in the name of the application, download.
 Your content is now available to subscribers. For fans of video instructions, we recommend visiting our YouTube channel. We have filmed step-by-step instructions for all Instagram features for you.
The web version of the social network is a bit more modest and slower. But you should not be upset if you prefer to work on a laptop. Install an emulator program on your computer. It adapts your operating system to Android.
You will be interested: an overview of emulators for Instagram.
The user receives the rights to download and use any applications, even those developed only for smartphones.
There are also free options, but they are rather limited in functionality. Through planning programs, you can conduct a full-fledged set of measures, working with one or more profiles.
Planners are preferred by professional bloggers, SMM-specialists, businessmen, celebrities. It is worth using services carefully, because. Instagram opposes delayed posting.
We told you about ways to download video content in the previous section. Now let's discuss the benefits of videos for your account:

When posting quality and interesting content every day, don't forget to communicate with your audience. Ask subscribers about what they would be interested in seeing on your profile.
Constantly analyze Instagram responses and statistics. Create more unique and engaging video and photo content on Instagram. And we give even more ideas in our blog 🙂
Share with friends:
Tweet
Share
Share
Submit
Classify
Adblock
detector
Social network desktop site does not allow posting. But there are workarounds.
You can open the mobile version of the Instagram* website on your computer and create stories and posts there, just like in the official app. How to do this - we show on the example of Chrome, but in most other browsers the steps will be similar.
Go to the Instagram* website and log in to your account.
Open developer tools. To do this, press Shift + Ctrl + I or right-click on the page and select View Code (or a line with a similar name).
On the toolbar that opens, find the icon with a schematic representation of multiple monitors or mobile devices and click on it. If you can't find it, press Shift + Ctrl + M. One way or another, the browser should launch the site in mobile mode.
Customize the size of the Instagram* interface that is convenient for you using the buttons above the site window.
Refresh the page. After that, a publish button will appear and you can use the social network on a PC in the same way as on a smartphone.
Last year, Facebook* launched a dedicated Creator Studio section. It allows you to publish and even schedule posts on Instagram*. You can't create stories yet.
To work with Creator Studio, you need to switch your Instagram* account to a professional one (creator profile or business account). To do this, go to the settings of the Instagram* mobile app, select "Account" → "Switch to a professional account" and follow the prompts. The procedure will take you a couple of minutes. If you don’t like something, you can return to the usual account type at any time.
In addition, you must link your profile to a Facebook page*. To do this, click the Edit (iOS) or Edit Profile (Android) button on your account page in the Instagram* app. Select "Page" and connect your new Facebook* page using system prompts.
Now open Creator Studio on your computer browser, select the Instagram* icon at the top and log in with your account.
To make a post, on the left panel, click the Create a post button and select Instagram* Feed. Add a photo or video using the Add Content button.
Click the arrow next to Publish and select the appropriate option: Publish Now (publish now) or Plan (schedule). In the second case, you can specify the time at which the service will publish the post automatically.
Emulators are special programs that allow you to run any Android application directly on your computer. By launching the official Instagram* mobile client this way, you can easily publish Stories and posts. You don't need an Android device for this.
Install any free emulator from Lifehacker's selection for Windows, Linux and macOS.